Wanna know how to make sourdough bread at home? Learn everything you need for baking a foolproof sourdough loaf, no Dutch oven needed!
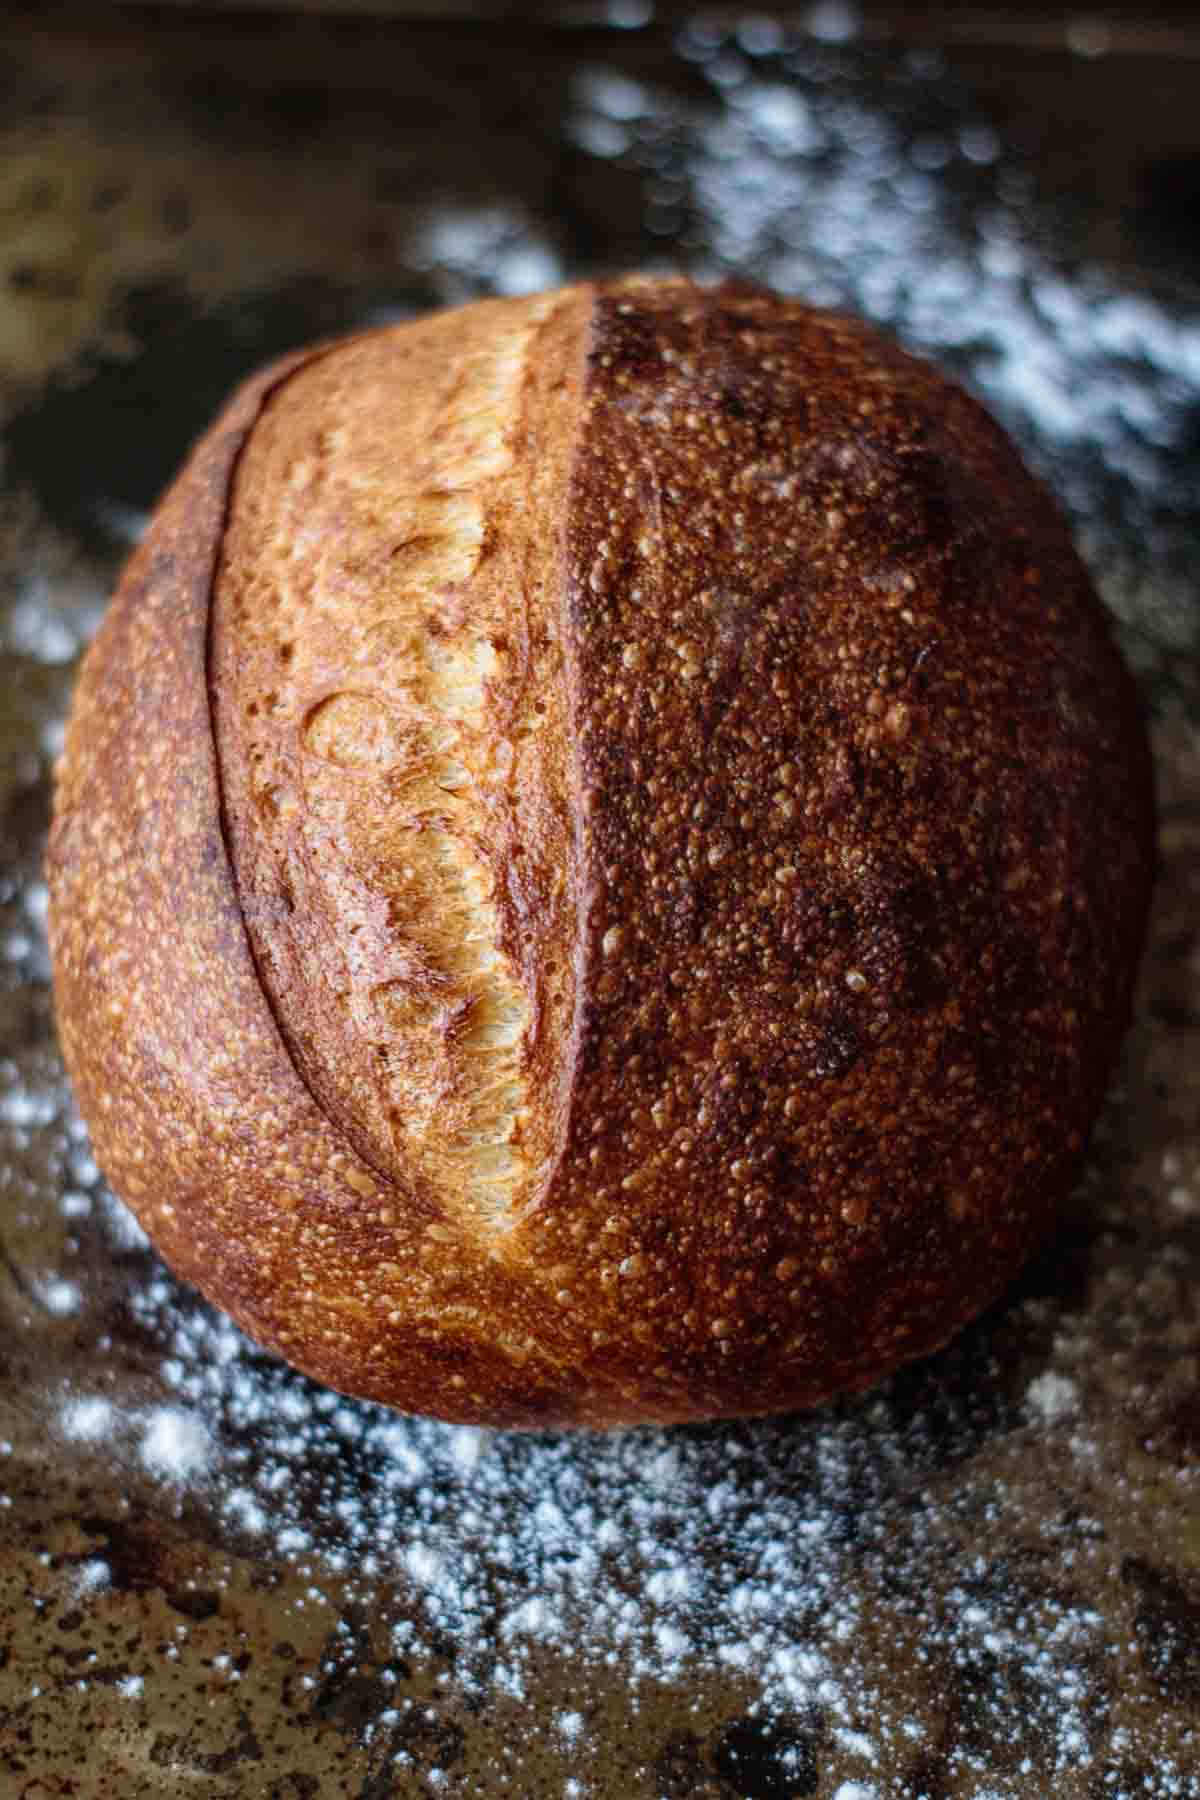
Let me tell you a bit about this recipe: this is a basic sourdough bread made for beginners. It’s easy to follow and has a very high chance of success.
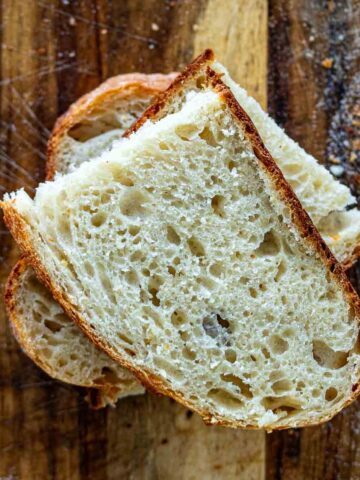
That said, let me tell you that this recipe won’t give you bread with big holes in it.
The low hydration dough is easier to work with, but will produce a tighter crumb. But even without the gigantic holes, your sourdough will still taste absolutely delicious, have a soft and chewy crumb and a crispy crust, and give you confidence enough to try different sourdough recipes!
What is sourdough bread?
Sourdough bread is bread made with the use of wild yeast. That means no commercial yeast is used to make this bread rise. Sourdough bread is also called slow fermentation bread, as wild yeast takes more time to ferment than industrialized yeast.
A bread made with sourdough is more similar to an artisan supermarket loaf: it has a tangier taste, the crust is more crisp and the texture, chewier. It is said that is also better for your gut: a sourdough loaf is easier to digest, as the long fermentation makes the gluten easier for the body to absorb.
Wanna learn how to make your own wild yeast culture? If you want to know more about wild yeast, also known as sourdough starter or sourdough culture, I have a foolproof way to make sourdough starter!
What do I need to bake sourdough bread?
We’re keeping it simple here. Although a Dutch oven helps you to get the perfect crust, you can achieve the same result without using one with a few tricks I’ll teach you in this post.
For baking this sourdough loaf, you’ll need:
- A sourdough starter;
- Spray bottle;
- Bowl;
- Parchment paper;
- 2 baking sheets;
- A razor or something sharp to score your loaf (the sharpest the better); and
- Patience.
A scale is always useful, specially when baking. Measuring dry ingredients like flour by using cups can be a bit tricky, as you can add a lot more flour than the recipe asks for. But if you don’t have one, don’t worry: I’ll teach you how to measure correctly the ingredients for this recipe below.
Also, you don’t need a banneton for this recipe. The dough will maintain its shape without needing one when proofing, as you can see in the video.
Ingredients
This is a basic sourdough bread, made with 5 simple ingredients:
- Sourdough Starter. Make sure yours is active before starting. An active sourdough starter is one that doubles within 6-8 hours after feeding, it has bubbles, and floats on top of the water in the float test.
- Water. Use chlorine-free water for a better fermentation.
- Flour. Although you can make this with all-purpose flour, bread flour will give your loaf a chewier texture and a better structure. Use bread flour for this recipe, specially if you’re new to sourdough baking, to guarantee a better rise.
- Salt. Stick with simple fine sea salt for this recipe.
- Sugar. Use white granulated or caster sugar. Sugar will assure you get a great-looking golden-brown crust.
Baking schedule
If you want to make the dough and bake it in the same day, this is my schedule:
- Around 11 PM - Feed sourdough starter
- 7 AM - Make the dough + autolyse
- 7:30 AM to 1 PM - stretch and fold + Bulk fermentation
- 1 PM - Shaping
- 1 PM to 4 PM - Proofing
- 4 PM - Baking.
For an overnight fermentation (with cold fermentation):
- 7 PM - Make the dough + autolyse
- 7:30 PM to 10 PM - Bulk fermentation with stretch and fold
- 10 PM to 7 AM - Cold fermentation
- 7 AM - Shaping
- 7 AM to 10 PM - Proofing
- 10 PM - Baking.
The times here are just an estimate that almost always works for me. My starter is already mature and responds really well when fed, and I’m always leaving my dough in a warm spot to optimize fermentation.
Times for you can vary, specially if your starter is new. Don’t worry, we’re talking about each step and how to check if it’s ready below.
When is my starter ready to use?
Your sourdough starter is ready to use when after 6 to 8 hours after feeding, it double in volume and has bubbles on its surface.
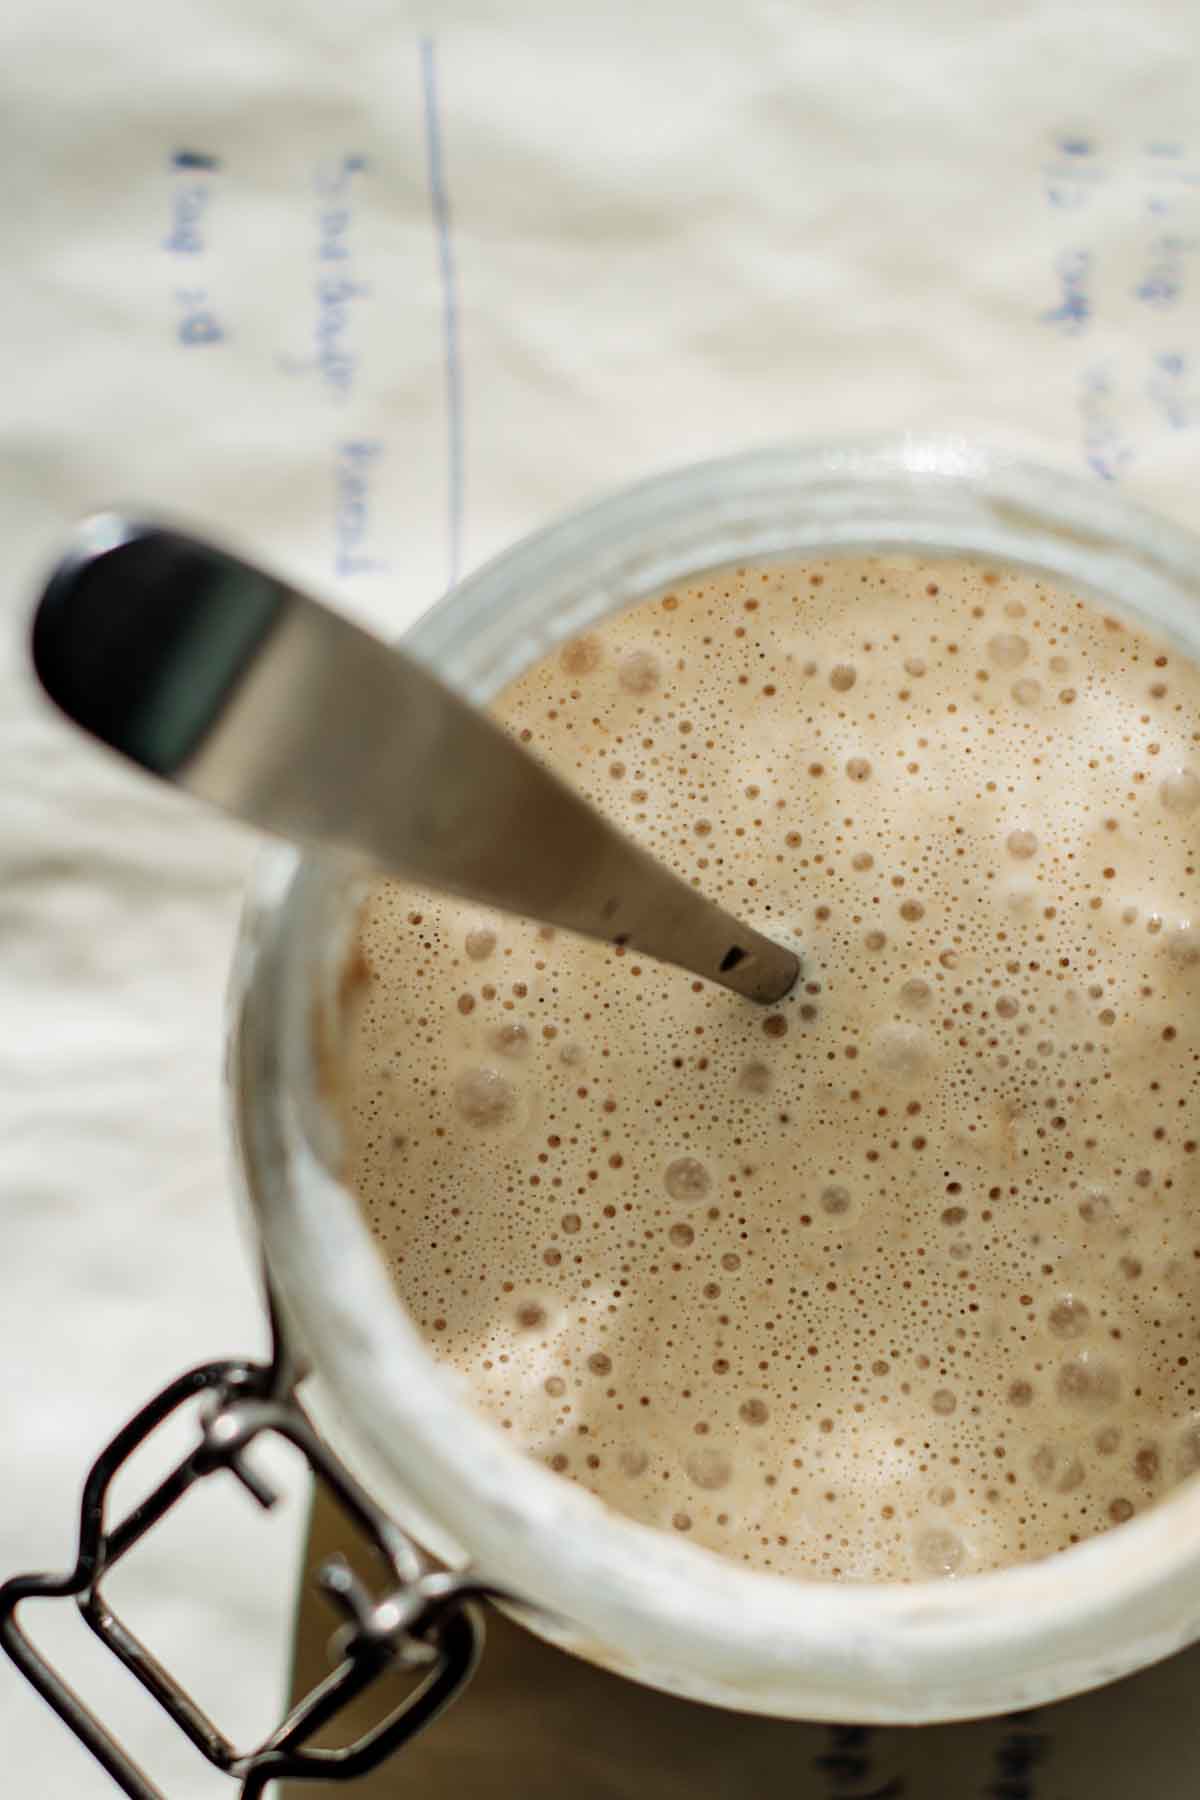
Feed your starter 6 to 12 hours before you plan putting the dough together. Each starter has its time to reach its peak (when it’s ready to use), but that’s usually between 6 to 12 hours. Remember to leave it in a warm spot to stimulate fermentation activity.
How to make it
After making sure your starter is active for baking, pour the amount you’ll need for this recipe in a small bowl. You can read more about how to feed your starter in my sourdough starter guide.
This recipe asks for about half a cup of starter (120g). Stir your starter well before measuring it if you’re using cups.
In a large bowl, add all ingredients and mix only until the dough is formed. Cover the bowl with plastic wrap, reusable beeswax wrap or a damp towel, and let the dough rest for 30 minutes.
This first resting time right after you mix your dough is known by autolyse. After this time, the dough will become easier to work with.
Bulk fermentation
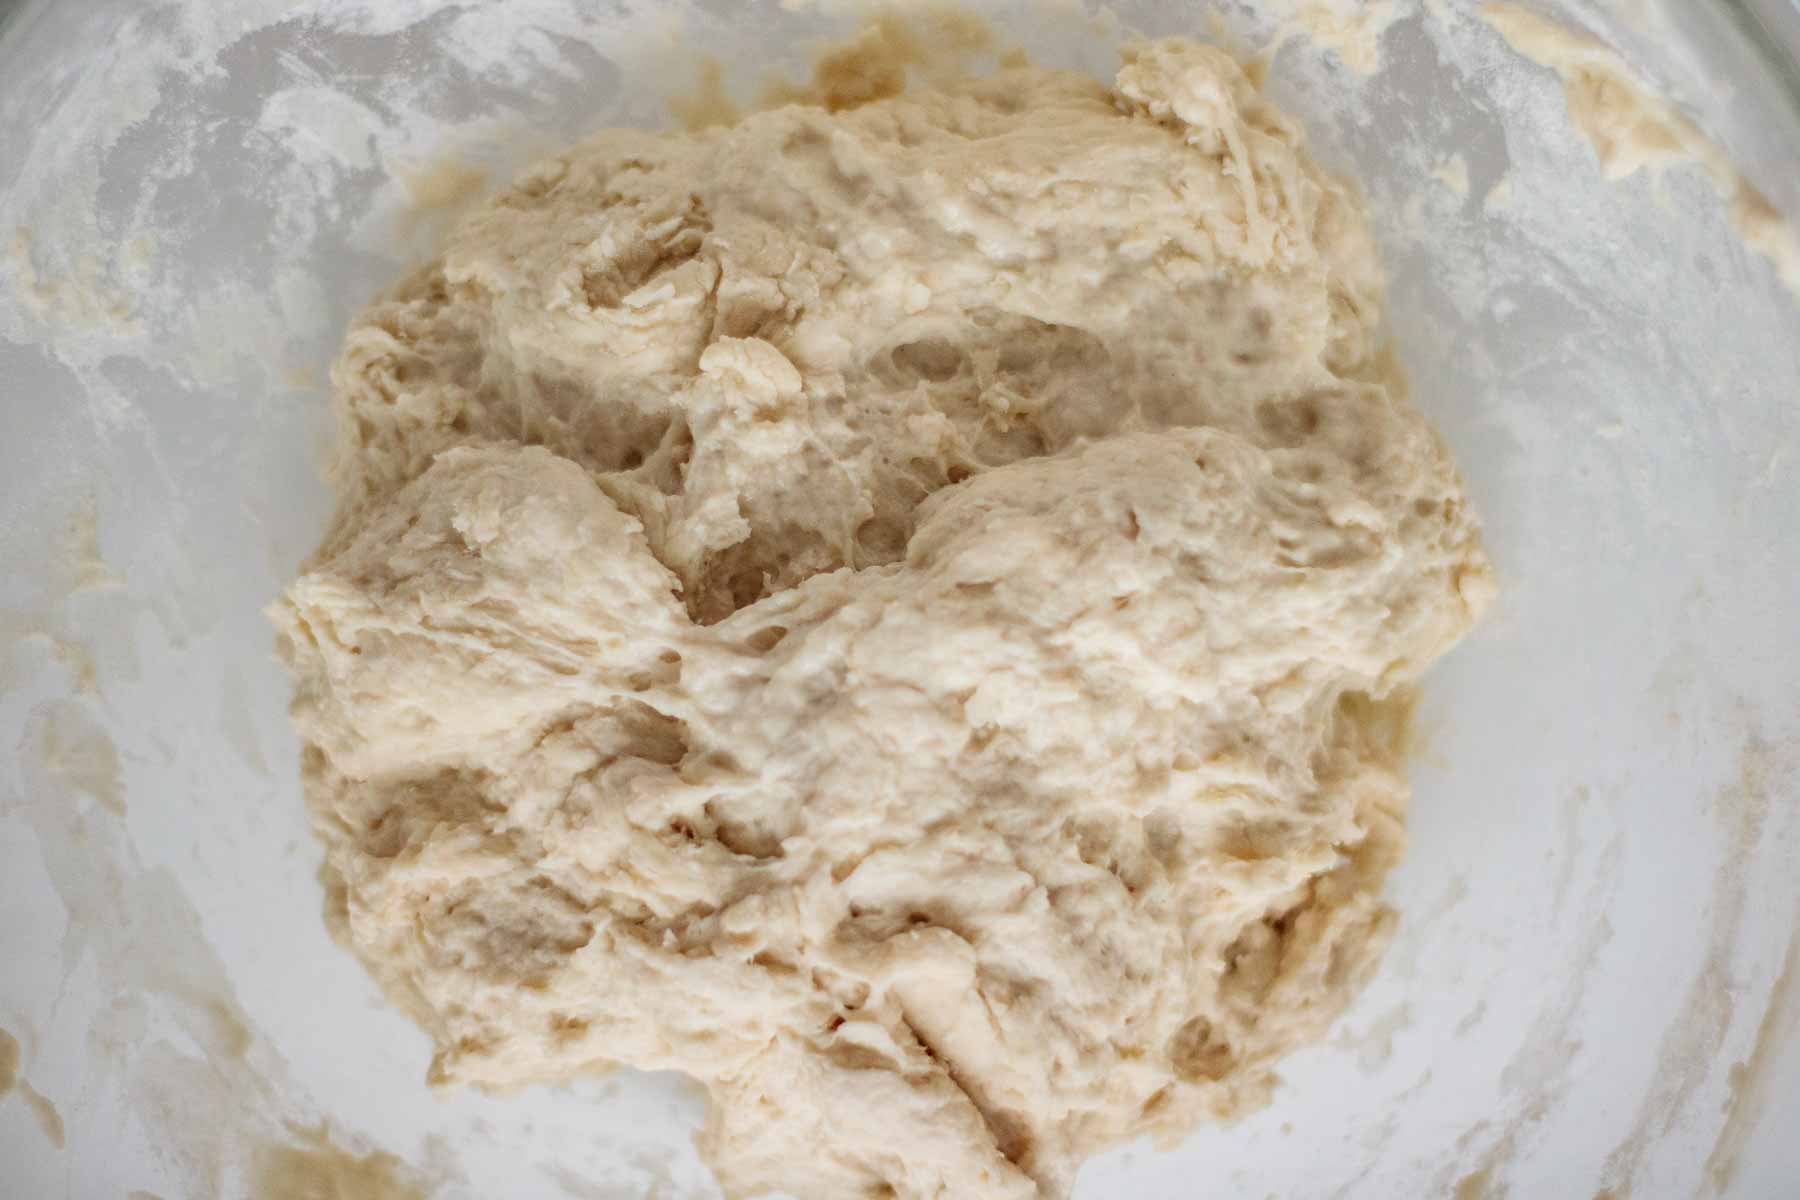
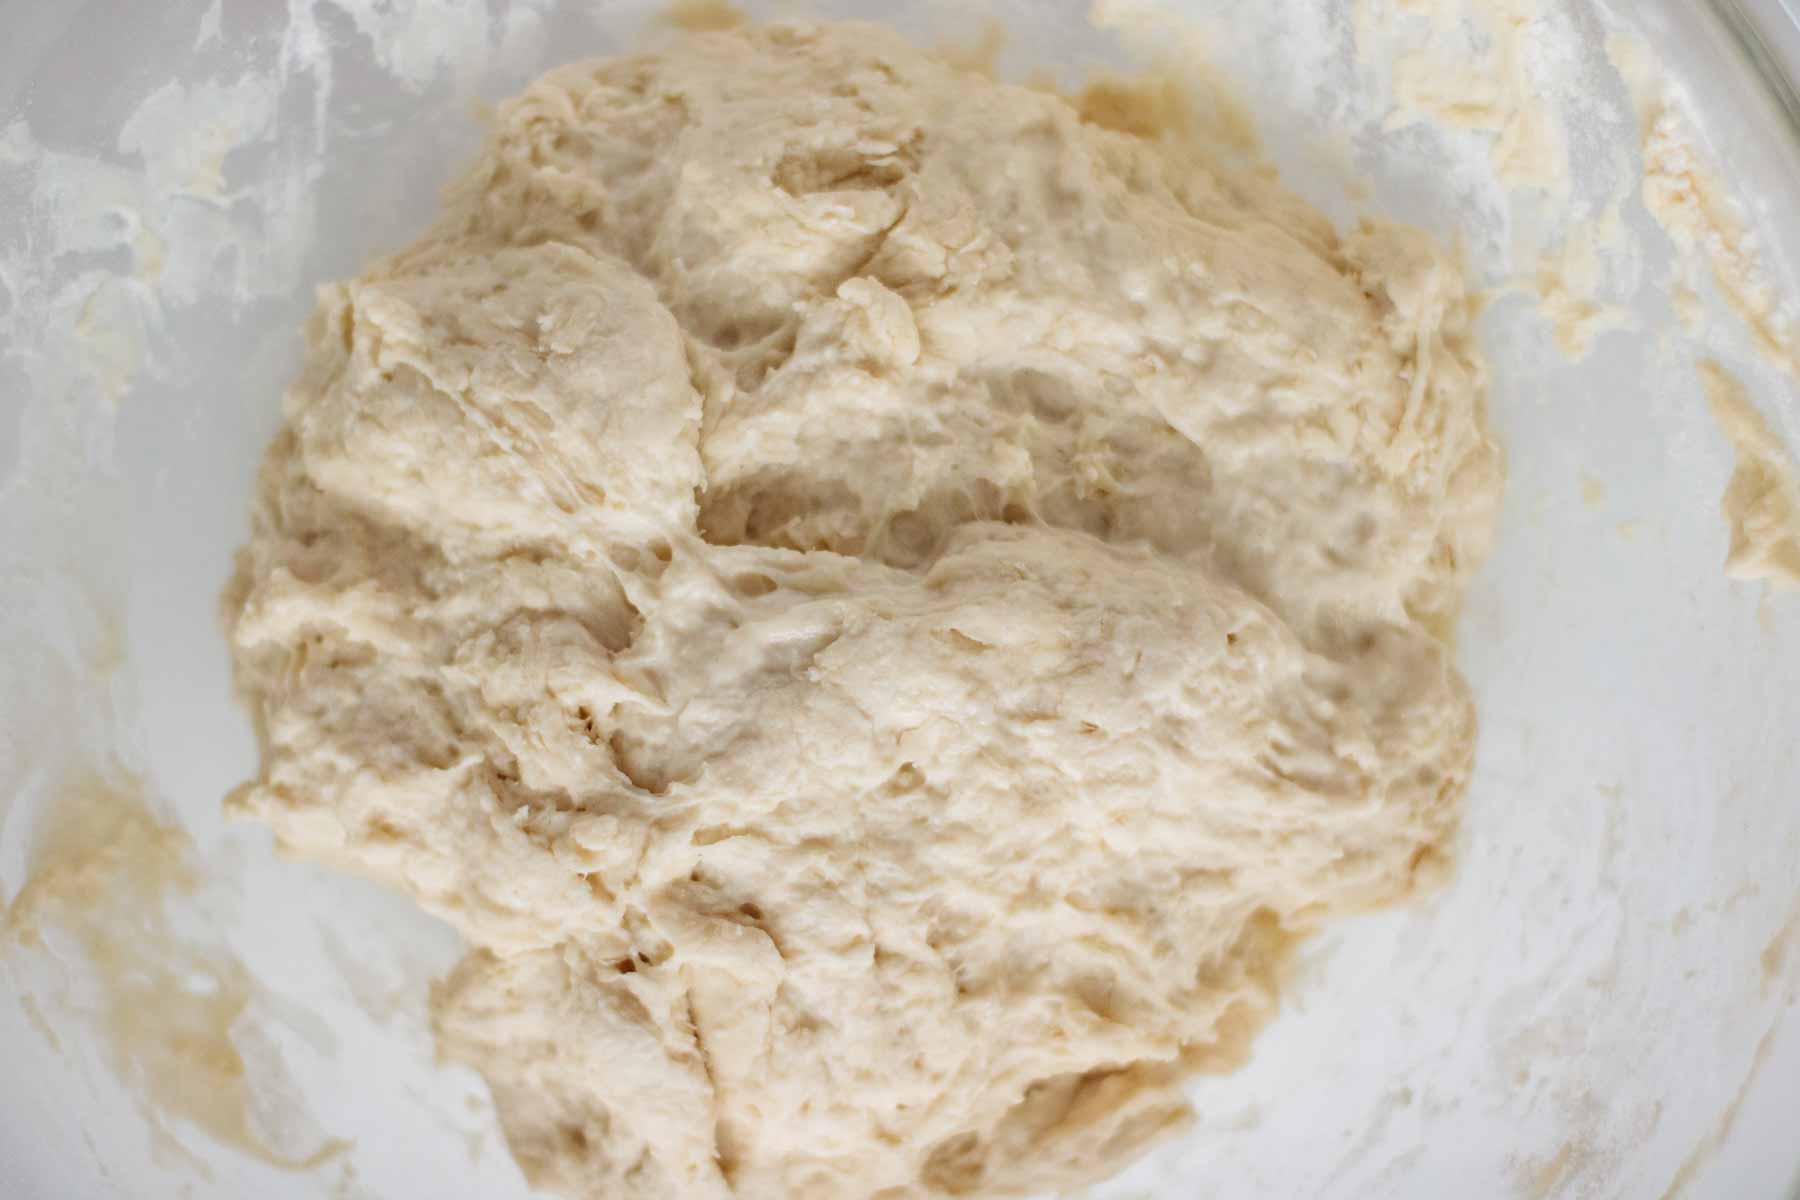
After 30 minutes of autolyse, you can see the dough already looks different: it is less sticky and a bit more elastic.
We’re starting with stretch and folds after this time, and will do it about 4 to 6 times, with 30 minutes intervals between each.
Why should you stretch and fold your dough? When you do that, you help the dough build a stronger structure and also to keep an even temperature. It makes a difference: when I don’t skip this step, I have a much bigger rise in the oven.
Also, when handling the dough, you can see how it’s developing. Is it getting more elastic? Does the dough feel lighter? Is it ready for preshaping? Does it have a good windowpane?
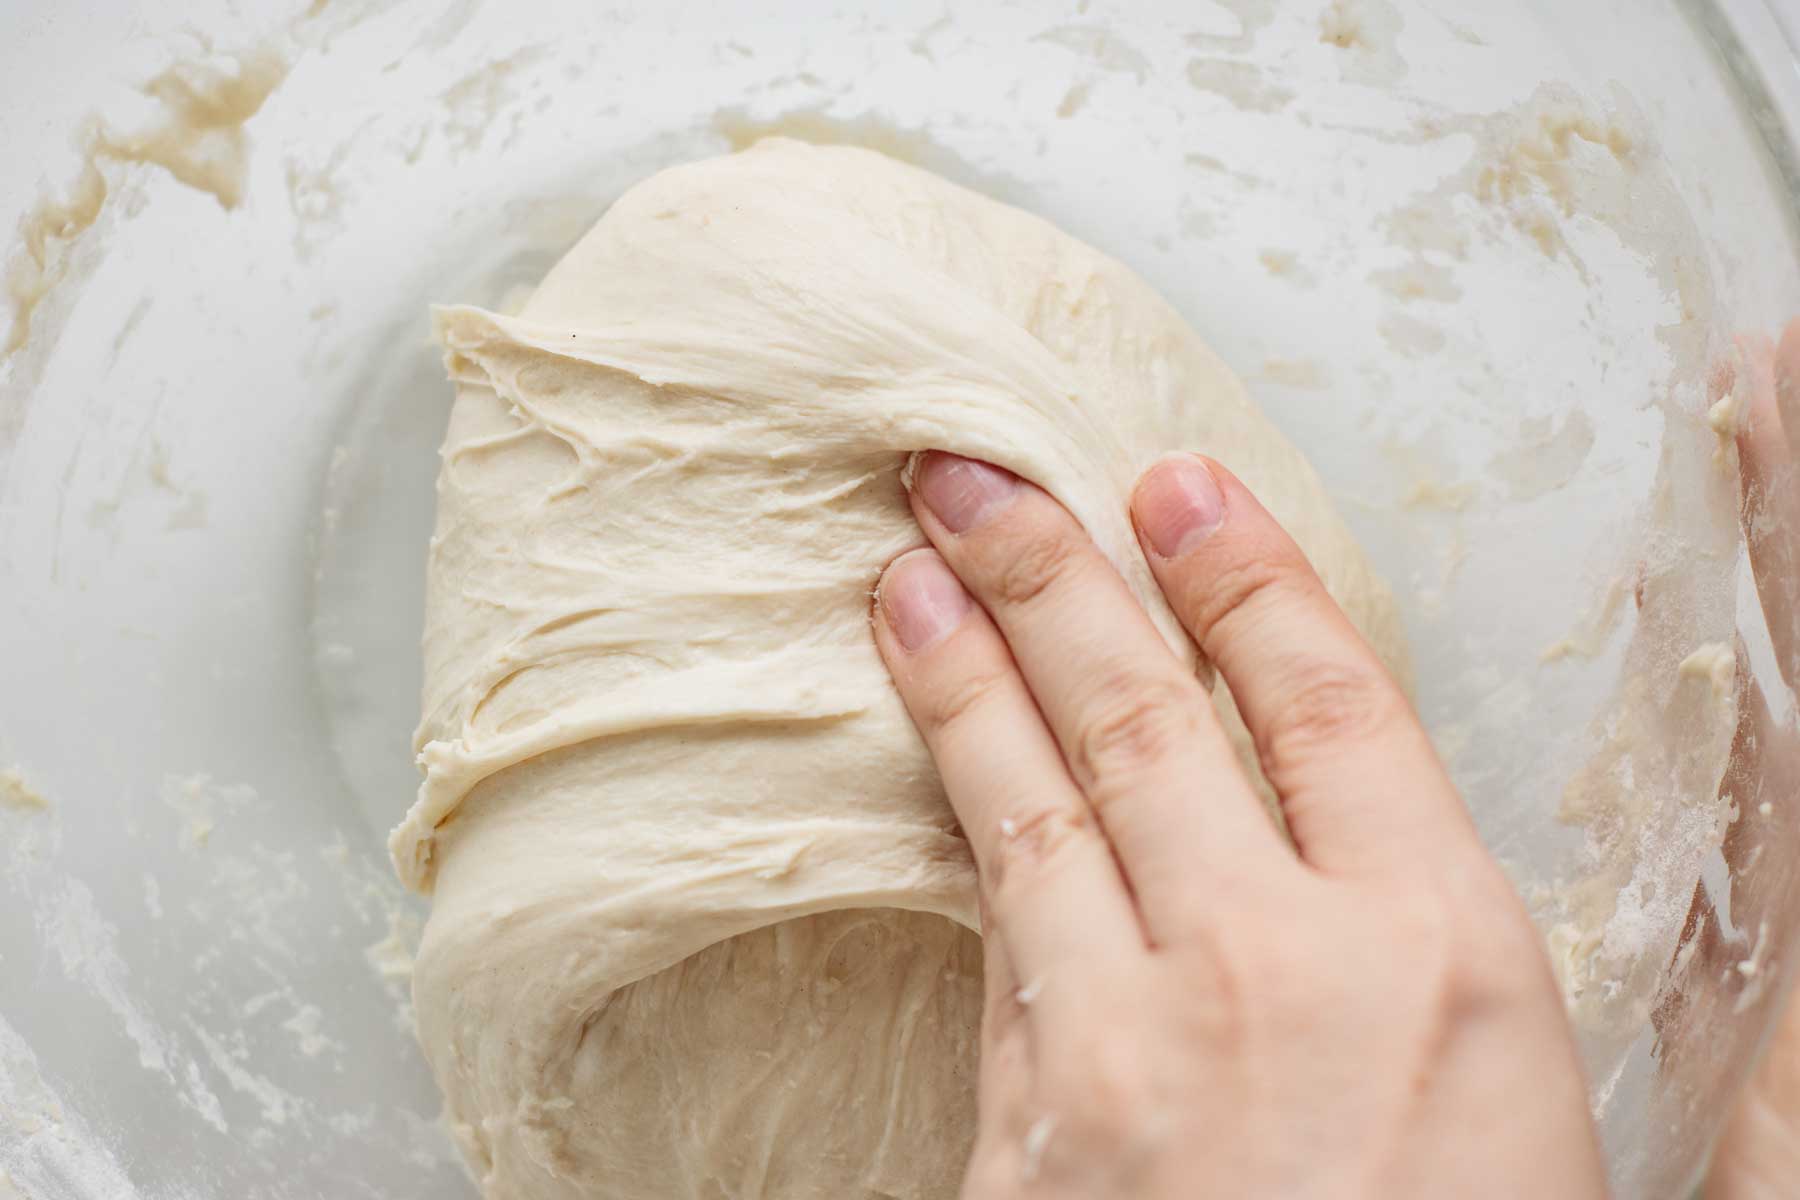
In the recipe’s video, you can check how I stretch and fold the dough. You just need your hands, and you can do it with the dough inside the bowl.
- Wet your hand in order to prevent the dough from sticking.
- Reach under one side of the dough and pull it straight up.
- Pull the dough over itself to the opposite side.
- Turn the bowl a quarter turn and repeat the stretch and fold process until the bowl has turned a full circle.
One important tip: always handle sourdough dough gently. It needs to be handled gently, so it won’t release all the gas that is developing.
How do you know bulk fermentation is done? I always check 3 things.
- First, shake your dough. Is it jiggly, or does it look kind of tough? If it’s tough, it’s not done: stretch and fold more 1 or 2 times more. Double check if your dough is not resting in a cold spot.
- Touch it. Does it feel soft on your hands? If it’s ready, it will feel soft as you handle it. Is your dough less sticky than before? It should be soft and kind of sticky, but not enough it stays in your fingers. It should be also stretchy, and strong enough it can be preshaped.
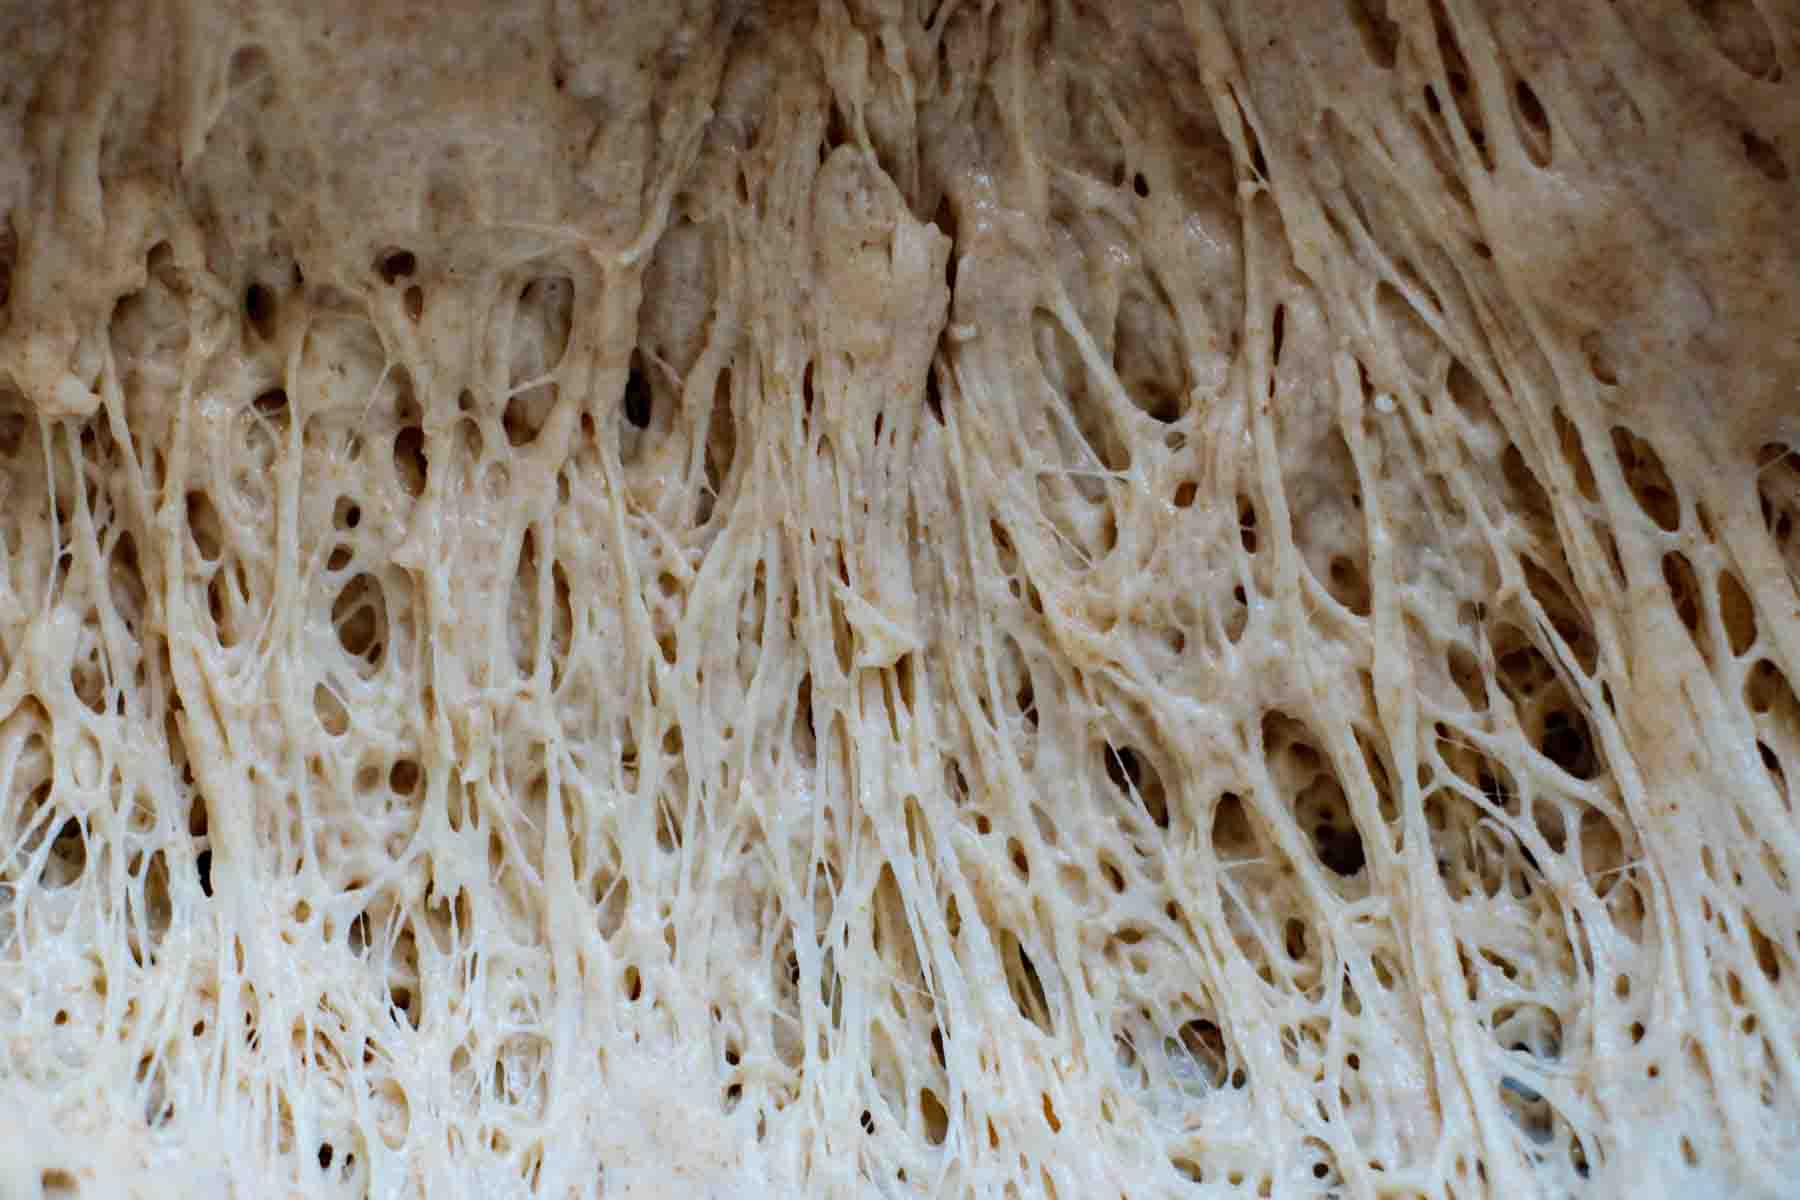
- Last, check windowpane. Watch the video on the end of this post if you’re having trouble identifying it. Does your dough have a good windowpane? It can have tiny folds, little ones are ok, but it cannot tear up easily when stretched.
If you’re going for an overnight cold fermentation, be sure to let your dough rise half its size before storing it int the fridge. Also, I would stick with plastic wrap or reusable beeswax wrap when doing cold fermentation: my dough usually creates a skin when I use a damp towel for covering inside the refrigerator.
Shaping and Proofing
If you choose to do cold fermentation, leave you dough in room temperature for about 1 hour before shaping.
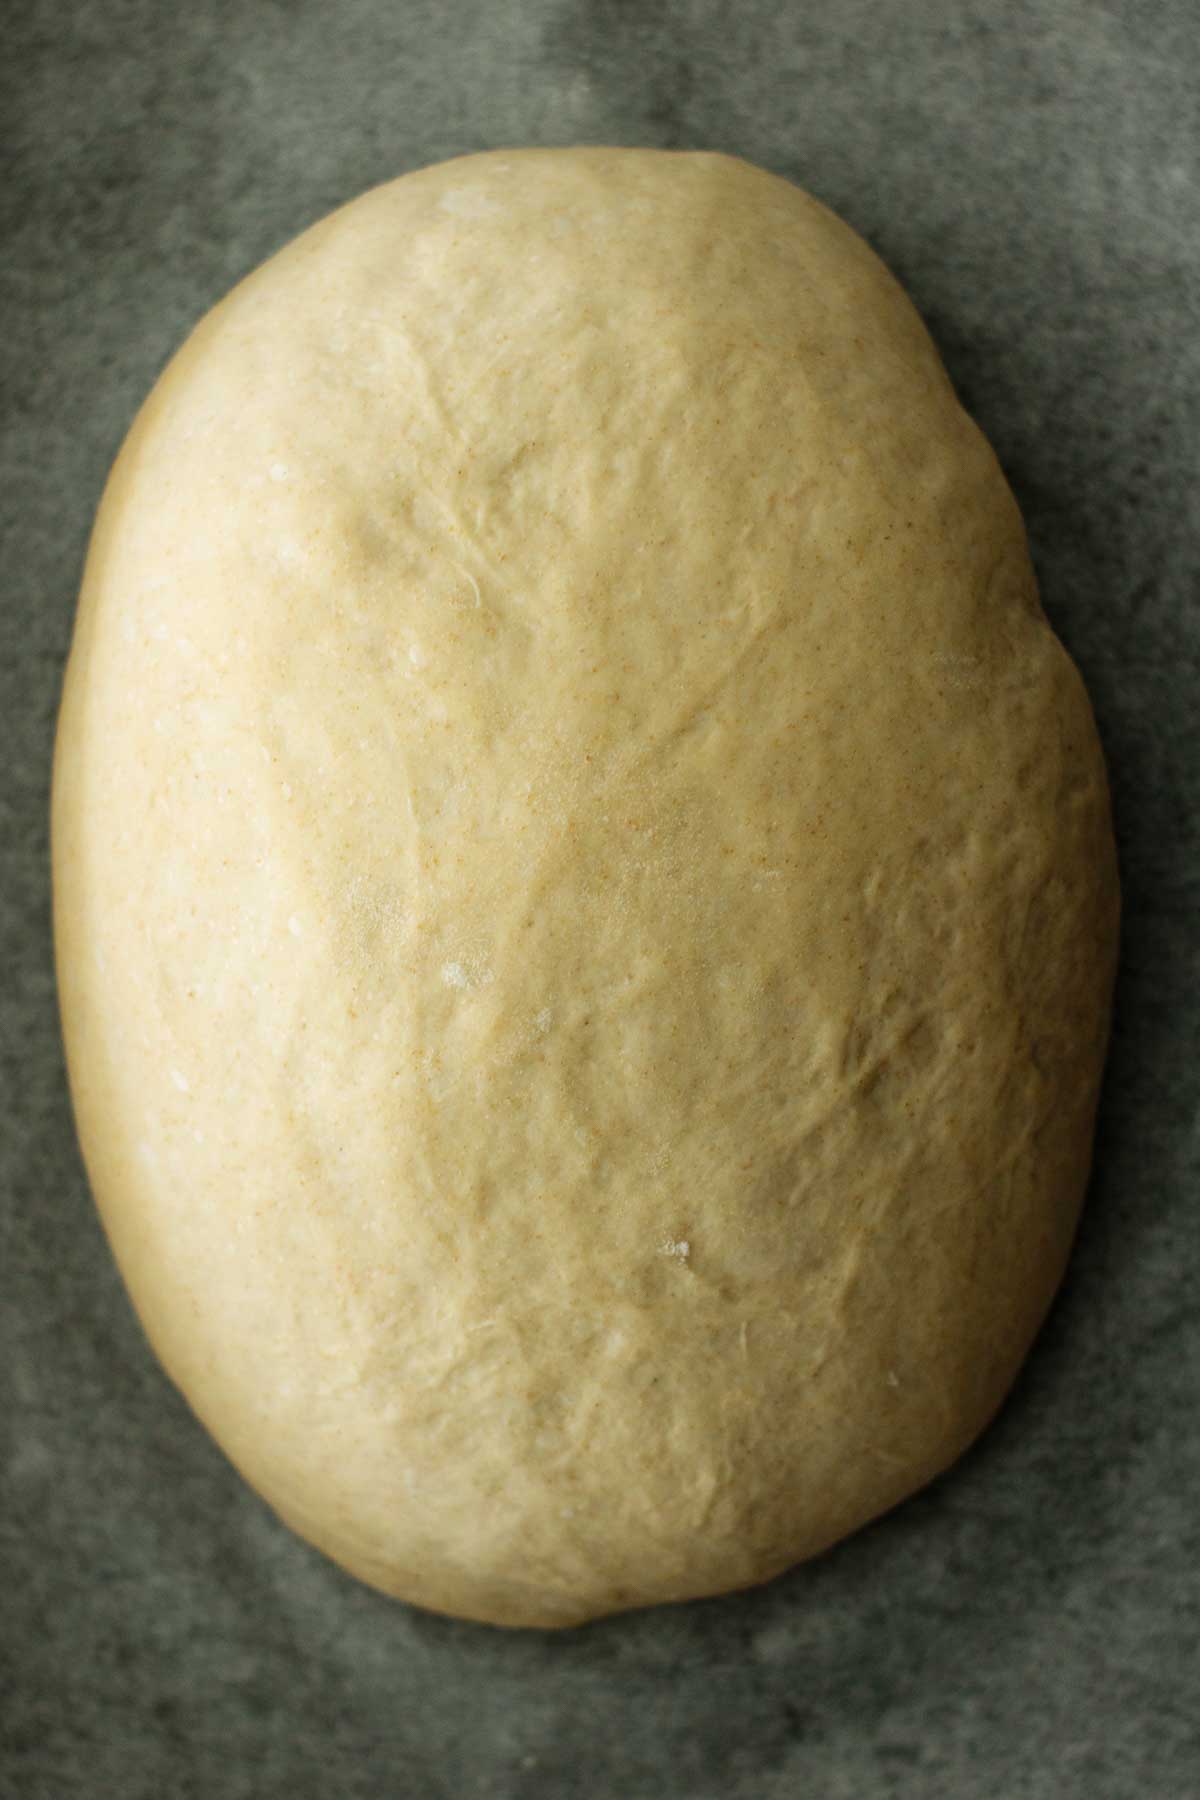
Place dough into a clean surface and pull the edge closest to you up and towards the middle. Repeat with each edge, folding the dough until tight. There is no need for a proofing basket for this recipe, just shape the dough and place it on a lined baking pan.
Proof your bread for at least 2 hours after shaping. During proofing, your loaf will rise about half its size. When ready, it will feel soft, light, and when pocked, will bounce back, leaving a slight indentation.
You need to be careful now to not overproof, or your loaf won’t rise properly and will have a poor structure. Overproofing can happen if you leave the dough proofing for longer than needed, and it’s more common when in a warmer environment.
How can I tell my dough is proofed? Poke it.
- Does it immediately springs back? Underproof.
- Does it stays where it is after poked? Overproofed.
- But if your dough pops back out slowly, leaving an indentation, it’s perfectly proofed.
You don’t have to poke your dough every minute, though. Poke it once, and if it’s underproofed, poke it again after 20 minutes.
Quick note: start preheating your oven 30 minutes before your dough is fully proofed. Middle rack to sourdough loaf, bottom rack to the baking sheet with water.
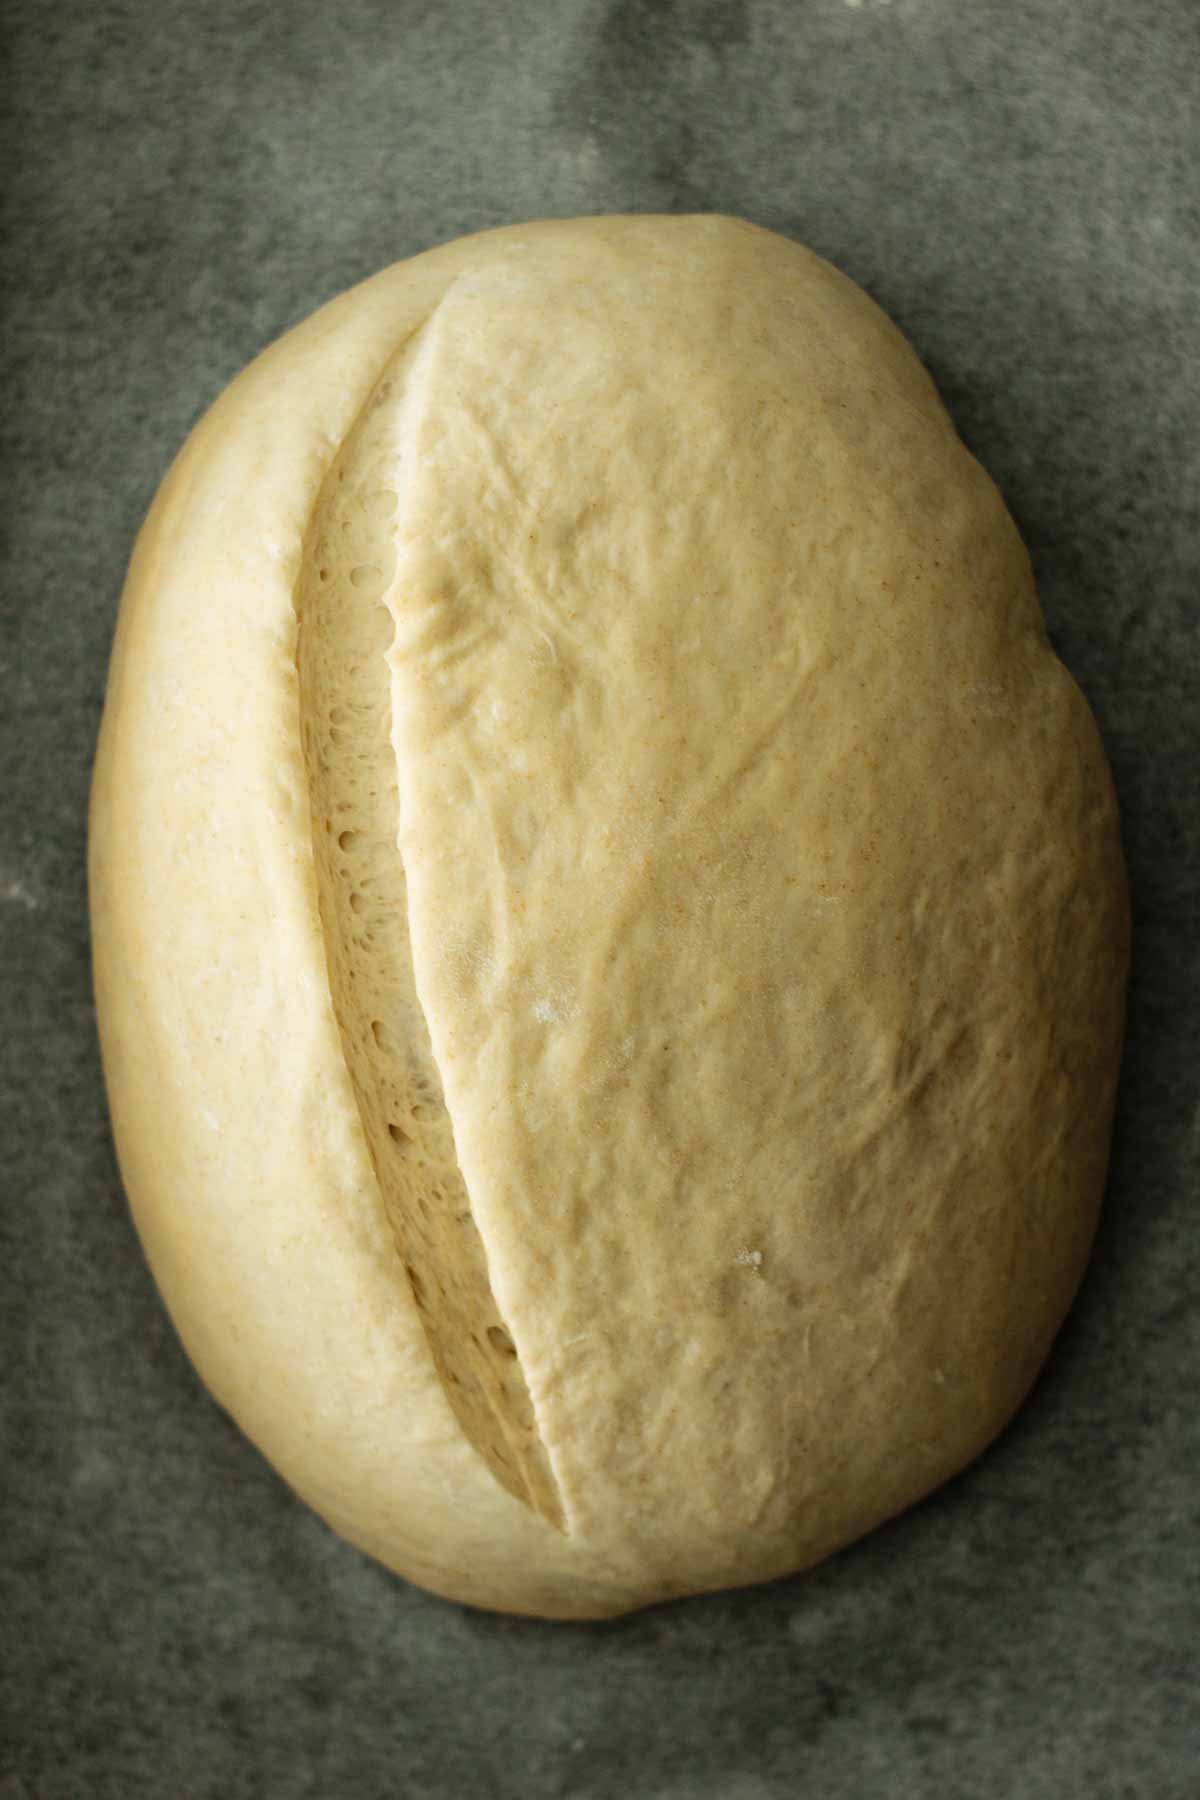
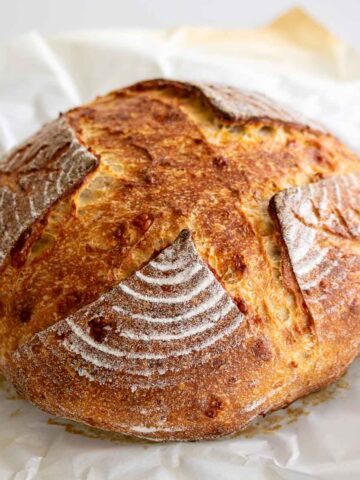
For scoring your dough, you need a sharp blade, razor or knife. Make a deep cut, half to 1 inch deep, and make it slightly diagonal so your loaf will bloom more beautifully. Pretty sourdough bread. We all want that.
Remember: use something sharp to score. If you use a knife or blade that is not sharp, you will press harder the dough for the blade to cut it, and that can compromise rising. The blade must slide through the loaf, not push it down.
How to bake sourdough without a Dutch oven
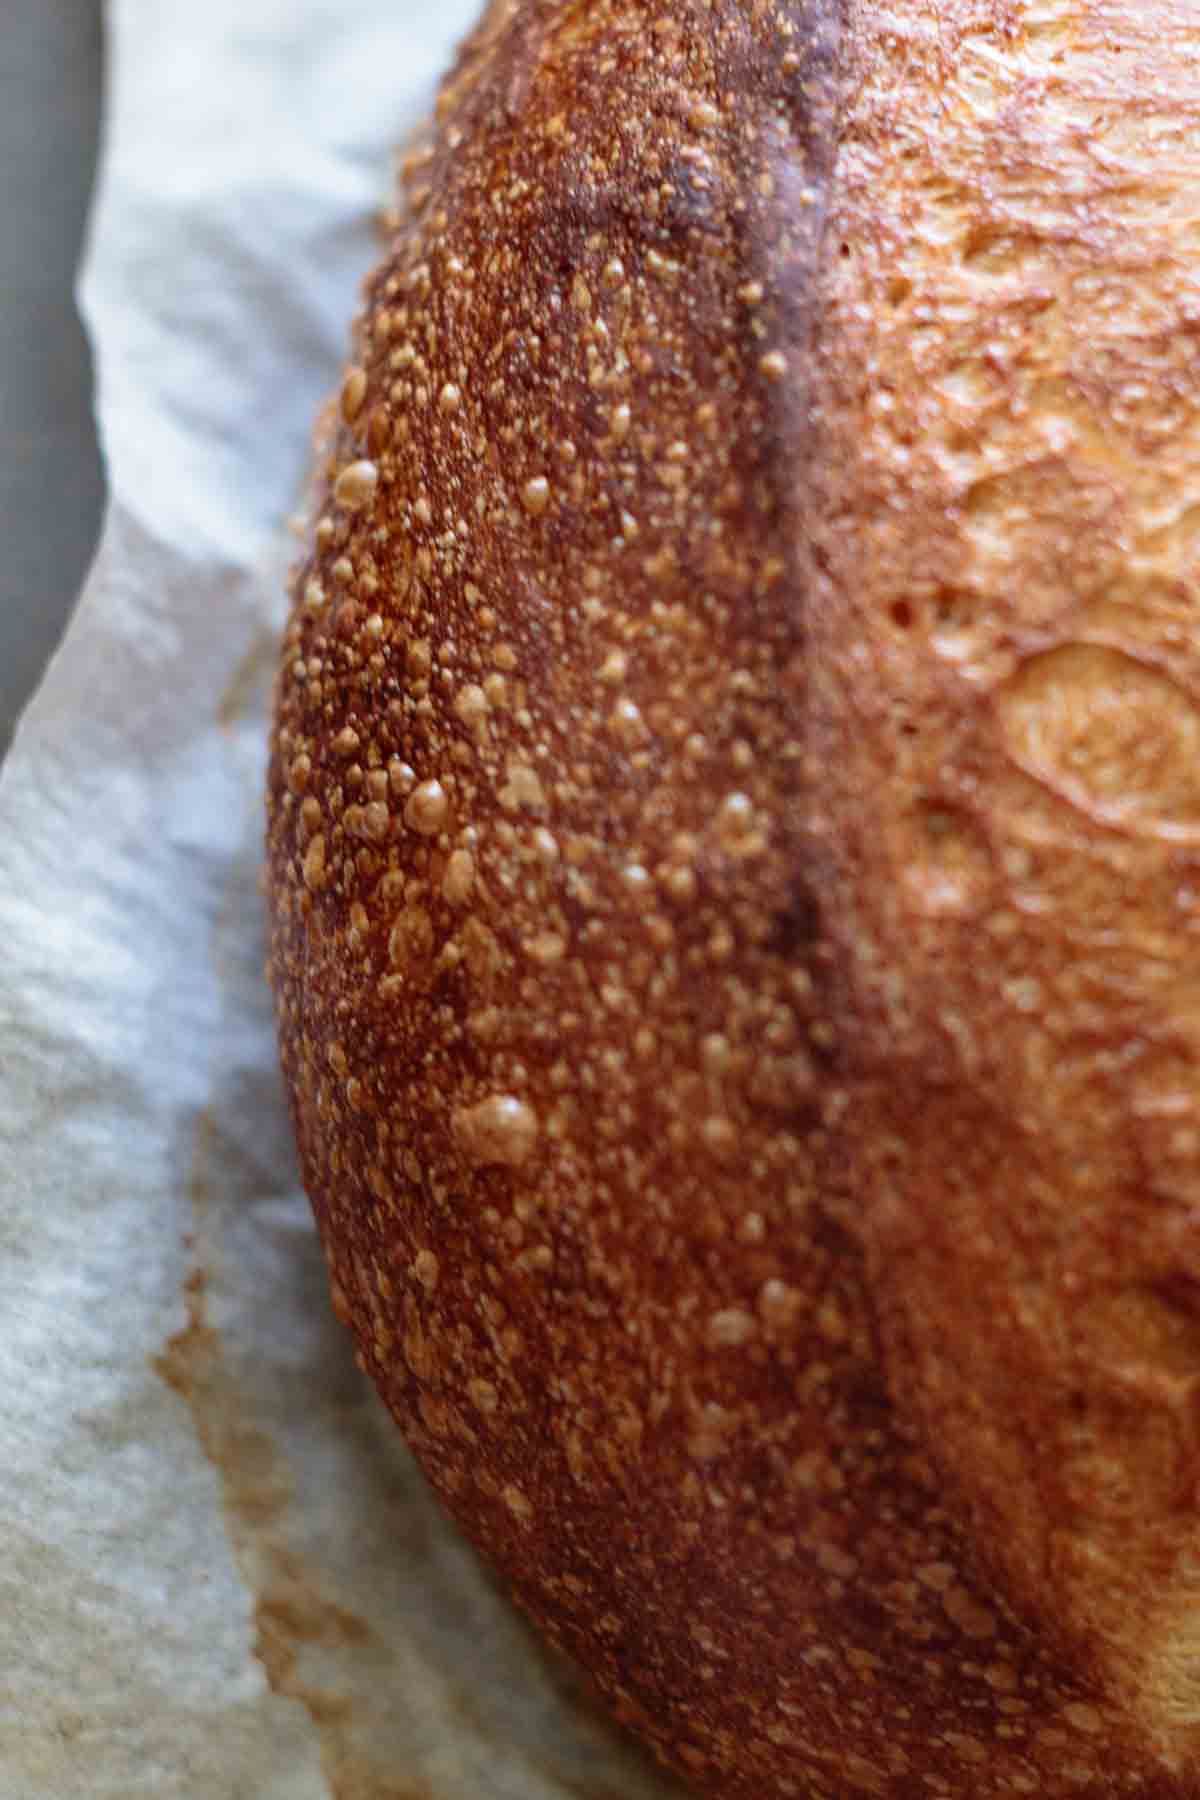
For baking a sourdough, you need a hot and humid environment. That will assure the best rise and crust for your bread. Although some say it’s best to use a Dutch oven to bake your sourdough, you can bake it without one and still get an outstanding loaf.
- Start preheating the oven 30 minutes before dough is fully proofed. Place an empty baking sheet at the bottom rack of your oven while preheating it.
- Spray your loaf with water just before placing it into the oven. Add a cup of water to the preheated baking sheet at the bottom rack (careful, it will make a lot of steam, and steam BURNS), place sourdough into the middle rack and close the oven door.
- Bake your loaf for 35 to 40 minutes or until it gets a golden brown beautiful crust.
Cooling the loaf
Your loaves are still baking even as they cool. So it is SUPER IMPORTANT NOT TO SLICE YOUR BREAD WHILE HOT. Slicing as soon as it’s out of the oven will result in a crumb with a gooey and gummy texture.
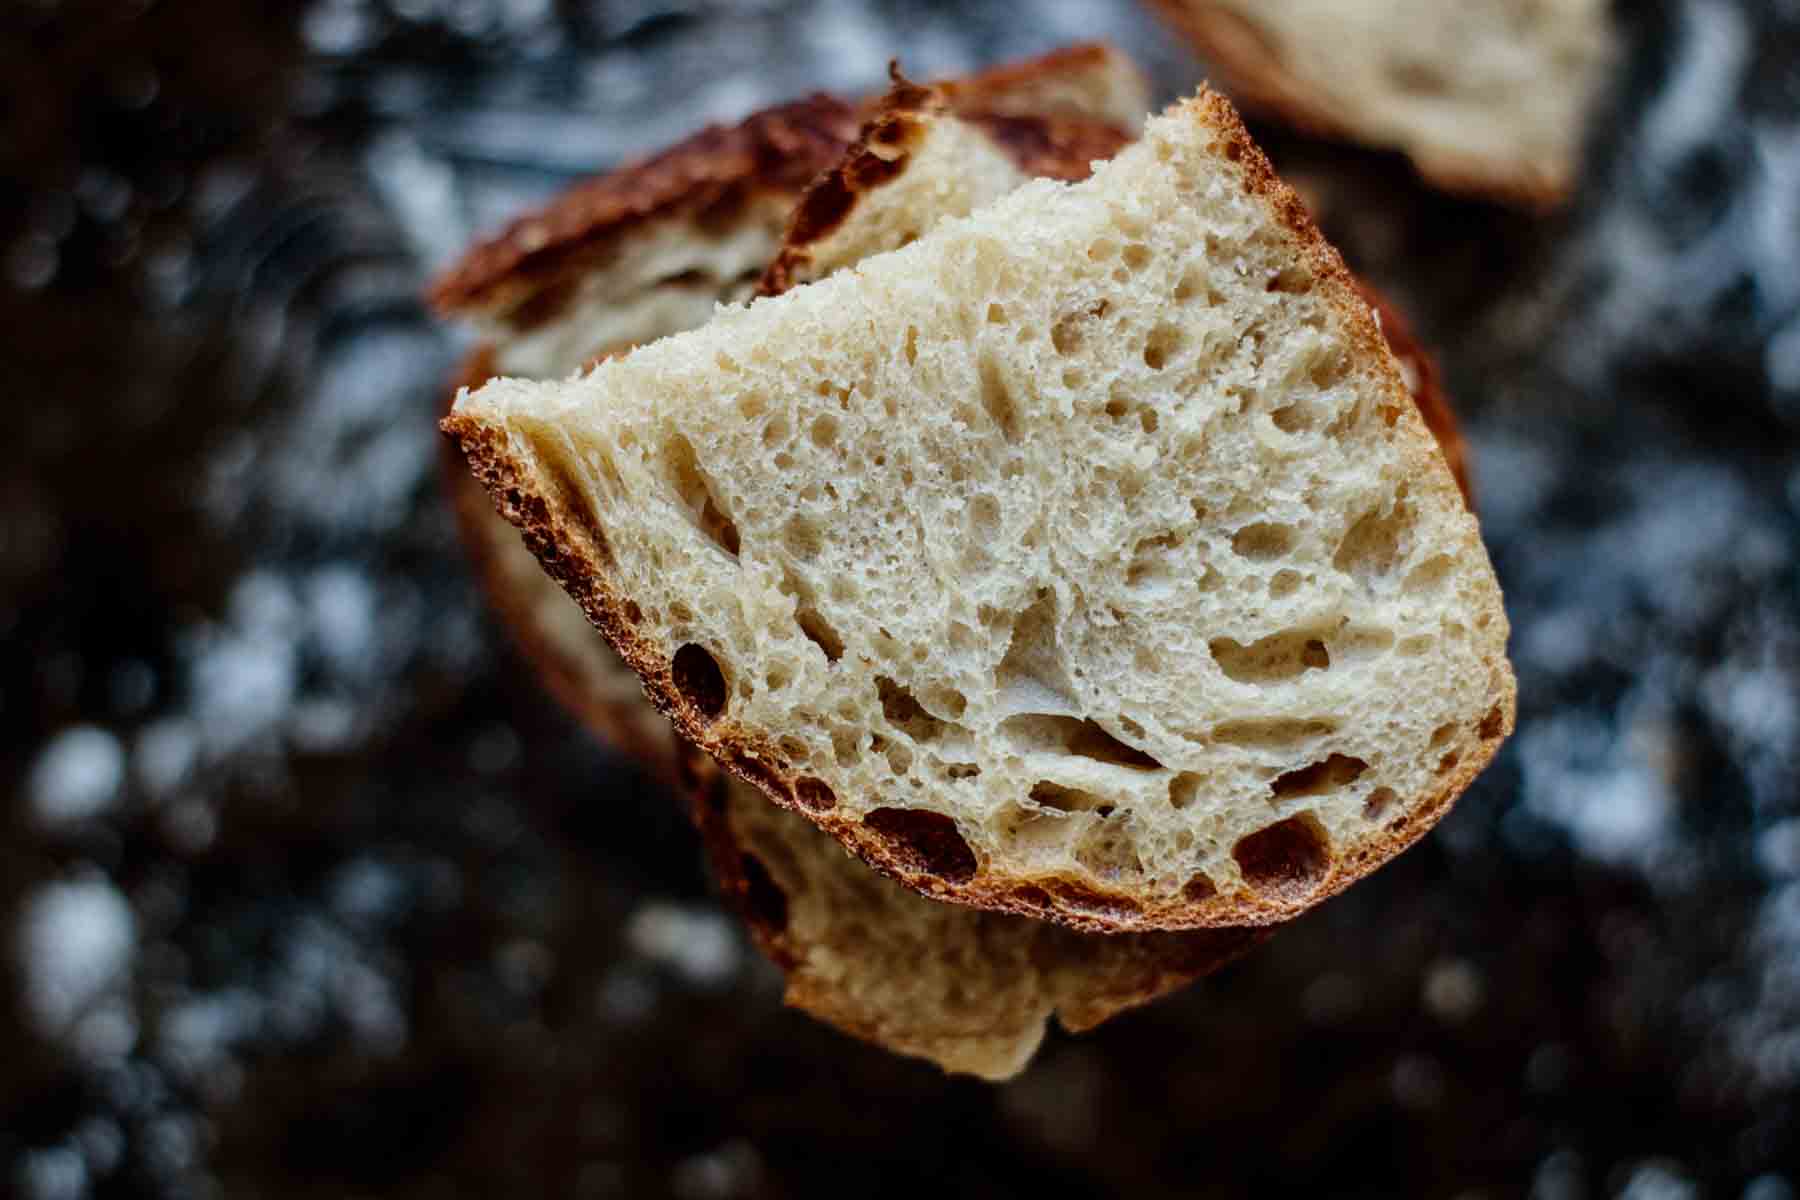
Wait at least 1 hour for it to cool. Use a good sharp serrated knife to cut your sourdough bread. The crust will be crusty, so you need a sharp bread knife to avoid squishing the bread as you slice.
Tips and tricks
- Use your sourdough starter when it’s on its peak (before it starts to fall) to get a better rise. If you use your starter after it loses size/activity, you might get a denser loaf.
- You need a super active starter. A new sourdough starter (less than 2 weeks old) might not be able to make your bread rise by itself. It might take an entire month for a new sourdough culture to be active enough to bake a good loaf. Also, don’t store your starter in a fridge before it completes at least one month: feed your starter every day and leave it at room temperature to speed up its development.
- Temperature matters. Find a warm spot in your home where you can leave your dough to rise.
- Your oven needs to be BURNING HOT. Preheat for at least 30 minutes on its highest temperature.
- If you never baked with sourdough before and you’re not a bread expert, start with a basic recipe like this one, or you might get frustrated (been there SO MANY TIMES). Maybe your first loaf won’t be very pretty, or won’t taste the way you were expecting: don’t give up! The more you bake, the more you get to know the recipe and the way your culture behaves.
- Finally, your bread won’t look the same as mine. Sourdough cultures are unique and behave differently. Taste, smell, color and final shape may differ, and that’s totally ok. I’m sure you’ll get a great sourdough loaf!
What can go wrong
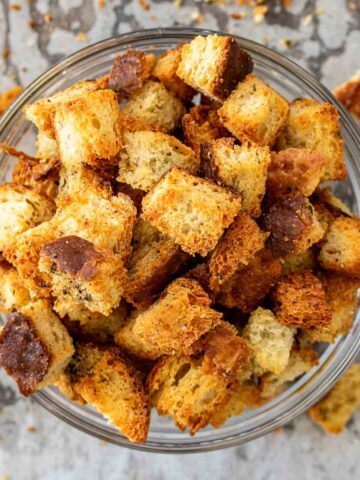
Overproofing your loaf. That happens when you let your dough proofing for longer than it has energy for. Overproofed dough will look flat and kind of runny. It won’t spring back when pocked, and will break when stretched. That can happen in warmer temperatures, specially during hot summer days. If overproofing happens, you can still bake your loaf and turn it into croutons after.
Underproofing your loaf. If you bake your loaf before fully proofed, it will turn out denser and with big holes near the crust. Next time, let your dough proof for longer. Always check if the dough is not proofing on a cold spot, as that will slow down fermentation and prolong proofing time.
Flavorless sourdough. A younger start may not produce a loaf as flavorful as an established one. Salt also plays a big role here: have you added less salt than what’s asked? That can affect both into flavor and fermentation. Doing a cold fermentation also helps to improve flavor, as a longer fermentation develops more complex flavors.
Too sour sourdough bread. That usually happens when you use a underfeed starter. Feed your sourdough 6 to 10 hours before using it for making the dough, always feeding it with the same water-flour quantity as its weight (if you have 100g of sourdough starter, feed it with 50g flour + 50g water). If you’re doing a long cold fermentation, try shortening it or skipping it altogether.
Underbaked or gummy bread. If you’re sure you didn’t under or overproofed your bread, leave it for 5 to 10 minutes more the next time you bake. Also, check if your oven is calibrated. The easiest way to do that is by buying an oven thermometer to check if your oven is in the right temperature. Usually, the problem is that the oven doesn’t get hot enough.
Why my bread didn’t rise?
That’s the last problem you can have while baking your sourdough bread - and usually, the most frustrating. It also can happen a lot in the beginning.
First, check your starter. Was it active enough? See how mine looks just before I make the dough in the video. Also, it’s best to use it when it’s at its peak (before it falls completely on the jar).
Regarding temperature, was your oven hot enough? You need it really hot to create steam, which is super important in the first 10 to 15 minutes. Steam will help the crust stay soft for longer, so your bread can rise freely in the beginning.
Did you handle gently your dough while stretching and shaping? Make it as gently as possible, so you won’t destroy all those air bubbles that are being created inside your loaf.
One last question: have you measured correctly the ingredients? While adding a bit more sugar probably won’t mess up your bread, adding too much salt can totally compromise your wild yeast.
How to measure correctly flour without a scale
Don’t dip your measuring cup into the flour package/container. The correct way to do it is:
- Fluff up the flour in the bag with a spoon.
- Scoop it with a spoon, filling the measuring cup.
- Level the measuring cup with the back of a knife.
And that’s it! Scooping flour directly with a measuring cup will make you add more flour that the recipe asks for, as scooping this way will pack the ingredient.
Storing
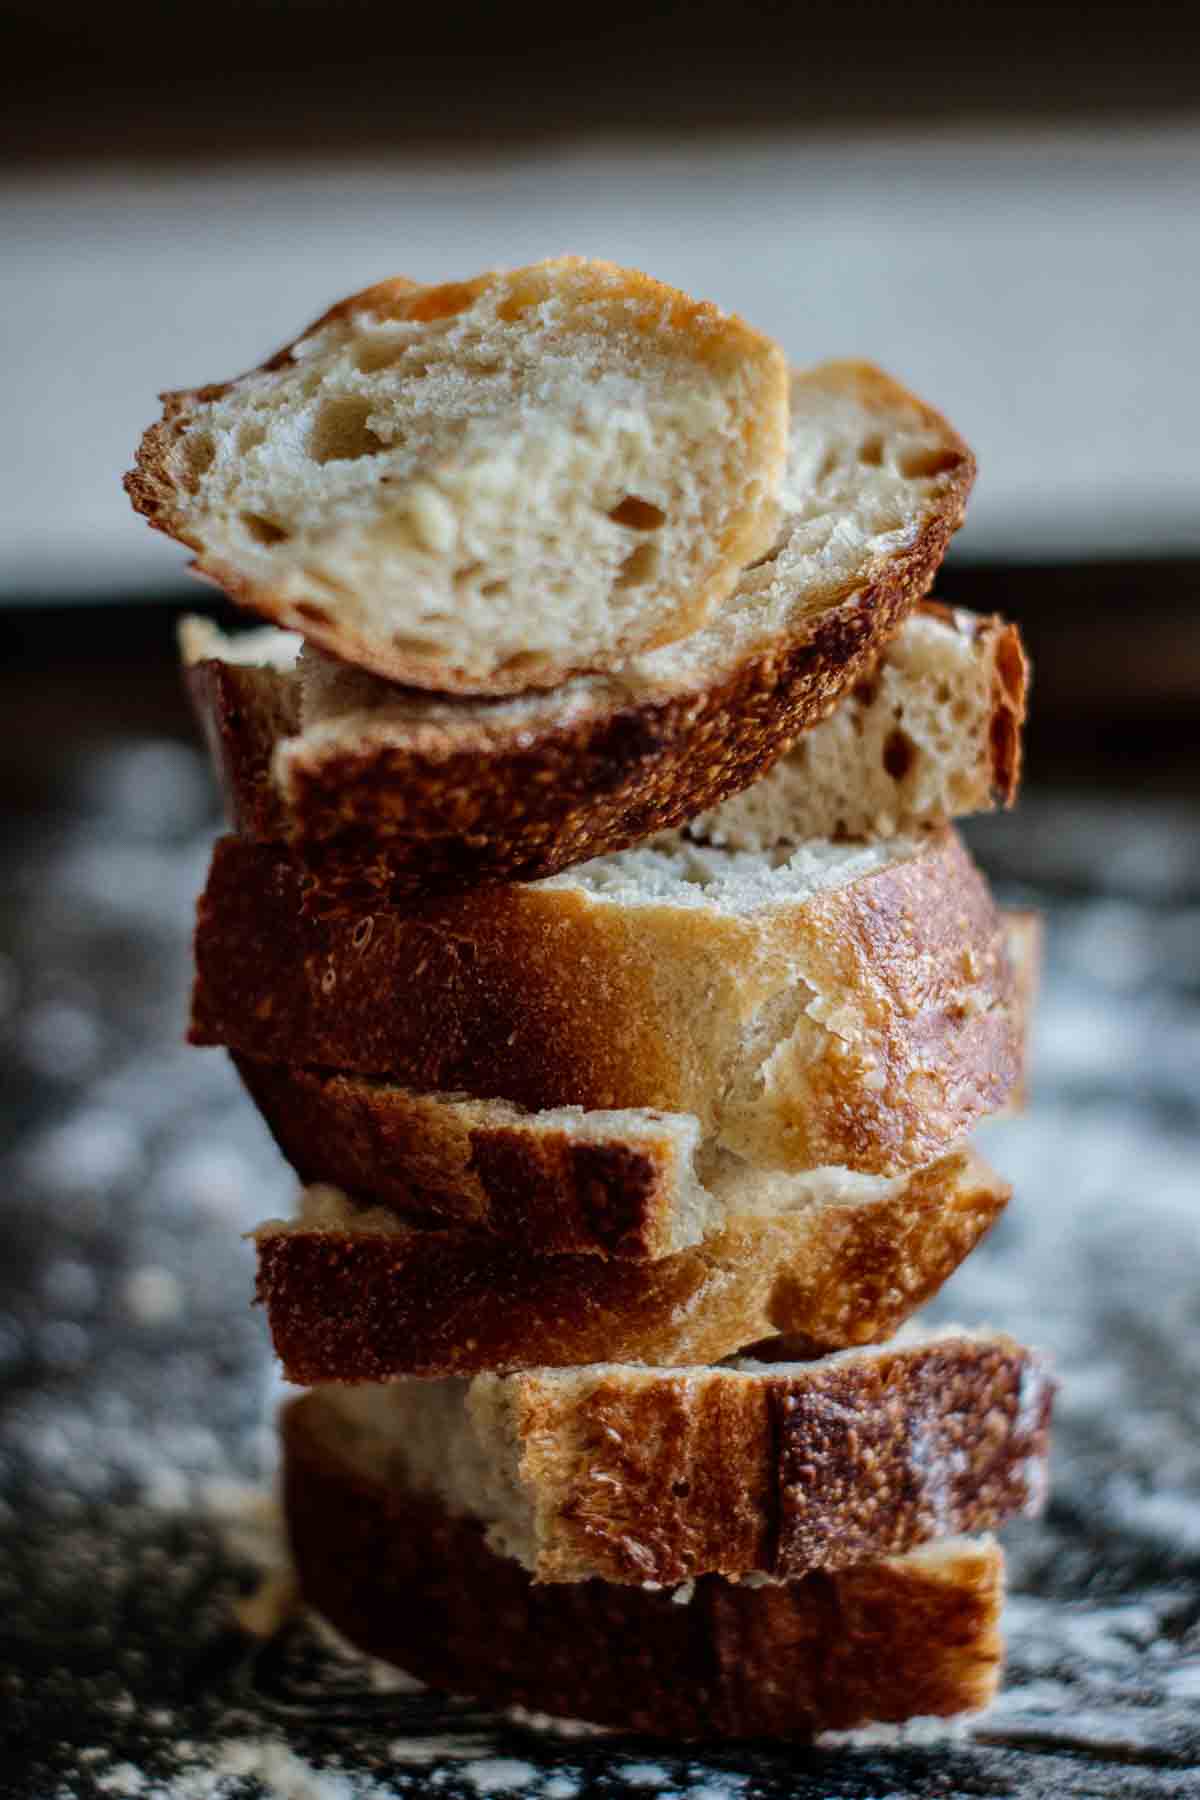
Store your sourdough bread, after cooled, in a bread keeper or an airtight container to keep it fresh for longer. It’s good for up to 5 days.
The crust will get softer after day one. For getting a crispier crust again, reheat the bread, in the oven on medium for 5 to 10 minutes.
More sourdough recipes
Sourdough english muffins
Pie crust made with sourdough discard
Sourdough bagels
Fluffy sourdough pancakes
📖 Recipe
Basic Sourdough Bread
Ingredients
- ½ cup sourdough starter 120g
- 1 cup water 240g
- 3 cups bread flour 375g
- 1 ½ teaspoon sea salt 7g
- 1 ½ teaspoon sugar 7g
Instructions
- Feed sourdough starter 6 to 12 hours prior to making the dough.
- In a large bowl, add sugar, salt, flour, sourdough starter and water and mix only until the dough is formed.
- Cover the bowl with plastic wrap, reusable beeswax wrap or a damp towel, and let the dough rest for 30 minutes in a warm spot.
- After 30 minutes, stretch and fold the dough over itself. Rotate the bowl ¼ turn and repeat the stretch and fold until you have complete 2 sets. Cover the bowl and repeat stretch and fold after 30 minutes, 4 to 6 times. Bulk fermentation is done when your dough is soft, less sticky, stretchy and with a good windowpane.
- Line a baking sheet with parchment paper and flour it lightly with bread flour or cornmeal to prevent from sticking.
- Do not punch down dough. Place dough into a clean surface and pull the edge closest to you up and towards the middle. Repeat with each edge, folding the dough until tight. There is no need for a proofing basket for this recipe, just shape the dough and place it on a lined baking pan.
- Place the dough over the lined baking sheet for proofing. After 1h30, poke it lightly and observe if the place where poked pops back out slowly and leave a slight indentation. If so, it’s ready to be baked.
- Preheat your oven to its maximum for at least 40 minutes, with racks both in the middle and bottom. Place an empty baking sheet on the bottom rack while the over preheats.
- Score your dough with a sharp blade or knife. You can make one clean cut through all the top, or you can score the way you prefer. Spray your dough with water.
- Pour carefully 1 cup of water into the baking sheet at the bottom rack of your oven just before placing your loaf into the middle rack.
- Lower the oven temperature to 425°F. Bake your loaf for about 40 to 50 minutes, or until the crust is golden brown and you get a hollow sound when you knock on loaf. If you prefer, and have a thermometer, you can check the internal temperature of your bread to check for doneness. For sourdough, it’s done when the thermometer read 210°F.
- Remove bread from the oven, placing loaf to cool on a wire rack for at least 1 hour before slicing.

Ruby
Tati,
Thank you! Your sourdough recipe worked like a charm. I’ve tried many recipes before, too many instructions, not disciplined enough but yours was straight forward and great result. It’s a keeper.
Ruby
Ps I can pics if you want 😃
Milk and Pop
Hi Ruby!
So glad to hear that! Yes, send me the pics, I would love to see your result 😉
And if you decide to try my other sourdough recipes and have any doubt, feel free to drop me a line!
cheers!