Want to bake delicious and easy sourdough bread in your own kitchen? This foolproof sourdough recipe was made for beginners and will give you a simple but delicious sourdough bread without using a Dutch oven.
Unlike bread made with commercial yeast, sourdough requires a longer fermentation process that results in a loaf with a tangy, complex taste, a chewy texture, and a crisp crust—similar to artisan bread you’d find at a bakery. Sourdough is also said to be easier to digest, thanks to the long fermentation, which helps break down gluten.
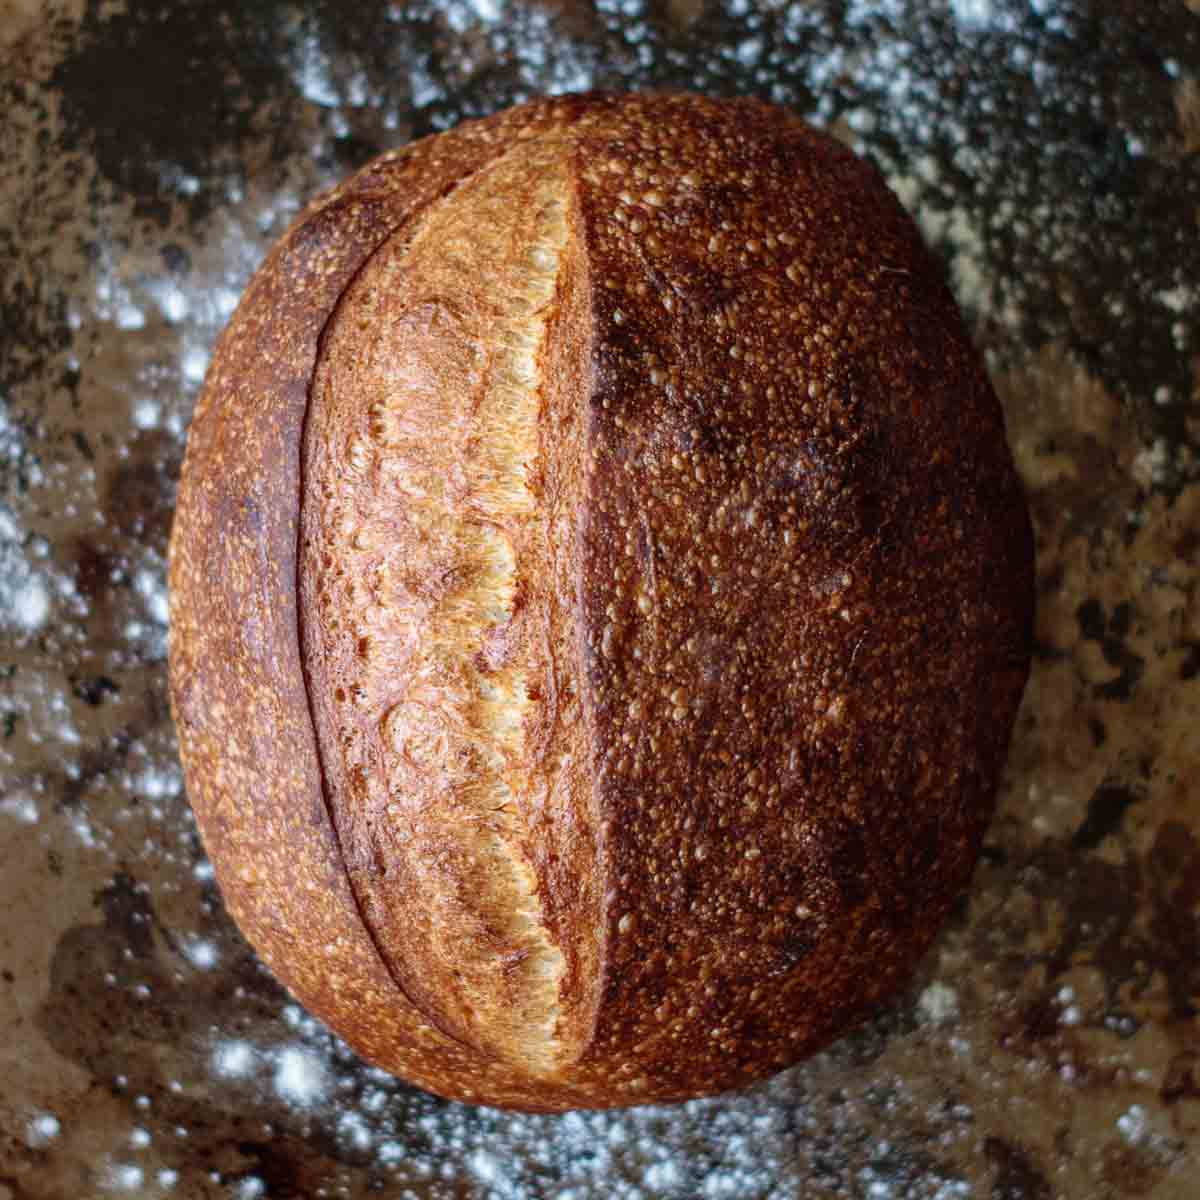
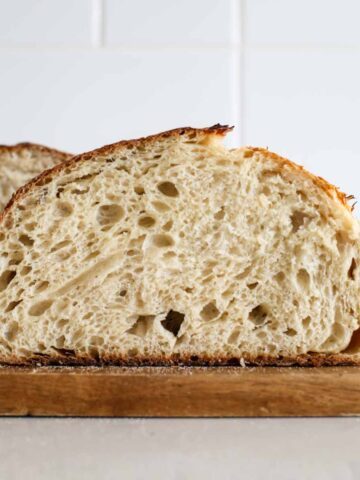
This is a beginner-friendly sourdough bread recipe that’s easy to follow and yields consistent results, perfect if you’re just starting out with sourdough baking. While this bread might not have those big ears, it still delivers a wonderfully soft and chewy crumb, a crisp golden crust, and incredible flavor. Plus, it’ll give you the skills and confidence to tackle more advanced recipes in the future!
Still don't have a starter? I can teach you how to make a bubbly sourdough starter in 15 days.
Jump to:
- What you'll need
- Ingredients
- Suggested Baking schedule
- Mixing the Dough
- Bulk Fermentation (First Rise)
- Overnight cold fermentation
- Shaping and Proofing
- Scoring the dough
- Baking sourdough without a Dutch oven
- Expert tips
- What can go wrong
- Why my bread didn’t rise?
- Storing and Freezing
- Reader's Favorite Sourdough Recipes
- 📖 Recipe
What you'll need
This recipe keeps things simple—no fancy equipment required! While a Dutch oven is often recommended for getting that perfect crust, you can get great results without one using other methods.
This is a recipe I recommend for beginners with little to no experience in sourdough or bread baking. It requires minimal equipment, making it an ideal starting point. Plus, if you decide sourdough or bread in general isn’t for you, you won’t be left with a pile of unused tools.
Here’s what you’ll need:
- An active sourdough starter;
- Water spray bottle;
- Mixing bowl;
- Parchment paper;
- Two baking sheets;
- Sharp blade, razor, or knife (for scoring); and
- A little patience
A kitchen scale is recommended for accuracy, but if you don’t have one, don’t worry—I’ll teach you how to measure ingredients properly using cups.
You also don’t need a banneton (proofing basket) for this recipe. The dough holds its shape beautifully during proofing without one, as demonstrated in the video tutorial.
Ingredients
We're using just five simple ingredients for this loaf:
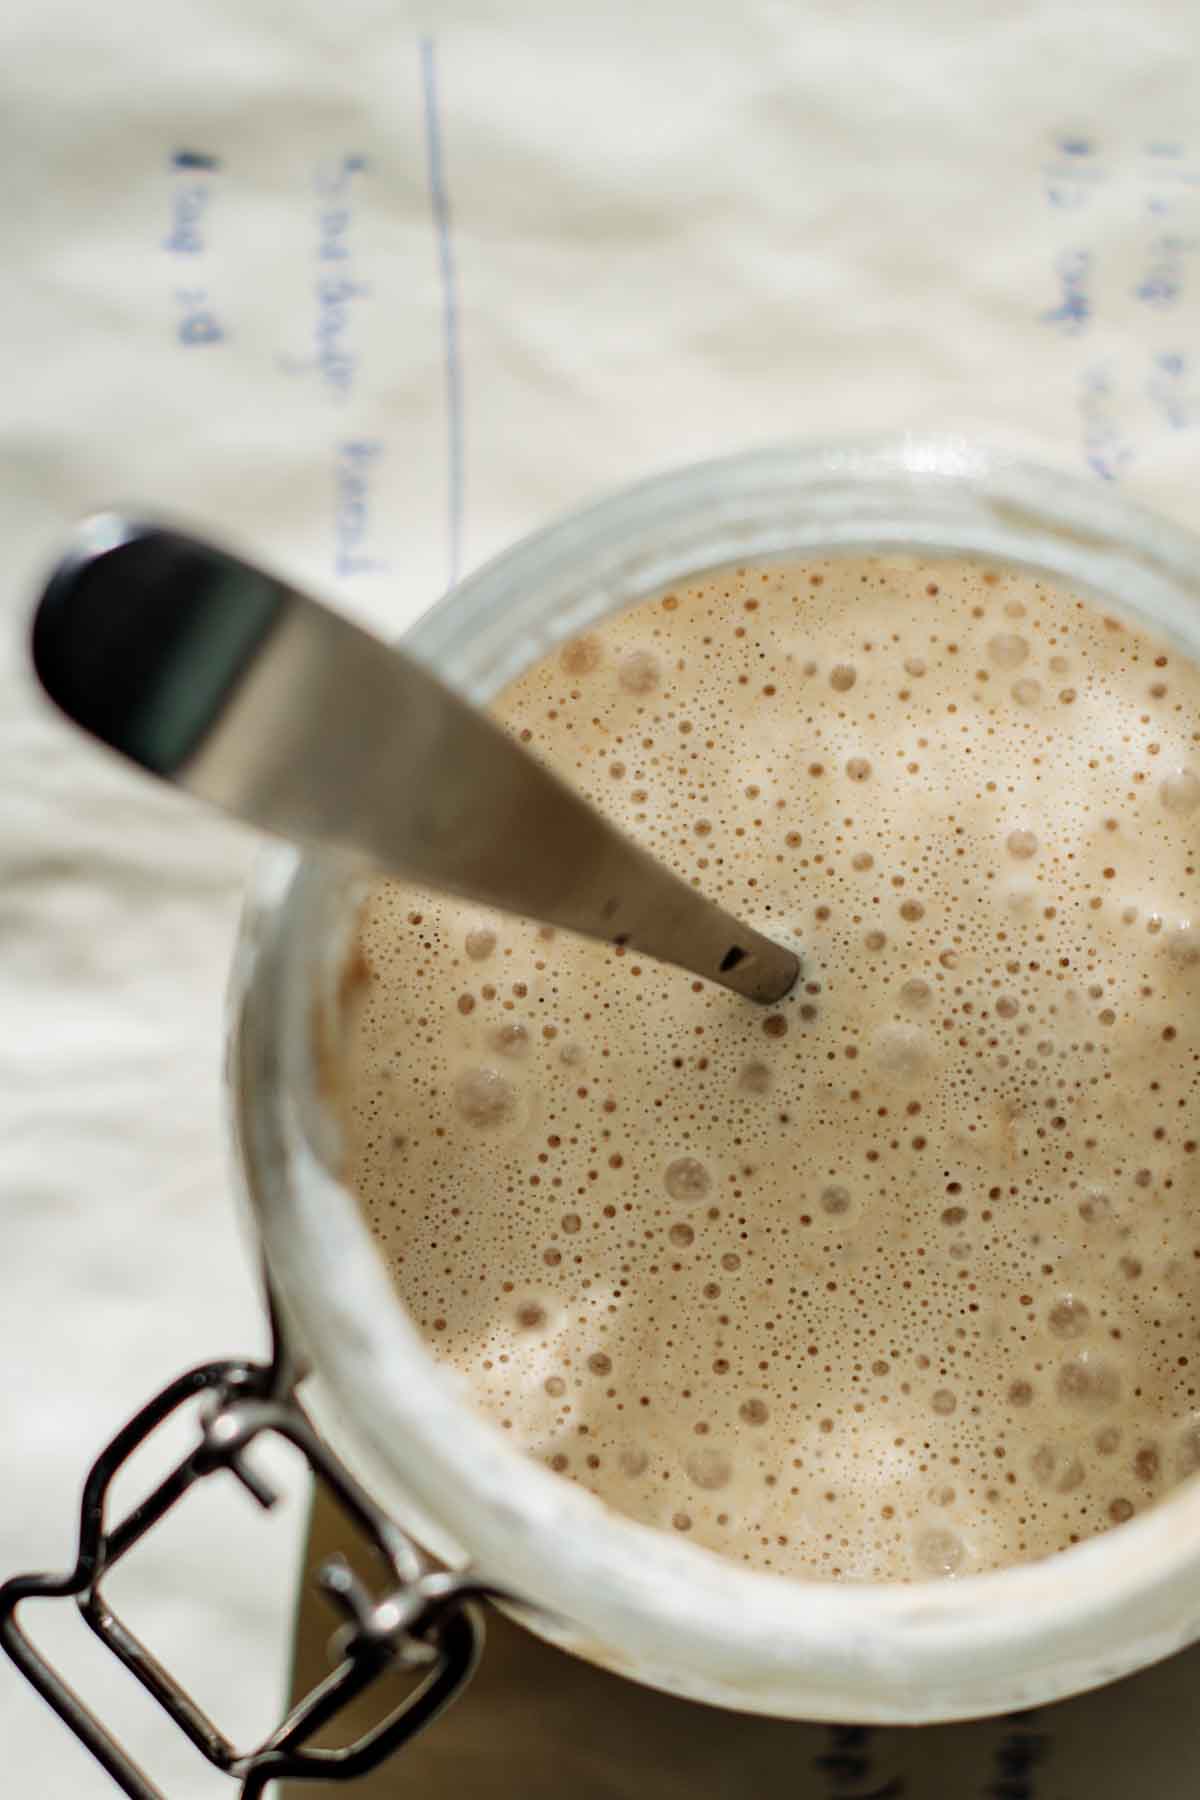
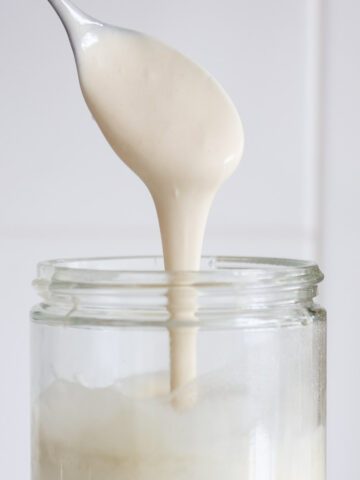
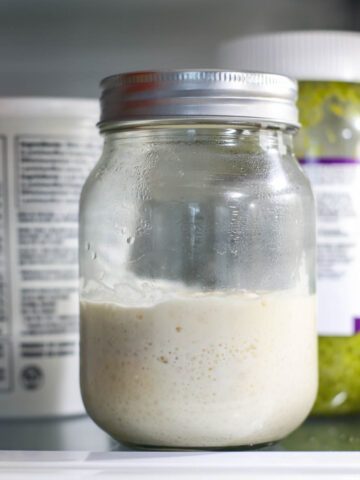
- Sourdough Starter: Ensure yours is active before starting. An active starter doubles in size within 6–8 hours after feeding, has visible bubbles, and if feed with white flour, passes the float test (a spoonful of starter floats in water).
- Water: Use chlorine-free water for better fermentation.
- Flour: Bread flour is best for structure and chewiness, especially if you’re new to sourdough baking. While all-purpose flour works, bread flour ensures a better rise.
- Salt: Stick with fine sea salt for this recipe.
- Sugar: Granulated or caster sugar helps achieve a beautiful golden-brown crust.
Suggested Baking schedule
Same-Day Baking:
- 11 PM: Feed your sourdough starter.
- 7 AM: Mix the dough and let it rest for 30 minutes.
- 7:30 AM – 2 PM: Perform stretch-and-folds during bulk fermentation.
- 2 PM: Shape the dough.
- 2 PM – 5 PM: Proof the dough.
- 5 PM: Bake.
Note: Fermentation times may vary depending on the maturity of your sourdough starter and the temperature of your kitchen. My best tip is learn to read the dough instead of watching the clock!
Mixing the Dough
This recipe calls for about ½ cup (120g) of starter. Stir your starter well before scooping to ensure accuracy when using cups.
Mix the Dough: In a large bowl, combine all ingredients and mix until just combined. Cover the bowl with plastic wrap, reusable beeswax wrap, or a damp towel, and let the dough rest for 30 minutes.
Using measuring cups? Don't scoop the flour directly! Instead, fluff up the flour, spoon it into the cup until it’s full, and then level it off with the back of a knife.
For the sourdough starter, stir it well before measuring. Pour it into the measuring cup, leveling it off if needed. Be careful not to add too much starter, as this can cause the dough to ferment too quickly.
This initial resting period allows the flour to fully hydrate and makes the dough easier to handle as you move forward. It will be way easier to work with it after this rest.
Bulk Fermentation (First Rise)
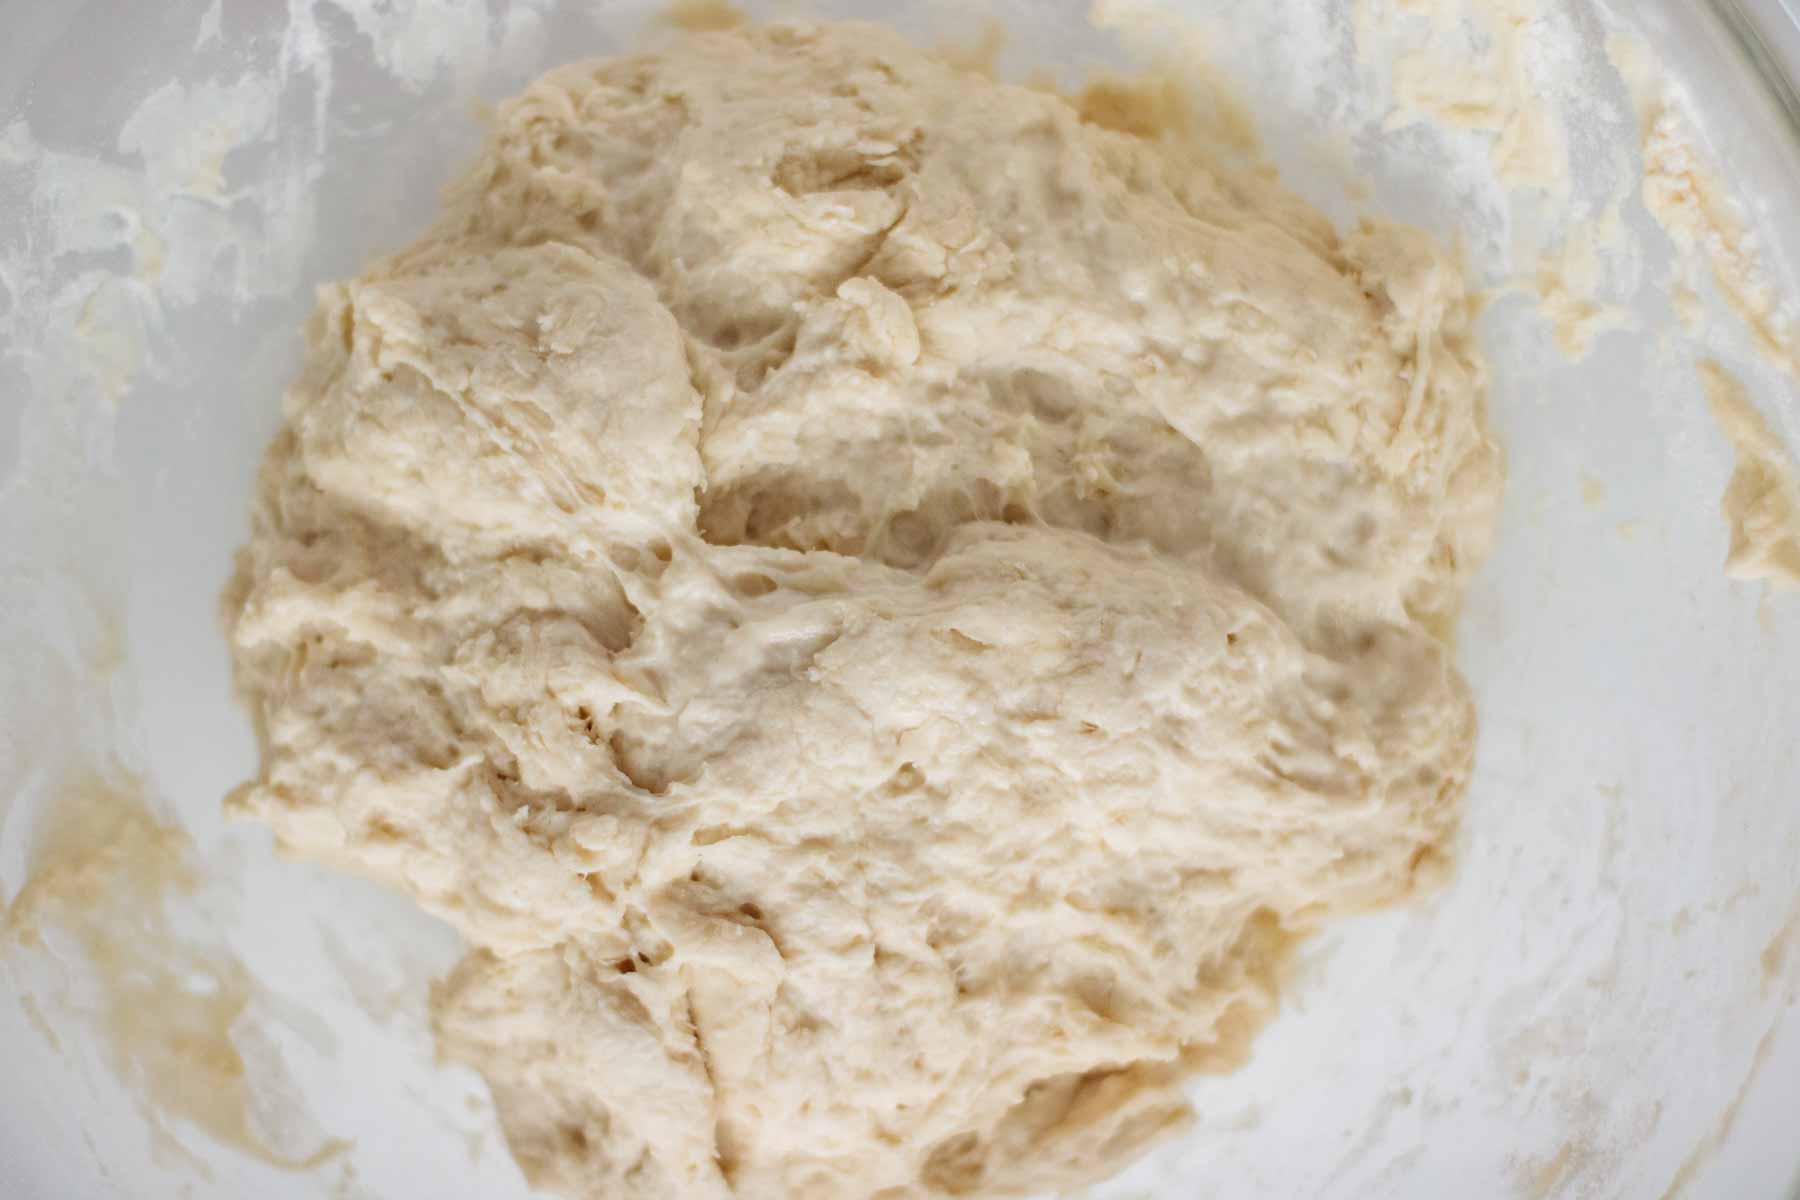
After 30 minutes, you’ll notice the dough looks different—it’s less sticky and a bit more elastic. Now, it’s time to start the stretch-and-fold process. You’ll repeat this step 4 to 6 times, with 30-minute intervals between each set.
Why stretch and fold? Stretching and folding helps the dough develop a stronger gluten structure while maintaining an even temperature throughout. This process makes a noticeable difference in your bake, like giving you a better oven spring even with no Dutch oven.
It’s also an opportunity to observe how the dough is progressing. Is it becoming more elastic? Does it feel lighter? Is it ready for preshaping? Can you achieve a good windowpane?
If you’re unsure how to perform a stretch and fold, check out the recipe’s video for guidance. All you need are your hands, and you can do it right in the mixing bowl.
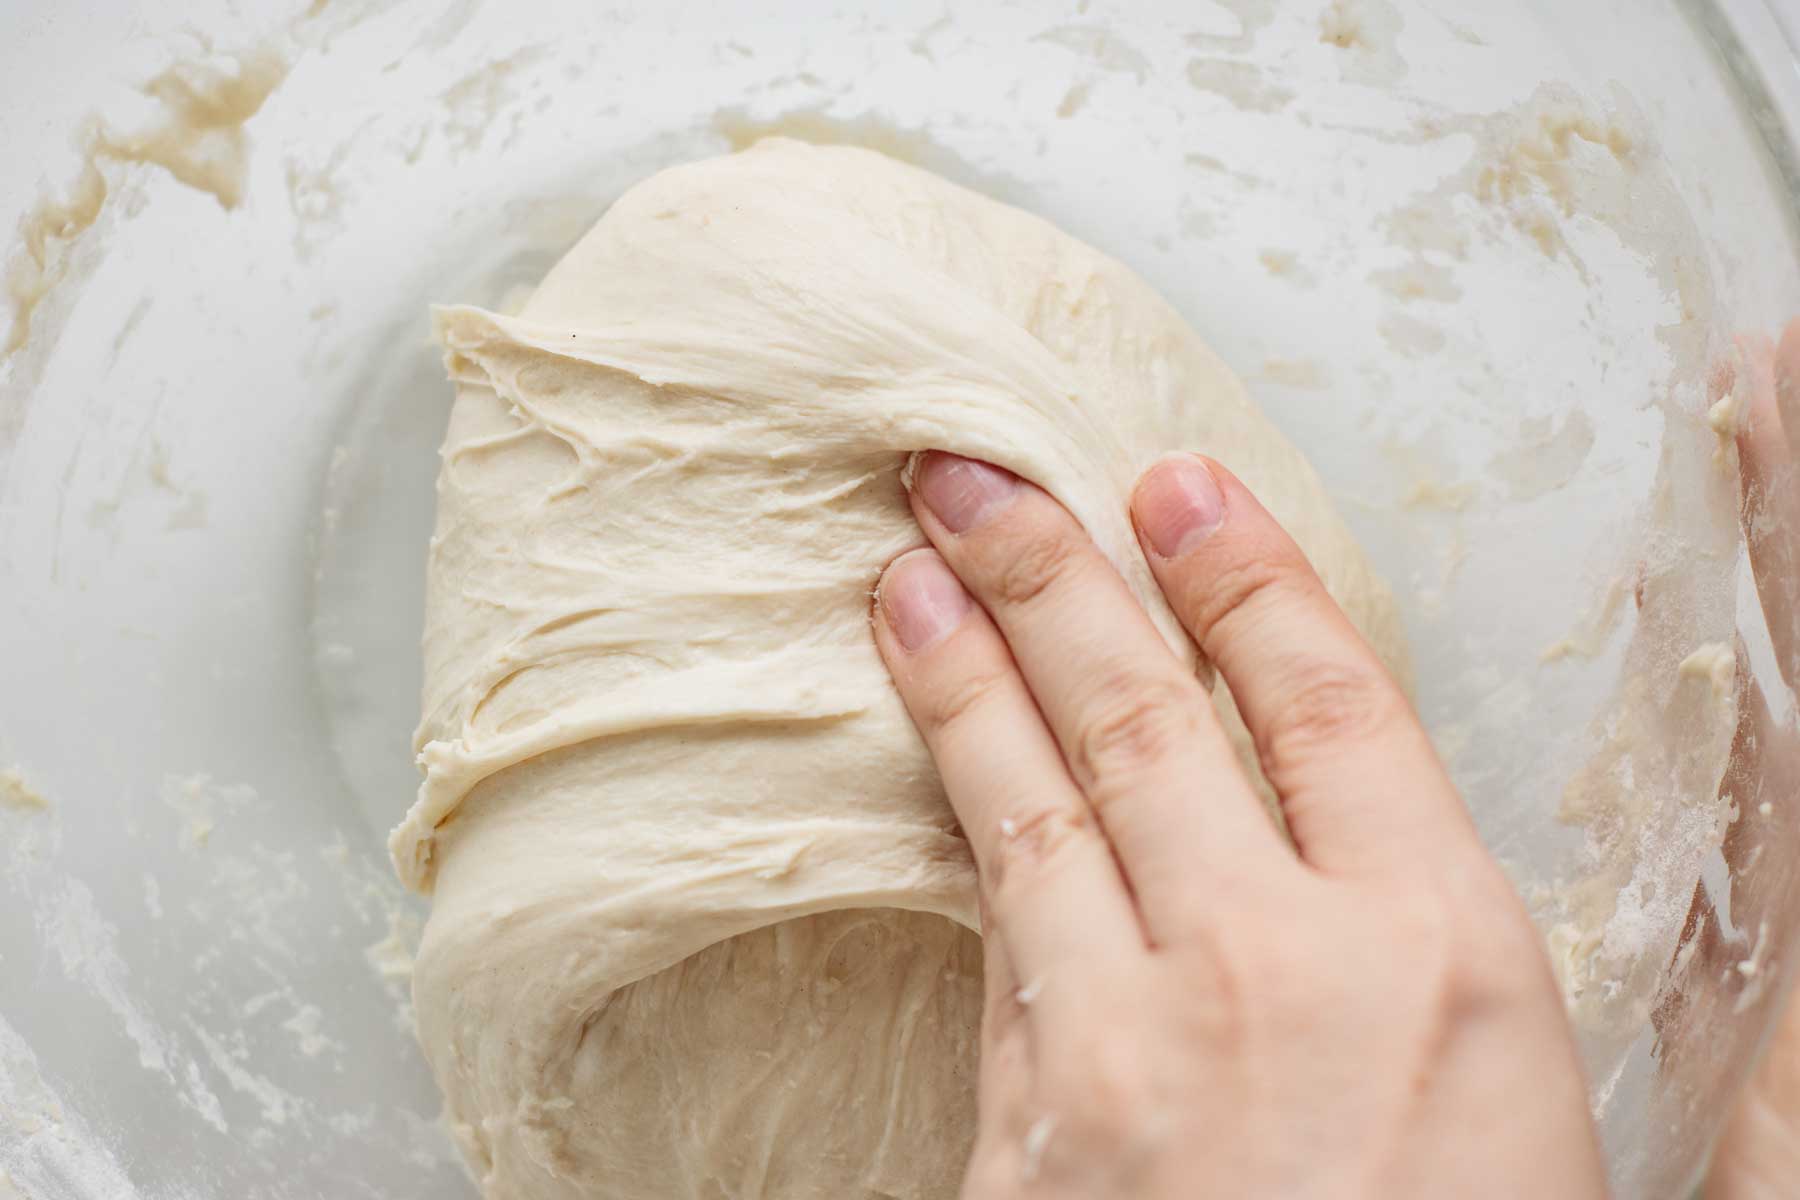
- Wet your hand to prevent the dough from sticking.
- Reach under one side of the dough and gently pull it straight up.
- Fold the dough over itself to the opposite side.
- Rotate the bowl a quarter turn and repeat the stretch-and-fold process. Continue until you’ve completed a full circle.
Tip: Always handle sourdough gently to avoid releasing the gas that’s developing during fermentation.
How do you know when bulk fermentation is done?
- Appearance: Gently shake the dough. Does it jiggle, or does it still seem stiff? If it’s stiff, it likely needs more time. Make sure the dough isn’t in a cold spot.
- Feel: Touch the dough. It should feel soft. While it may still be slightly sticky, it shouldn’t cling to your fingers. The dough should also feel stretchy, and strong enough it can be shaped.
- Windowpane Test: Stretch a small piece of dough between your fingers. Does it form a thin, translucent membrane without tearing easily? Tiny folds are okay, but if the dough tears too easily, it needs more time. If you're unsure, watch the video at the end of this post for a demonstration.
Overnight cold fermentation
If you plan to refrigerate your dough for an overnight cold fermentation, let it rise until it’s about halfway to double its size before transferring it to the fridge. For this step, I recommend covering the dough with plastic wrap or reusable beeswax wrap. Using a damp towel in the refrigerator often leads to the dough forming a skin.
For this recipe, we’re skipping the shaping step before cold fermentation. While it’s possible to use a bowl lined with a clean kitchen towel for shaping at this stage (if you don't have a banneton), many beginners struggle to do so and end up with a mess. In this recipe the dough goes directly into the fridge, covered, and we’ll shape it the next day.
I recommend cold fermenting this dough for the best flavor.
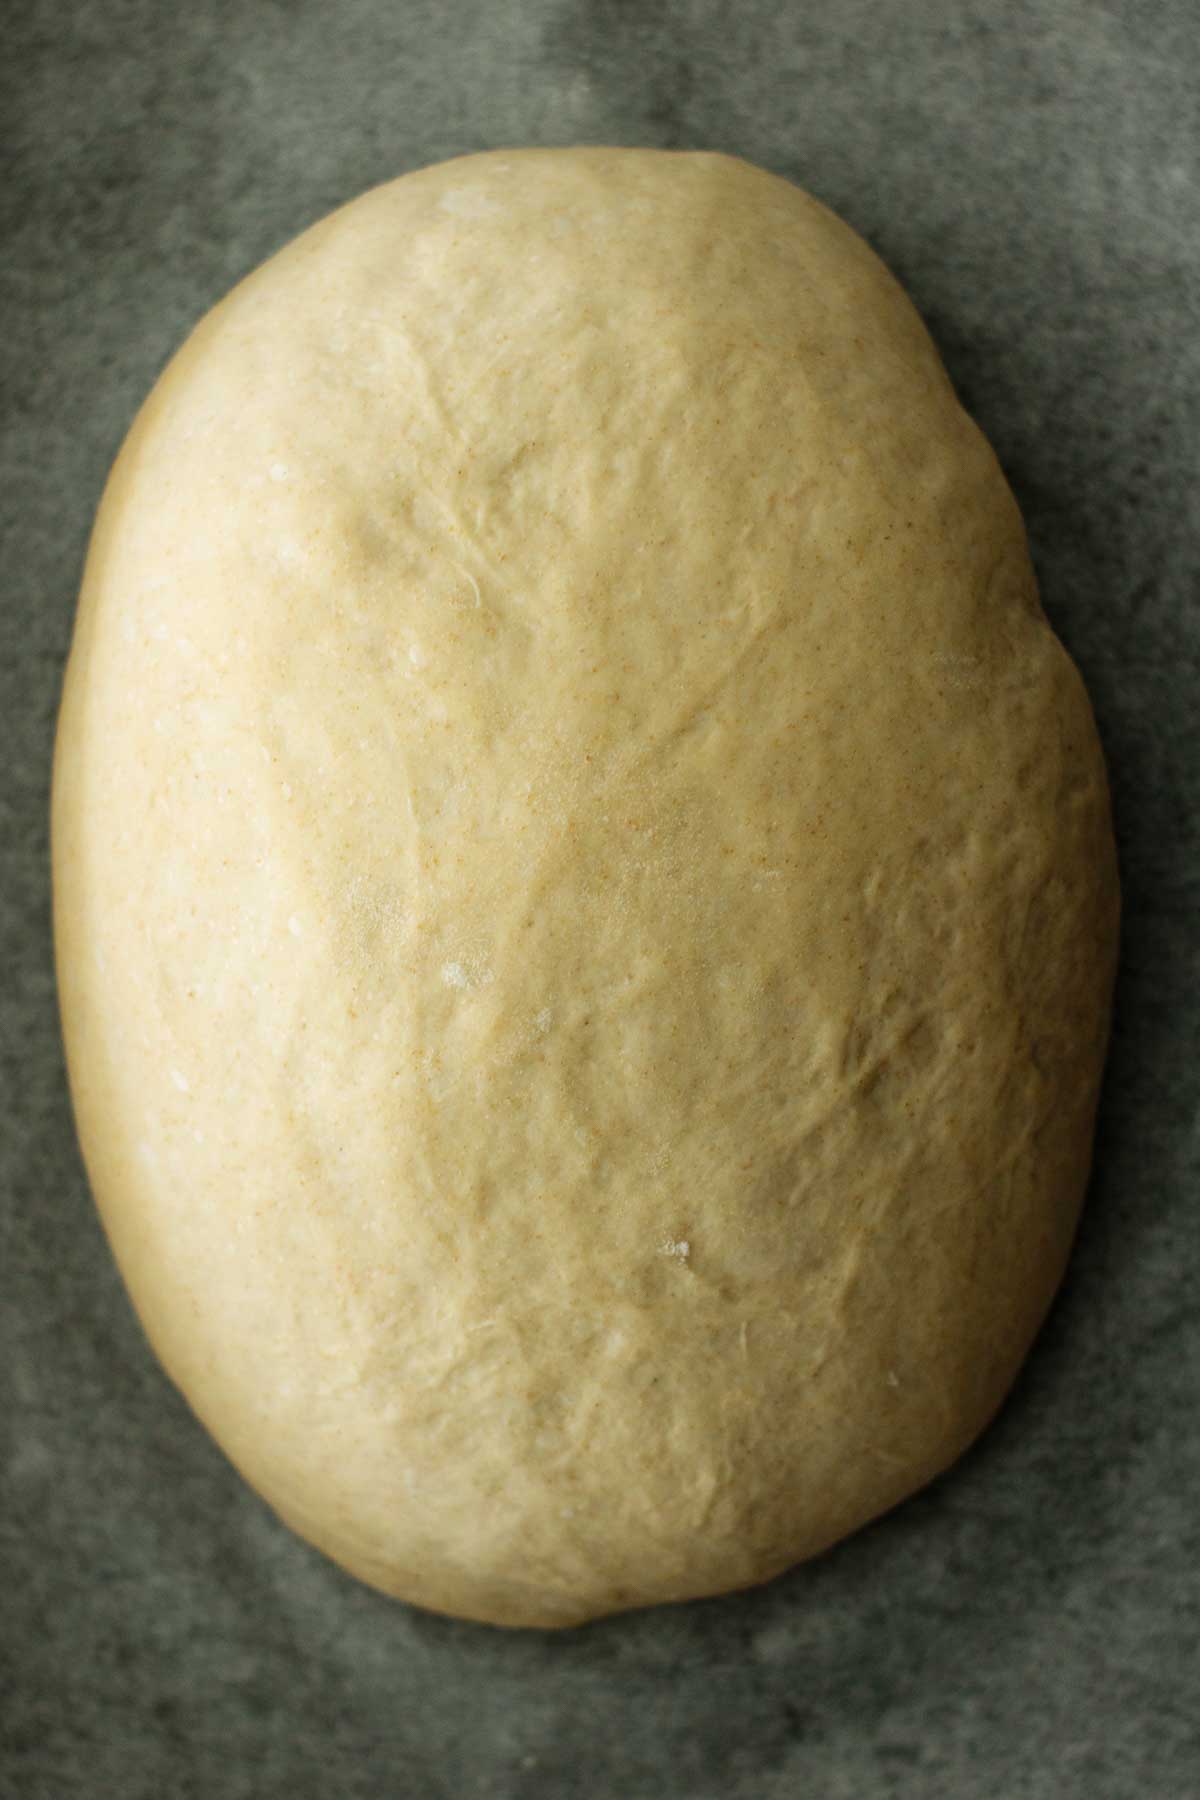
Shaping and Proofing
Place the dough on a clean surface. Pull the edge closest to you up and fold it toward the middle. Repeat this process with all the edges, folding the dough tightly to create tension. For this recipe, there’s no need for a proofing basket—simply shape the dough and place it on a lined baking pan.
Let your bread proof for at least 2 hours after shaping. During this time, the loaf will rise by about half its size. When it’s ready, the dough will feel soft and light. A gentle poke will leave a slight indentation that springs back slowly.
Be cautious not to overproof the dough. Overproofing can occur if you leave the dough proofing for too long, especially in a warm environment, resulting in a loaf with poor structure and minimal oven spring.
Use the poke test to check if the dough if proofed:
- Underproofed: If the dough immediately springs back after being poked, it needs more time.
- Overproofed: If the dough doesn’t bounce back at all, it’s been proofed for too long.
- Perfectly proofed: If the dough slowly springs back and leaves a slight indentation, it’s proofed.
You don’t need to keep poking your dough frequently—poke it once, and if it’s underproofed, check again in 20 minutes.
Preheating your oven for at least 20 minutes as soons as the dough is proofed. Use the middle rack to bake the sourdough loaf and place a baking sheet with water on the bottom rack to create steam.
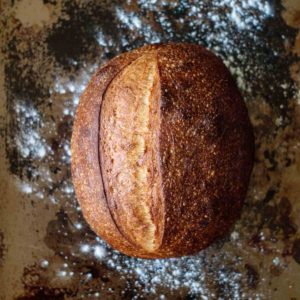
Scoring the dough
To score your dough, use a sharp blade, razor, or knife. Make a deep cut, about ½ to 1 inch deep, and angle it slightly diagonal. This allows your loaf to bloom beautifully as it bakes. After all, we all love a pretty sourdough loaf!
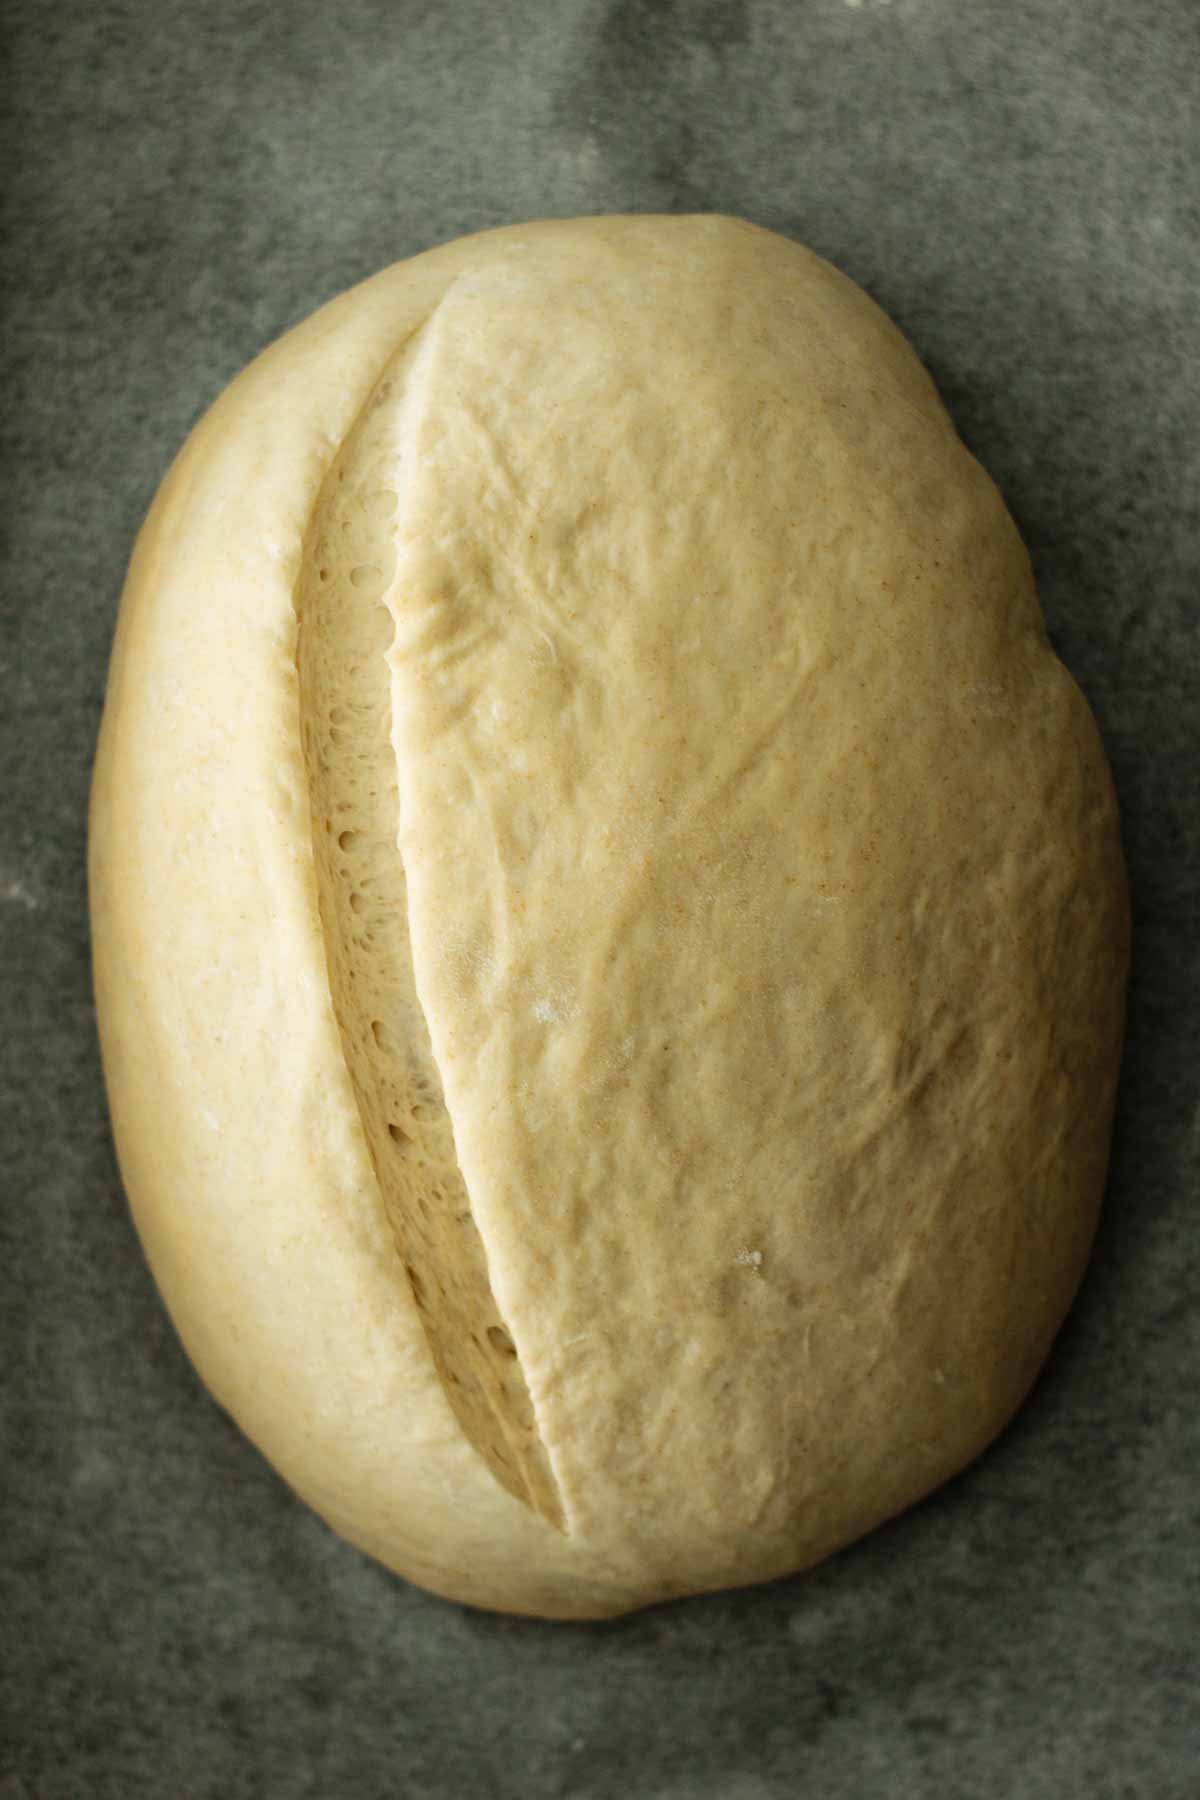
Important tip: Always use a sharp blade for scoring. A dull blade requires more pressure to cut through the dough, which can deflate it and affect its rise. A sharp blade should glide effortlessly through the surface without compressing the dough.
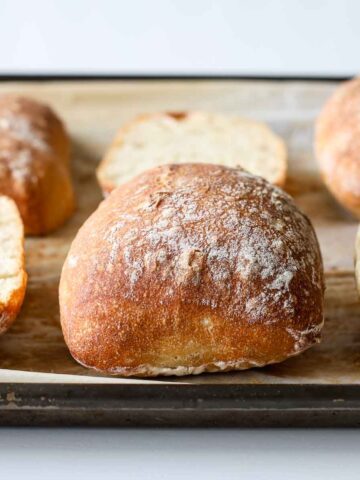
Baking sourdough without a Dutch oven
To bake a great sourdough loaf, you need a hot and humid environment. This makes sure you get a good rise and a beautiful crust for your bread.
- Preheat Your Oven: Begin preheating as soon as your dough is fully proofed. Place an empty baking sheet on the bottom rack of your oven while it heats up.
- Prepare Your Loaf: Just before placing your bread in the oven, lightly spray the surface of the loaf with water.
- Create Steam: Carefully pour a cup of water onto the preheated baking sheet on the bottom rack. Be cautious—this will generate a lot of steam, and steam burns!
- Bake the Bread: Place your loaf on the middle rack and bake for 40 to 50 minutes, or until the crust turns a beautiful golden brown.
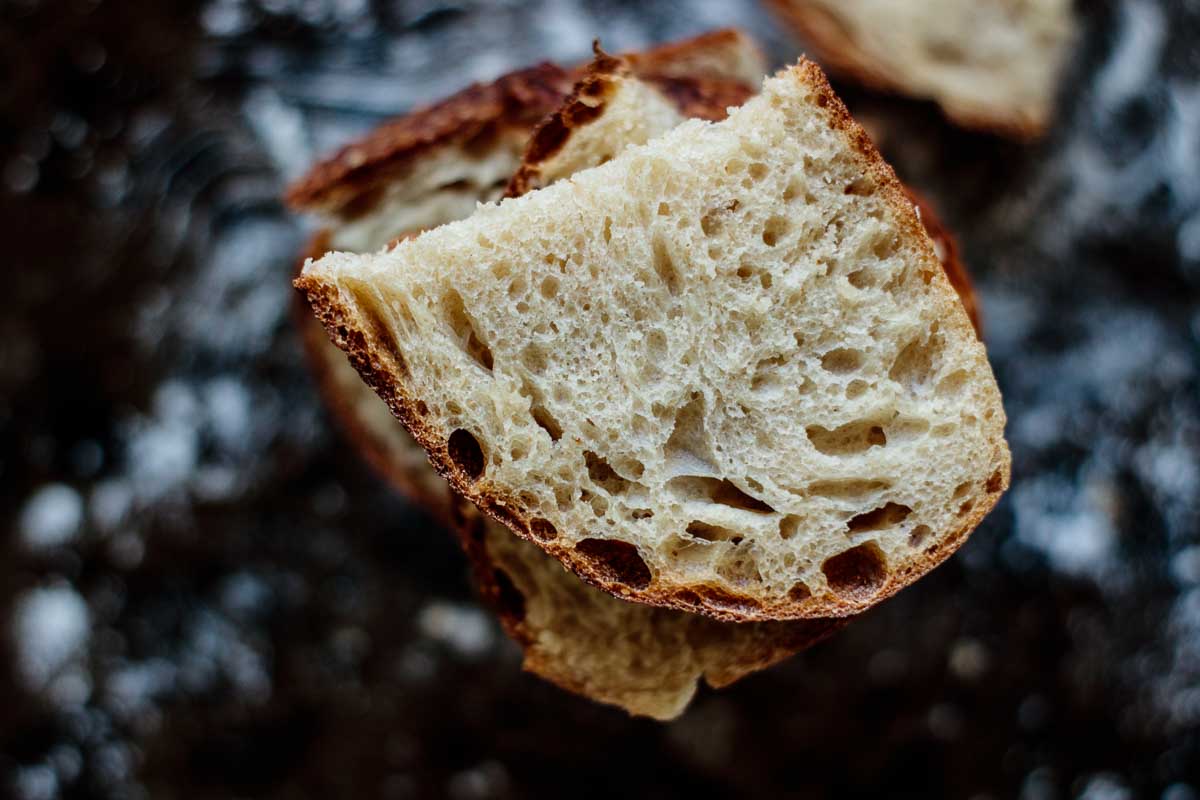
Your bread continues to bake internally as it cools, so it’s crucial not to slice it while it’s hot. Cutting too soon will result in a gummy, underdeveloped crumb.
Wait at least 1 hour for the bread to cool completely before slicing. Use a sharp serrated knife to cut through the crust without squishing the loaf. The crust will be firm, so a good bread knife is key for clean, even slices.
Expert tips
It’s best to use your sourdough starter when it’s at its peak (before it starts to fall) to get the best rise. If you use your starter after it’s lost its size and activity, you may end up with a denser loaf. Your starter is ready to use when it doubles in size within 6–8 hours of feeding and has visible bubbles.
Are you feeding your starter correctly? Check my tips on how to feed a sourdough starter.
You need an active starter. A new sourdough starter (less than 2 weeks old) may not be strong enough to make your bread rise on its own. It could take up to a month for a new starter to become active enough to bake a good loaf. Also, don’t store your starter in the fridge before it’s been fed consistently for at least a month. Keep it at room temperature and feed it daily to speed up its development.
Temperature matters. Find a warm spot in your home where your dough can rise comfortably.
Preheat your oven thoroughly. Make sure your oven is burning hot—preheat it for at least 20 minutes on its highest setting.
If you’ve never baked with sourdough before and you’re not a bread expert, start with a basic recipe like this one, or you might get frustrated (trust me, I’ve been there many times!). Your first loaf may not be as pretty or taste exactly how you imagined, but don’t give up! The more you bake, the more you’ll understand the recipe and how your starter behaves.
Lastly, your bread won’t look exactly like mine. Every sourdough culture is unique and behaves differently. The taste, smell, color, and final shape can all vary, and that’s completely okay. But I’m confident you’ll be able to make a delicious sourdough loaf with this recipe!
What can go wrong
Overproofing your loaf: This happens when you let your dough proof for longer than it has energy for. Overproofed dough will look flat and somewhat runny. It won’t spring back when poked and will tear when stretched. Overproofing can occur in warmer temperatures, especially during hot summer days. If this happens, you can still bake your loaf and turn it into croutons afterward.
Underproofing your loaf: If you bake your loaf before it’s fully proofed, it will turn out denser, with large holes near the crust. Next time, let your dough proof for longer. Always check that your dough isn’t proofing in a cold spot, as that will slow down fermentation and prolong proofing time.
Flavorless sourdough: A younger starter may not produce a loaf as flavorful as a more established one. Salt also plays a big role here: did you add less salt than the recipe calls for? That can affect both flavor and fermentation. Cold fermentation also helps improve flavor, as longer fermentation develops more complex flavors.
Too sour sourdough bread: This usually happens when you use an underfed starter. Feed your sourdough starter 6 to 10 hours before using it to make the dough, always feeding it with the same weight of water and flour (for example, if you have 100g of starter, feed it with 50g flour and 50g water). If you're doing a long cold fermentation, try shortening it or skipping it altogether.
Underbaked or gummy bread: If you're sure you didn’t underproof or overproof your bread, try leaving it in the oven for 5 to 10 more minutes the next time you bake. Also, check if your oven is calibrated. The easiest way to do that is by buying an oven thermometer to verify if your oven is at the right temperature. Typically, the issue is that the oven isn’t getting hot enough.
Why my bread didn’t rise?
That’s a frequent problem you might encounter while baking sourdough bread—and it’s often the most frustrating. It tends to happen a lot when you're just starting out.
First, check your starter. Was it active enough? Watch how mine looks just before I make the dough in the recipe's video. It's best to use your starter when it’s at its peak (before it falls completely in the jar).
Regarding temperature, was your oven hot enough? You need it to be really hot to create steam, which is crucial in the first 10 to 15 minutes. Steam helps to keep the crust soft for longer, allowing your bread to rise freely at the start.
Did you handle your dough gently while stretching and shaping it? Be as gentle as possible to avoid destroying the air bubbles that are developing inside your loaf.
Last question: did you measure the ingredients correctly? While adding a little extra sugar won’t affect your bread as much, adding too much salt can compromise the activity of the wild yeast. Adding way more starter than needed (let's say more than 180 grams) can also mess up the recipe.
Again, measure flour correctly without a scale:
- Fluff up the flour in the container with a spoon.
- Scoop the flour into the measuring cup with the spoon.
- Level the measuring cup with the back of a knife.
Storing and Freezing
Store your sourdough bread, after it’s cooled, in a bread keeper or an airtight container to keep it fresh for longer. It will stay good for up to 5 days. Check more ways to store sourdough bread, and how to use leftover sourdough.
The crust will soften after day one. To restore a crispy crust, reheat the bread in the oven on medium for 5 to 10 minutes.
Reader's Favorite Sourdough Recipes


Have you tried this Beginner Sourdough Bread? Please leave a 🌟 star rating in the recipe card below, I'd love to know how it went!
📖 Recipe
Basic Sourdough Bread Without Dutch Oven
Equipment
- 2 baking sheets
- Parchment paper
- spray bottle
Ingredients
- ½ cup sourdough starter
- 1 cup water
- 3 cups bread flour
- 1 ¼ teaspoon sea salt
- 1 ½ teaspoon sugar
Instructions
- Feed your sourdough starter: Feed your sourdough starter 6 to 12 hours prior to making the dough. The starter should be at its peak activity when you use it, meaning it should have doubled in size and have visible bubbles.
- Mix the dough: In a large bowl, combine the sugar, salt, flour, sourdough starter, and water. Mix only until the dough is formed. It’s okay if the dough is slightly shaggy at this stage.
- Rest the dough for 30 minutes: Cover the bowl with plastic wrap, reusable beeswax wrap, or a damp towel. Let the dough rest in a warm spot for 30 minutes. This rest period helps the flour absorb water, making the dough easier to work with.
- Stretch and fold: After 30 minutes, begin the stretch and fold process. Reach under one side of the dough and pull it up, then fold it over itself. Rotate the bowl ¼ turn and repeat the stretch and fold. After each set, cover the bowl and let the dough rest for 30 minutes. Repeat the stretch and fold 4 to 6 times, with 30-minute intervals, until the dough is soft, less sticky, stretchy, and shows a good windowpane when stretched (meaning it doesn’t tear easily).
- Bulk fermentation: After completing the stretch and folds, let the dough rest at room temperature for bulk fermentation. The dough should rise, almost double and become airy and smooth. This might take between 5 to 10 hours, depending on the temperature of your kitchen (*check note for cold fermentation).
- Prepare the baking pan: Line a baking sheet with parchment paper and lightly flour it with bread flour or cornmeal to prevent sticking.
- Shape the dough: Do not punch down the dough. Instead, place the dough on a clean surface. Gently pull the edge closest to you up and fold it towards the middle. Repeat this process with each edge, folding the dough until it’s tight and shaped into a round or oval loaf. There’s no need for a proofing basket—just shape the dough and place it on the prepared baking sheet.
- Proof the shaped dough: Let the dough proof on the lined baking sheet for about 1 and a half hours. After this time, lightly poke the dough with your finger. If the dough slowly springs back and leaves a slight indentation, it’s ready to be baked. If it springs back quickly, let it proof for longer. Avoid overproofing, as this can cause the loaf to lose its structure.
- Preheat your oven: Preheat your oven to its maximum temperature (475/500°F) for at least 40 minutes. Place an empty baking sheet on the bottom rack of the oven during the preheating process.
- Score the dough: Once the dough is ready and the oven is preheated, score the top with a sharp blade, razor, or knife. You can make one long cut across the top, or score in a pattern of your choice. This helps the bread expand during baking. Spray the dough lightly with water to create steam during baking.
- Bake the bread: Carefully pour 1 cup of water into the preheated baking sheet on the bottom rack of your oven just before placing the loaf on the middle rack. Lower the oven temperature to 425°F. Bake the loaf for 40 to 50 minutes, or until the crust is golden brown and you hear a hollow sound when you knock on the bottom of the loaf.
- Cool the bread: Once the bread is done, remove it from the oven and let it cool on a wire rack for at least 1 hour before slicing. This allows the crumb to set and prevents it from being gummy.
Video
Notes
-
- For best results, ferment the dough in a warm, draft-free location (around 70°F to 75°F).
- If it’s too cold, fermentation will slow down, and the dough may need longer to rise.
-
-
- When testing if your dough is proofed, do the "poke test" gently. If it springs back too quickly, it’s underproofed. If it doesn’t spring back at all, it’s overproofed. A slight indentation means it’s ready.
- Avoid overproofing, which can happen in warmer environments. This could result in a flat, runny dough.
-
-
- Dense Loaf: This could be caused by underproofing or using an inactive starter. Be sure your starter is strong and that your dough has proofed fully before baking.
- Overproofed Loaf: This happens when the dough is left to rise too long. If overproofed, your loaf may spread out too much and not rise properly in the oven. You can still bake it and use it for croutons.

Gene Galloway
I have a question, I've baked a few sourdough loaves using basically t he same recipe as yours, same starter, float test OK, multiple stretches, etc. I use a dutch oven. 475 degrees with lid on for 20 minutes, 10-15 minutes with the lid off. Here is my problem, my loaf rises great, crust looks fantastic, tastes good, but it always comes out a little under cooked or moist insdie. I've tried cooking it longer with the lid on, but then the bottom crust is burnt and super hard. What am I doing wrong?
thx, Gene
Milk and Pop
Hi Gene! If you're using a dutch oven, I think 35 minutes total is too little time for your loaf. When I use a DO, I bake with lid on for 20 minutes, then bake for at least another 20 without it. Usually it takes me around 50 minutes with a DO. Also, 475F may be too high, I bake my sourdough at 450F, and if by chance my loaf starts to get too brown on top, I lower temperature to 400F. If that doesn't solve, I put foil over the top. Try baking at 450F on first 20 minutes, and lower to 400F during the remaining time. Also, always bake on middle shelf, or middle-bottom shelf, never on the lowest shelf of your oven. Hope this helps you!
Gene
Thanks for the suggestions, I will give it a try. I will probably try the 20 min. lid on at 450, lower to 400 lid off with loose fitting foil on top for 30 min. I'm worried about the crust getting too burnt with lid off for that long. I will let you know how it goes. I'll probably bake a new loaf on Wed. or Thurs
Milk and Pop
Let me know how it goes, Gene! If you're worried about burning, you can cover your loaf with foil, I've done it before and still got a beautiful crust! Good luck 🙂
Coralia Varga
That texture is gorgeous. We've been playing with sourdough starters and all sort of sourdough and I must say I think I prefer it to the otherwise normal bread. Your recipe is spot on
Milk and Pop
The flavors you can get with a sourdough are just amazing! I'm trying to add starter in every single bread recipe I have ?
Connie
Such beautiful images! Just recently, I found baking bread to be very satisfying. Learning the process of activating yeast and proofing is just so interesting to me.
Milk and Pop
Thank you, Connie! I'm also in love with baking, it's fascinating!
Veronika
Nothing can be better than a homemade freshly baked sourdough bread! I love your easy and clear instructions, going to put this recipe on my to do list!
Milk and Pop
Right? Fresh bread is the best!
Tammy
Oh my gosh this is exactly the post I needed! I've been trying for years to successfully make sourdough but for some reason it is one of the toughest breads to make for me. Love all the tips and the video you've included. I'm excited to give it another go now 🙂 Thank you!
Milk and Pop
I'm so happy to hear that! Tell me how it went, Tammy!
Pam Greer
What great instructions! Your loaf is gorgeous and I'm hoping mine looks just as good!
Milk and Pop
Thank you, Pam! Your loaf will be even better, I'm sure of it!