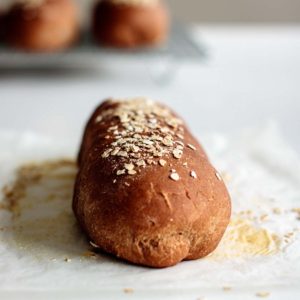
Cheesecake Factory Brown Bread is an easy copycat recipe of this famous bread roll. This batch makes 4 soft, tender brown bread rolls and has a foolproof step-by-step so you can get them right on your first try!
Are you a sourdough baker? Check out my wild yeast version of this recipe: sourdough molasses rolls!
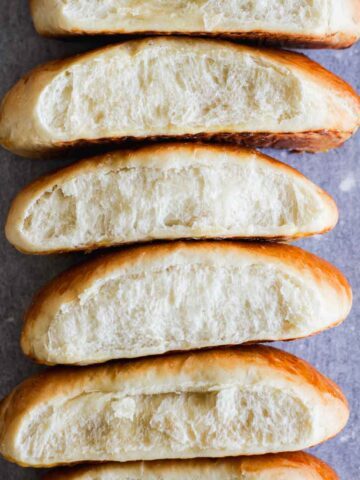
Looking for more copycat recipes? For a sweet and light roll, try my Subway Honey Oat Bread!
Jump to:
- 🥐Why bake this bread
- 🍞What kind of bread is this?
- 📃Ingredients and Substitutions
- 🥄How to make it
- 🥣How to make this bread with overnight proofing
- 🙋🏻♀️Can I make this recipe using a bread machine?
- 🙋🏻♀️Why my bread is heavy and dense?
- ✔️Measuring your flour and dry ingredients correctly
- 🫙Storing and Freezing
- 🥐More bread recipes
- 📖 Recipe
🥐Why bake this bread
This Cheesecake Factory copycat brown bread is going to become a staple at your home, I just know it! It happened here, and I’m always doubling the recipe, so it lasts more than a couple of days.
Maybe is the combination of honey and chocolate, the softness of this baguette loaf, its texture with butter, I really don’t know. But this bread is totally addictive.
Is it good for having with jam? Yes. Butter? Yep. Soups? Oh yeah! And it keeps wonderful for days, if you’re lucky enough and have any left after the first.
Even if you’re a beginner at baking bread with yeast, I got you! I’ve made a foolproof step by step, talked about every single ingredient and subs, and if you still have doubts after reading everything, there's also a step-by-step video.
Feel free to ask me questions you might still have in the comments!
🍞What kind of bread is this?
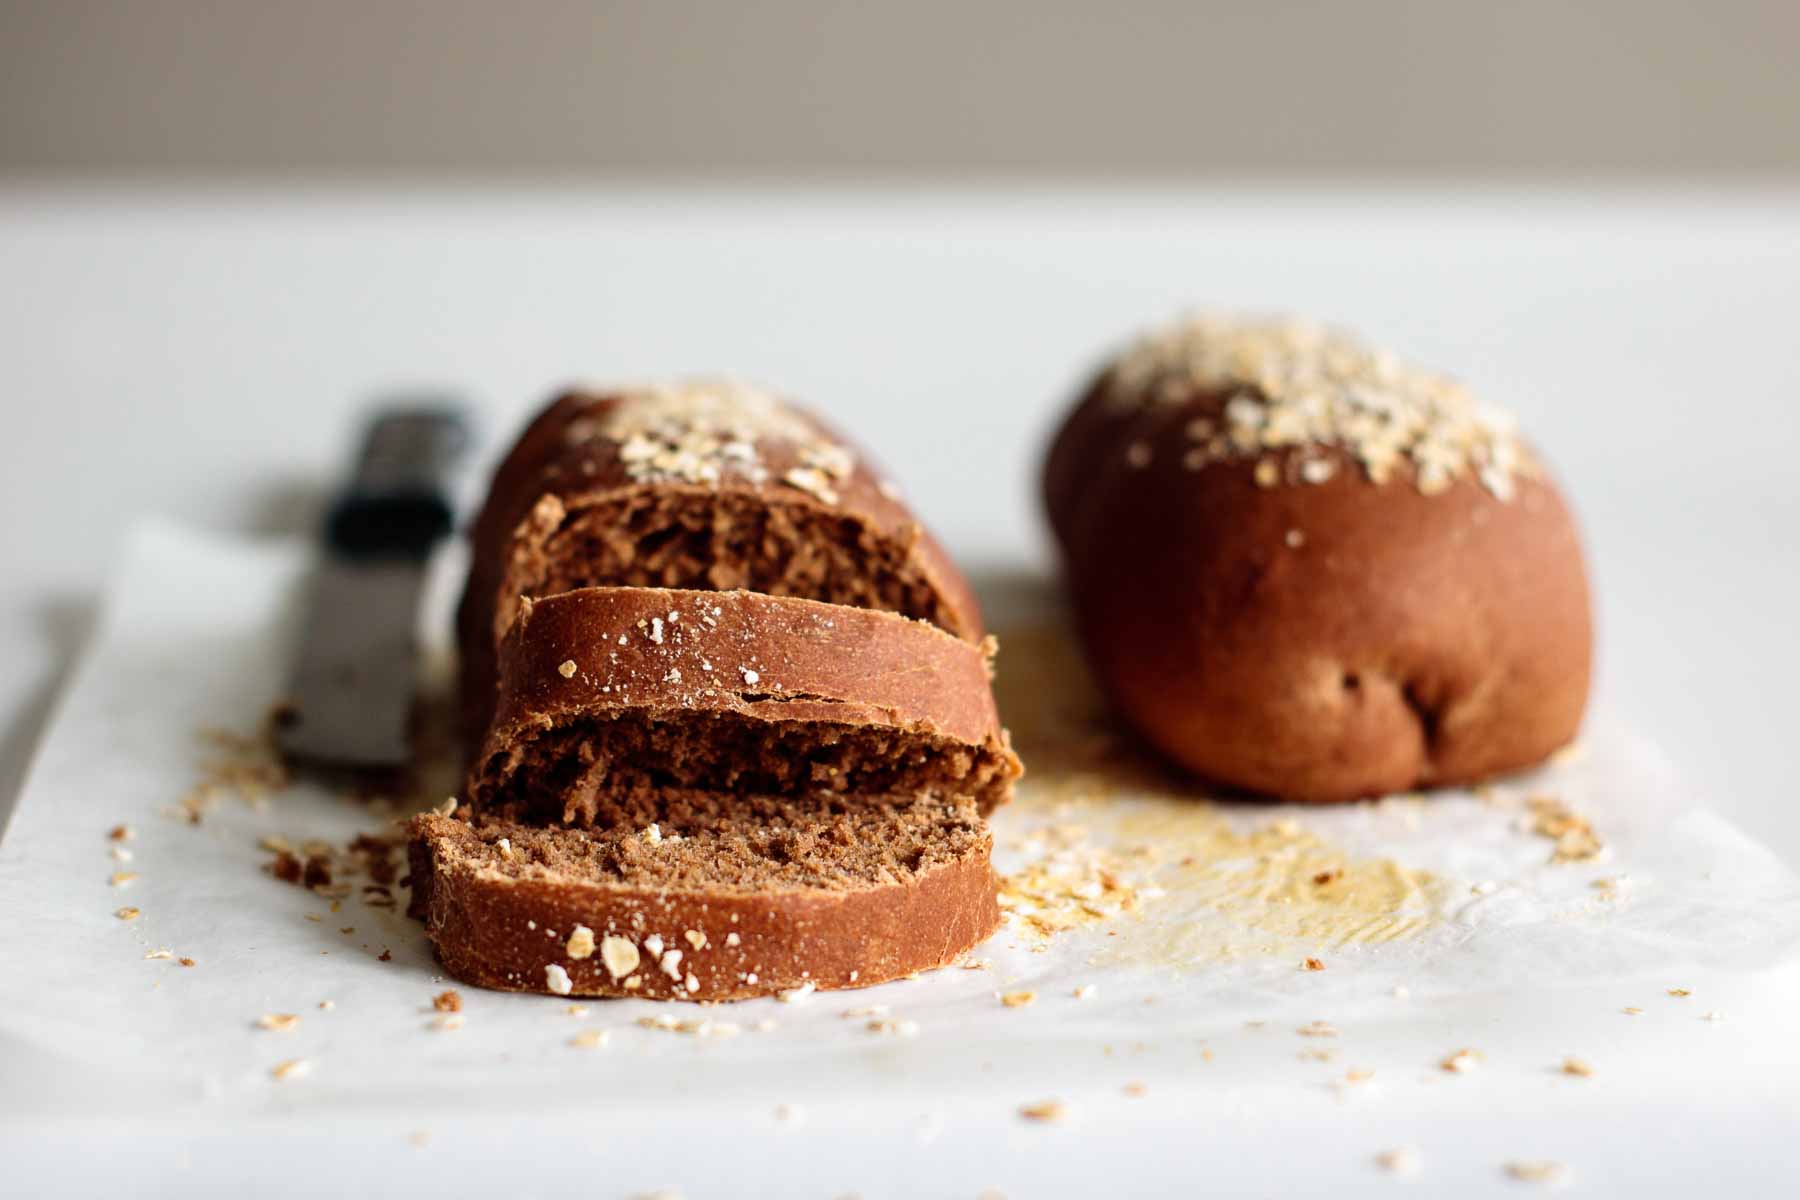
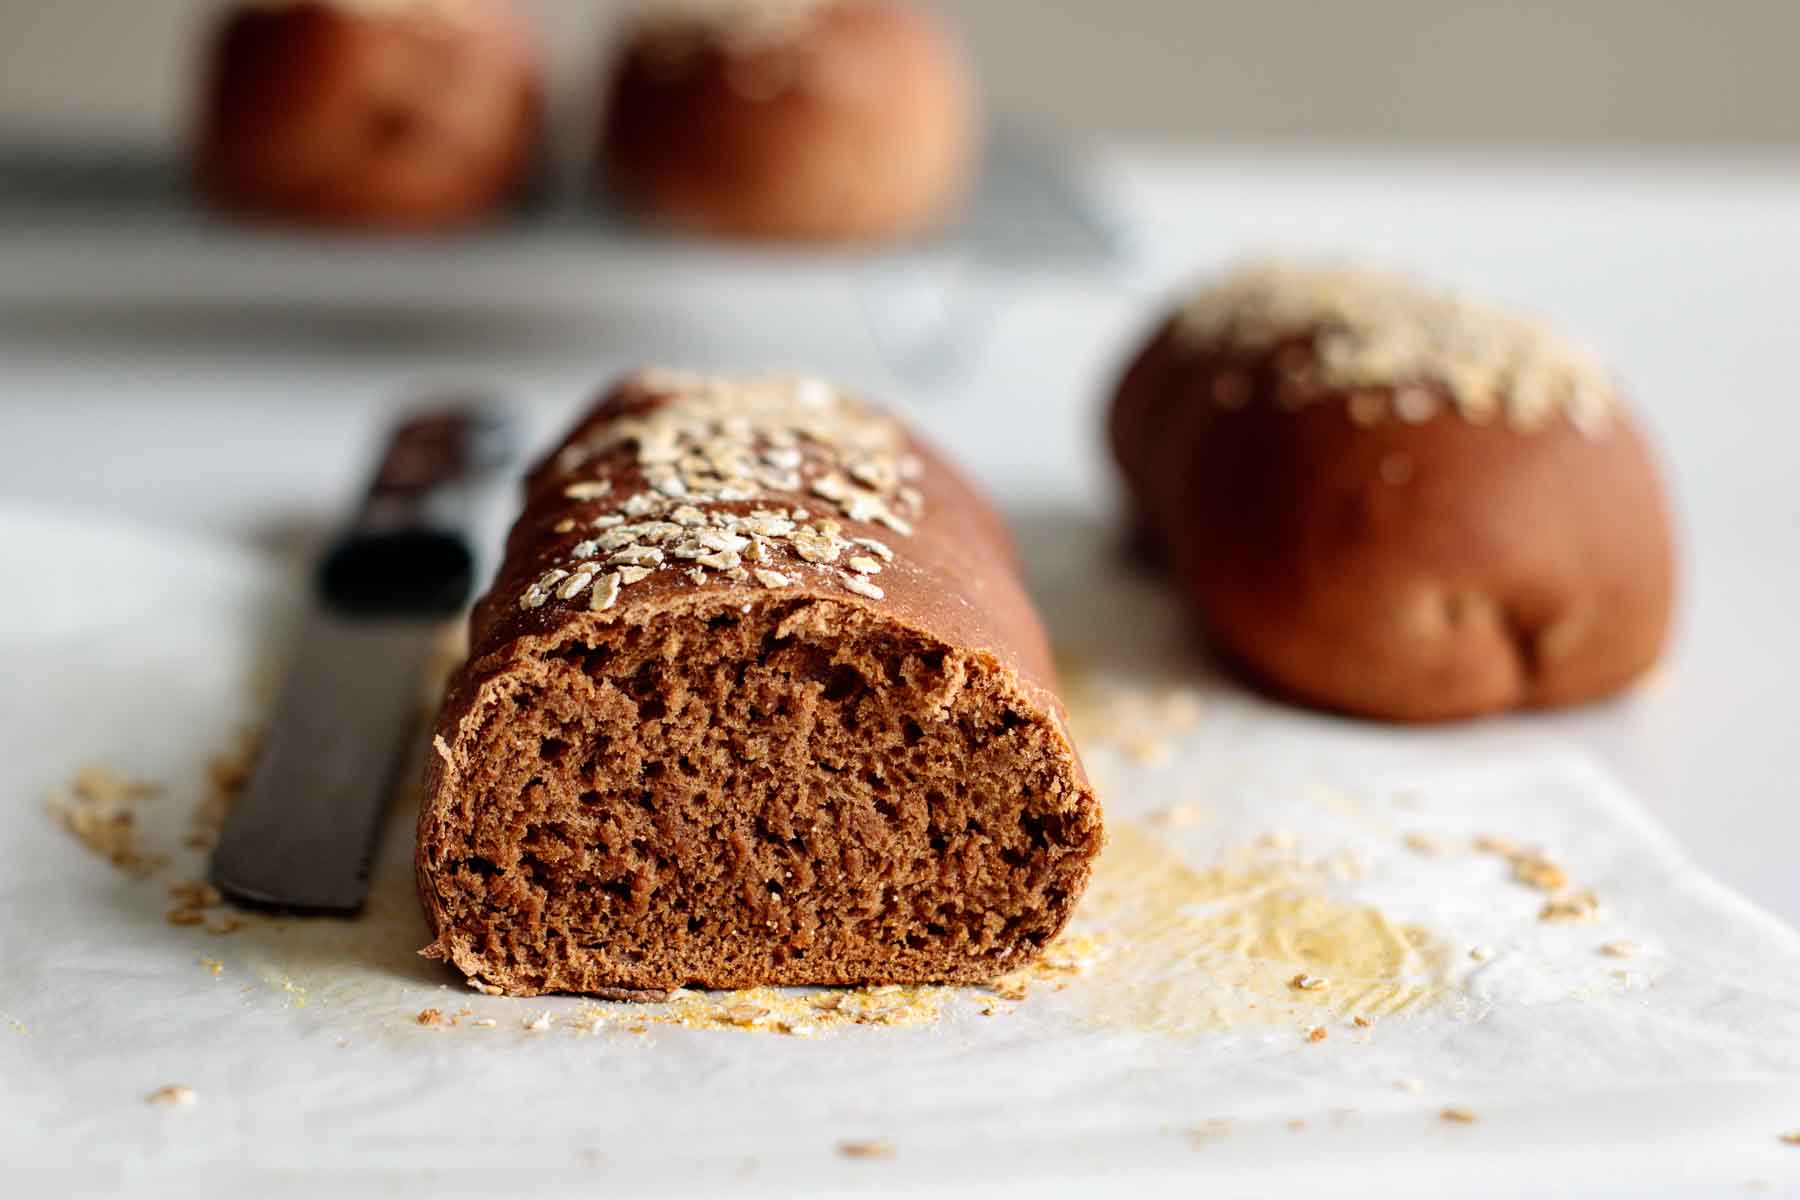
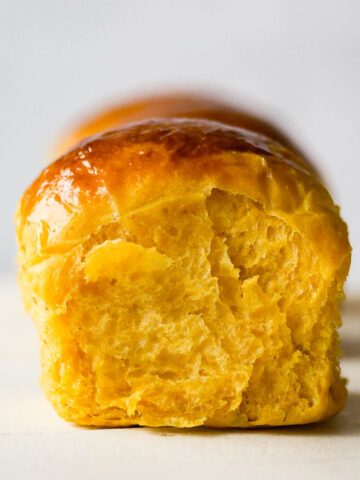
This is a very soft baguette-shaped bread, with a rich deep flavor and slightly sweet.
The combination of the ingredients plus molasses and cocoa give this bread a delicious deep taste as well a beautiful brown color. Brown sugar and honey make the loaves lightly sweet as the ones from Cheesecake Factory.

📃Ingredients and Substitutions
First, let me say you can substitute some ingredients, BUT that will always change the final taste. You’ll still get a delicious loaf, though!
Sugar. I use brown sugar in this recipe. Light or dark brown sugar can be used, as well as white sugar.
Yeast. Use instant dry yeast. If using yeast that needs to be proofed, do so by using the water and sugar asked in the recipe, so you won’t add more liquid that needed.
Bread flour. Use white bread flour. You can substitute for all-purpose flour, but loaves will lose a bit of their structure. They will taste the same.
Whole wheat flour. One of the ingredients that’s also responsible for flavor, try not to use all-purpose or white bread flour only. Your bread will lack a nutty taste if doing so - but it won’t be bad, if you don’t mind!
Cocoa powder. Use it unsweetened, natural or Dutch. The latter will give more color to the loaves. Do not use hot cocoa mix!
Salt. Never forget to add salt to your bread! Salt is one of the ingredients that affect taste and fermentation: too little and the dough will rise much more quickly than normal during proofing, resulting in a sticky dough and a more prone to collapse loaf. Use fine sea salt.
Butter. It helps the bread to achieve the soft, fluffy texture. Also responsible for a richer taste. Use butter, or any vegan butter/margarine for a dairy-free, vegan option.
Honey. It’s what makes the bread be irresistible, and gives its sweet, sweet taste. You can substitute for maple syrup for a similar taste if you’re baking with vegan ingredients only.
Molasses. Blackstrap/dark molasses will give a more bitter taste, while mild to light (regular) molasses will add more sugar to the recipe. Molasses is one of the main ingredients responsible for flavor, so try not to skip it! If you opt not to use it, replace with honey or corn syrup, same amount.
Although some recipes add espresso powder, I choose to leave it out of this brown bread. I didn’t really noticed a huge improvement with it and is not everyone that has espresso powder (or instant coffee to use as a substitute) in their pantry.
To deepen even more the flavors, I recommend trying a cold overnight fermentation.
🥄How to make it
Let’s go through a step by step together so you’ll get it right first time!
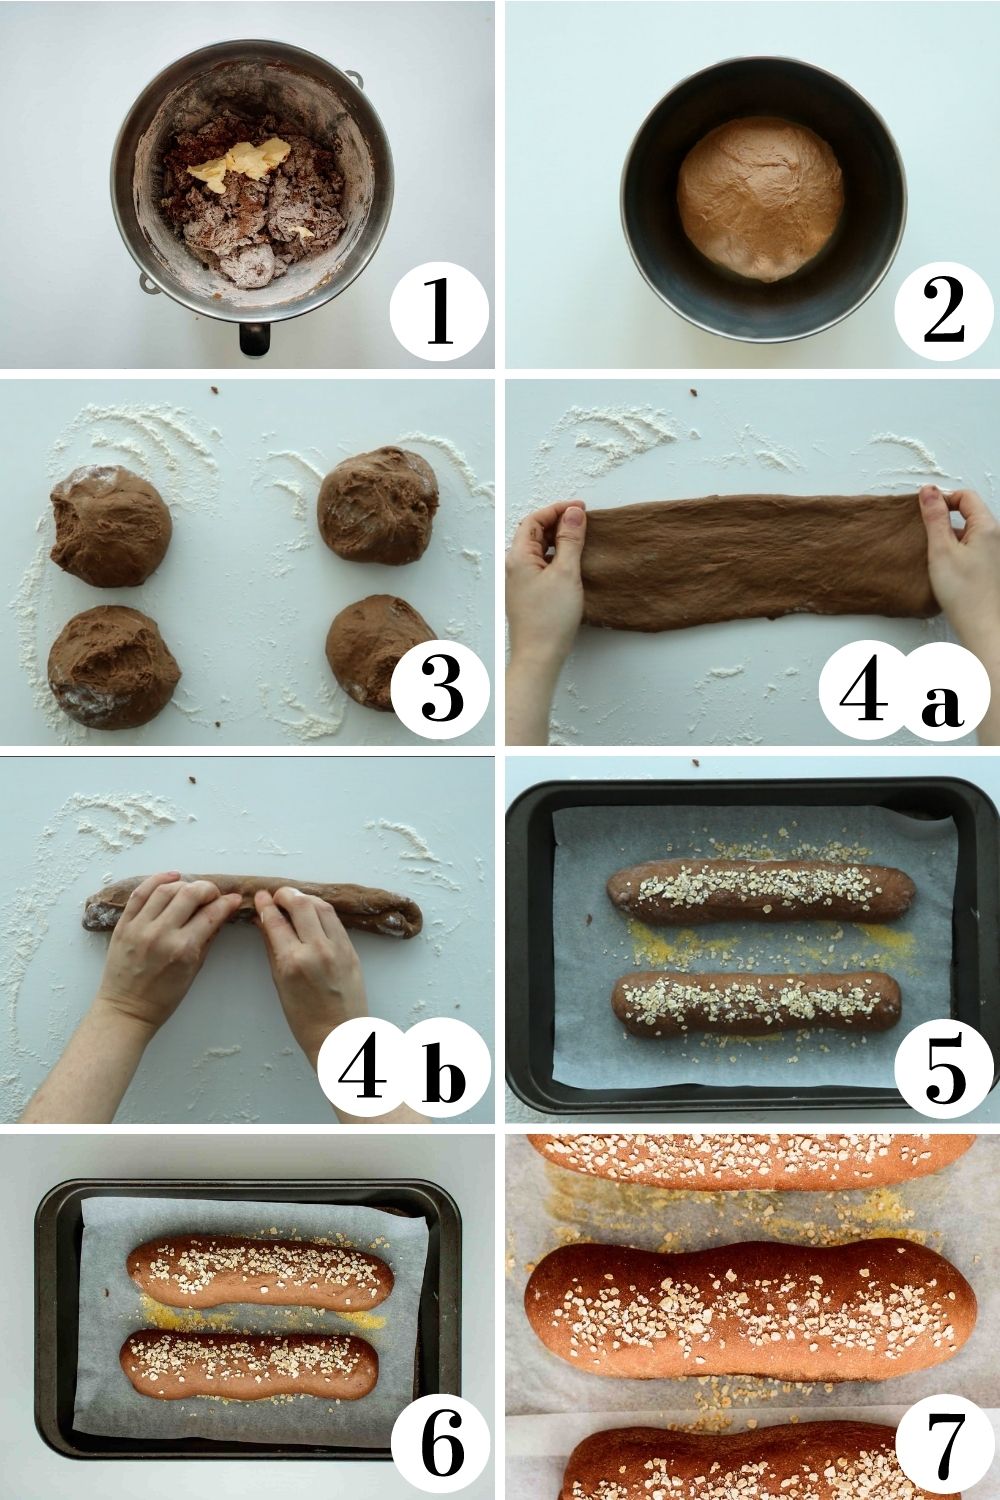
- Make the dough.
- Stir together water, honey and molasses.
- In a large bowl, mix bread and whole wheat flour, salt, sugar, cocoa powder and yeast. Add honey mixture and mix until dough is partially formed. Add butter and knead for 8 to 10 minutes if using a stand mixer, 12 to 15 minutes if doing by hand. When ready, dough will feel tacky, smooth, and will stick to the bottom of the bowl when the mixer stops, but not at your fingers.
- First rise. Transfer dough to a clean bowl, cover it with plastic wrap, bee wax wrap or a damp towel and let it rise until it doubles. It will take from 1 to 2 hours. Remember to leave in a warm spot.
- Divide dough. After the first rise, deflate dough. Flour the surface you’ll be working on. Divide dough into 4 pieces.
- Shape dough. Using your hands or a rolling pin, open each piece in a rectangle (4a). Roll into a cylinder and pinch to close (4b).
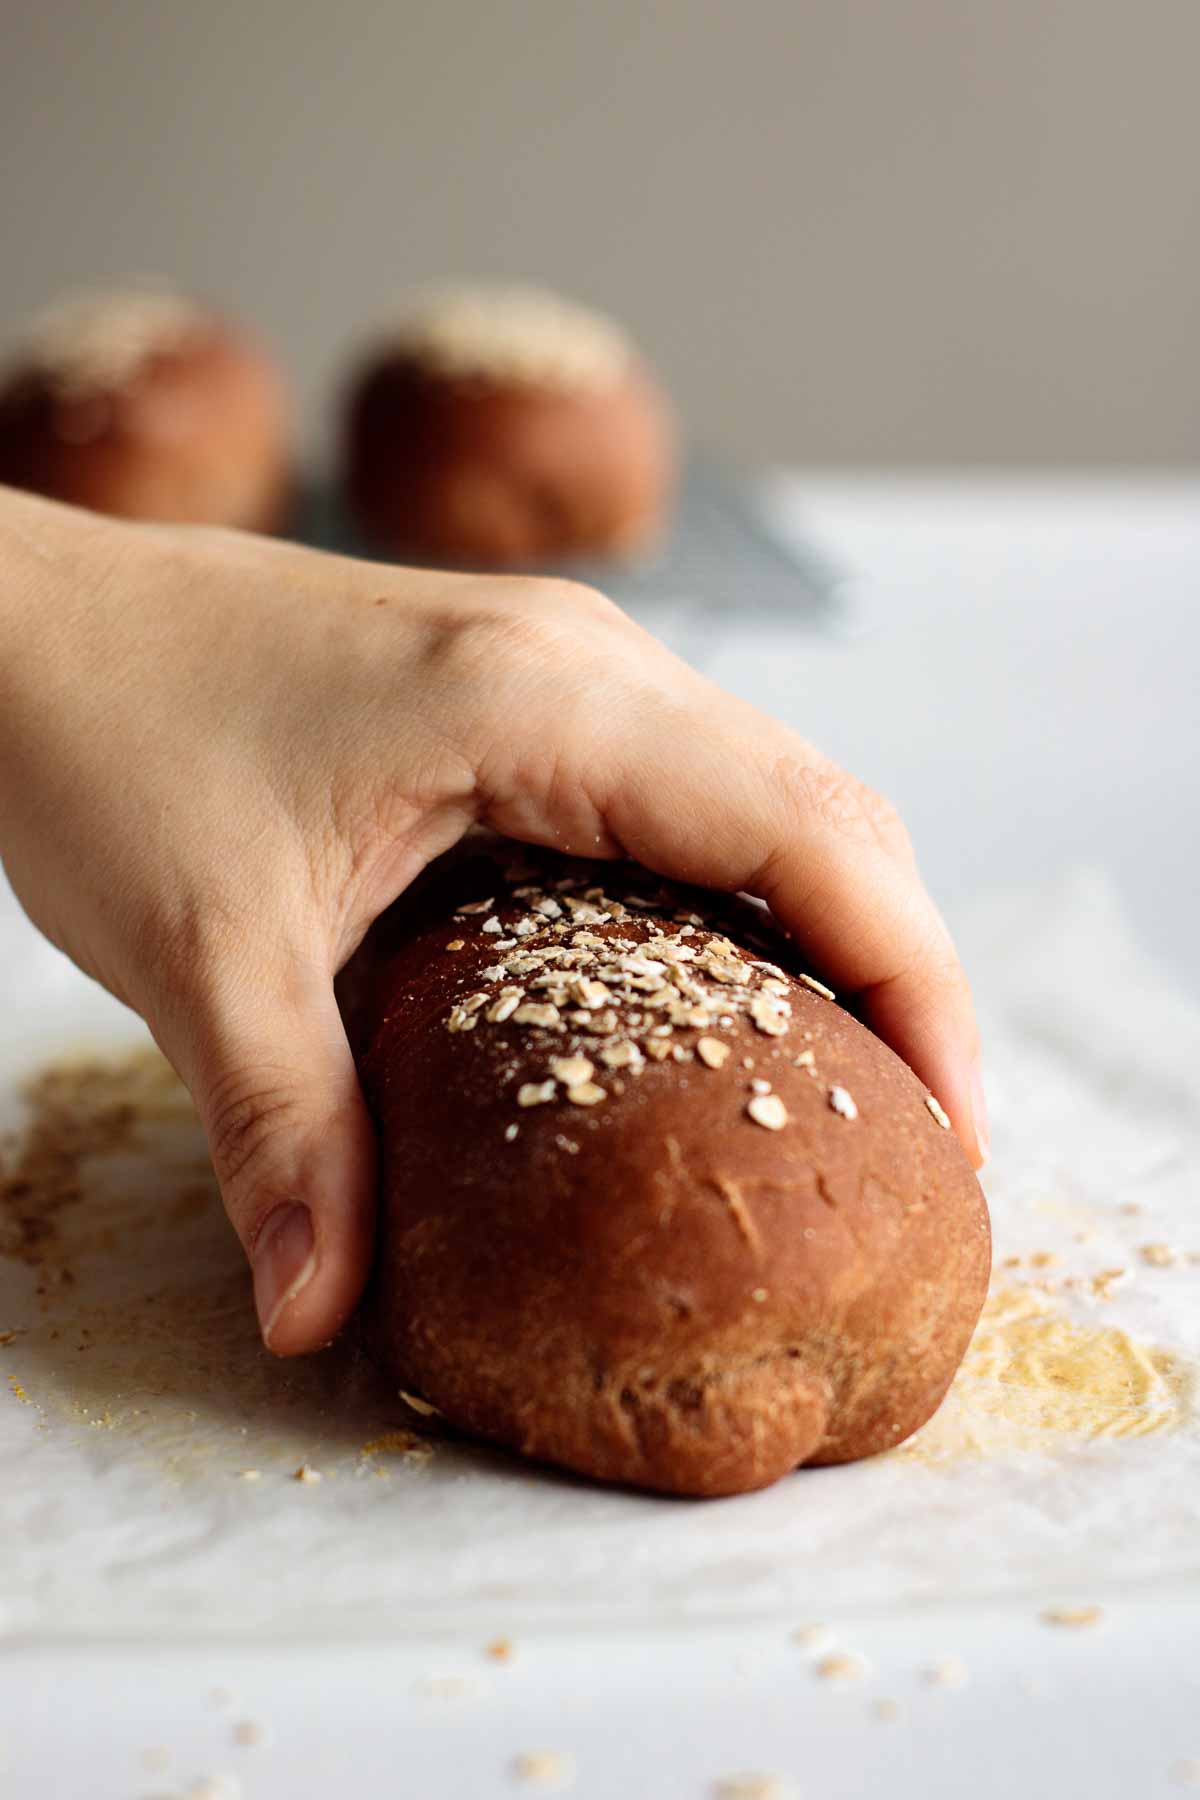
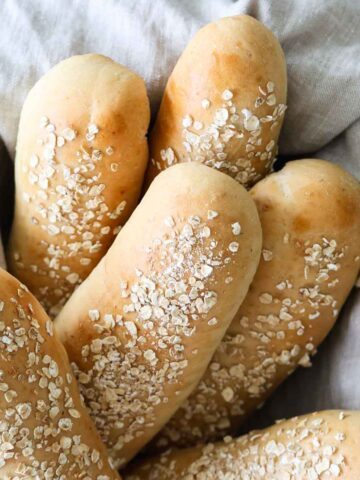
- Second rise. Place in a lined baking sheet, lightly coating the bottom with cornmeal (if using). Leave space between them as they will double. Top with oats, cover loosely with plastic wrap and let rise for 40 minutes more or until loaves almost double, and look puffy and light.
- Baking. Preheat oven to 350°F. Uncover loaves and bake them for 30 to 35 minutes.
- Cooling. Let loaves cool for 15 minutes before slicing.
🥣How to make this bread with overnight proofing
If you want to leave this dough resting overnight, here is how you shall proceed after step 1.
- Cover dough and leave it resting in a warm spot for 40 minutes.
- Place it inside your fridge and leave it fermenting overnight or for up to 24 hours.
- Leave it at room temperature for 30 minutes before shaping.
- Proceed to step 3.
Do not leave the dough resting overnight OUTSIDE your fridge!
🙋🏻♀️Can I make this recipe using a bread machine?
Totally! But to get loaves like the ones in the photos, you should use it for mixing and proofing (dough cycle) only.
Shaping and baking should be done following the direction of this recipe for best result.
🙋🏻♀️Why my bread is heavy and dense?
If your bread doesn’t feel light and has a dense texture, one of those things could have gone wrong during the execution:
- Have you knead enough the dough? It needs to feel smooth in your hands and have at least some windowpane. See the recipe video to check your dough texture.
- If you’re kneading the dough by hand, do it for at least 12 minutes.
- Always let the dough rise in a warm spot of your home. If your oven has a proofing function, use it. Cold spots may double the rising time and even inactivate the yeast.
- Careful to not overproof the dough. Don’t let it rising for more than 2 hours before shaping if you’re not doing it inside your fridge.
- Check the expiration date of your yeast. Was it open before you used it? If yes, was your yeast stored inside the fridge? Was it open for more than 6 months? I don’t ask for yeast proofing in this recipe it’s made with instant yeast, but proof it if you’re feeling unsure.
- If you choose to proof your yeast, remember to never use HOT water. Water needs to be lukewarm (baby bottle temperature).
✔️Measuring your flour and dry ingredients correctly
If you’re using cups and forget to measure the dry ingredients in the right way, you’ll add more flour than necessary and the dough will turn out dry.
Scoop flour into the measuring cup using a spoon, then level it using the back of a knife. Do not scoop directly with the measuring cup, or you’ll get more flour the recipe asks for.
🫙Storing and Freezing
Store the brown honey loaves in a bread keeper or airtight container, away from sunlight. Do not store inside the fridge. It keeps for 2 to 5 days.
Gently reheat in the oven or toaster before eating, as this bread is even better when warm.
For freezing, store in a freezer-safe bag or airtight container. It keeps for up to 3 months. To reheat, leave it at room temperature for 1 hour to thaw, then use your toaster, oven (medium, 5 to 8 minutes) or microwave (40 seconds to 1 minute).
🥐More bread recipes
Whole Wheat Rolls
Best Sandwich Roll
Homemade Baguette
If you tried this Cheesecake Factory Brown Bread Recipe, please leave a 🌟 star rating and let me know how it goes in the comments below!
📖 Recipe
Cheesecake Factory Brown Bread
Ingredients
- 1 ¼ cup water
- ¼ cup honey
- 2 tablespoon molasses
- 2 ¼ cup white bread flour
- 1 ¾ cup whole wheat flour
- 1 tablespoon brown sugar
- 1 ½ tablespoon cocoa powder
- 2 teaspoon instant dry yeast
- 1 teaspoon salt
- 3 tablespoon butter softened and unsalted
- oats for dusting top
- cornmeal for dusting bottom optional
Instructions
- In a medium bowl, mix lukewarm water, honey and molasses until honey and molasses dissolve.
- In a large bowl, mix bread and whole wheat flour, salt, sugar, cocoa powder and yeast.
- Add honey mixture and mix until dough is partially formed.
- Add butter and knead for 8 to 10 minutes if using a stand mixer, 10 to 15 minutes if doing by hand. When ready, dough will feel tacky, smooth, and will stick to the bottom of the bowl when the mixer stops, but not at your fingers.
- Transfer dough to a clean bowl, cover it with plastic wrap, bee wax wrap or a damp towel and let it rise until it doubles. It will take from 1 to 2 hours. Remember to leave in a warm spot.
- After the first rise, deflate dough. Flour the surface you’ll be working on. Divide dough into 4 pieces.
- Using your hands or a rolling pin, open each piece in a rectangle. Roll into a cylinder and pinch to close.
- Place in a lined baking sheet, lightly coating the bottom with cornmeal (if using). Leave space between them as they will double. Top with oats, cover loosely with plastic wrap and let rise for 40 minutes more or until loaves almost double, and look puffy and light.
- Preheat oven to 350°F. Uncover loaves and bake them for 30 to 35 minutes.
- Let loaves cool for 15 minutes before slicing.
MB
Your recipe is great. You said you have a recipe that makes this bread but uses sourdough starter instead. Can you please share that recipe. I would like to make the sourdough starter version of it instead of using yeast. Thank you so much.
Tatiana Kamakura
Hi MB,
Search for Sourdough Brown Bread and you'll find it, cheers!
Stephanie
Question - can this be made into a boule (like how sourdough is shaped). I’m looking to make a larger loaf but unsure how this would change cooking time!
Tatiana Kamakura
Hi Stephanie,
You can use a loaf pan to bake this recipe. Never tried making a boule with it, but it would def change the baking time. If you do, check the center with a thermometer. It needs to be at least 195oF for it to be done baking. Hope that helps!
Doris Cripps
Hi, can this bread be made for a diabetic?
Tatiana Kamakura
Hi Doris,
I'm not able to answer that, sorry!
Claude
Made this bread last night for my family. What a treat!! Great recipe and way to follow instructions!
Only question for need is.. how do you keep the oats on? Mine would not stick to the dough. Maybe add a little butter for glue?
Tatiana Kamakura
Hi Claude!
So happy you enjoyed it! A light brush of water on the dough before adding the oats usually does the trick. Press them in gently and they should stay put during baking. Butter might work too! Cheers 😉