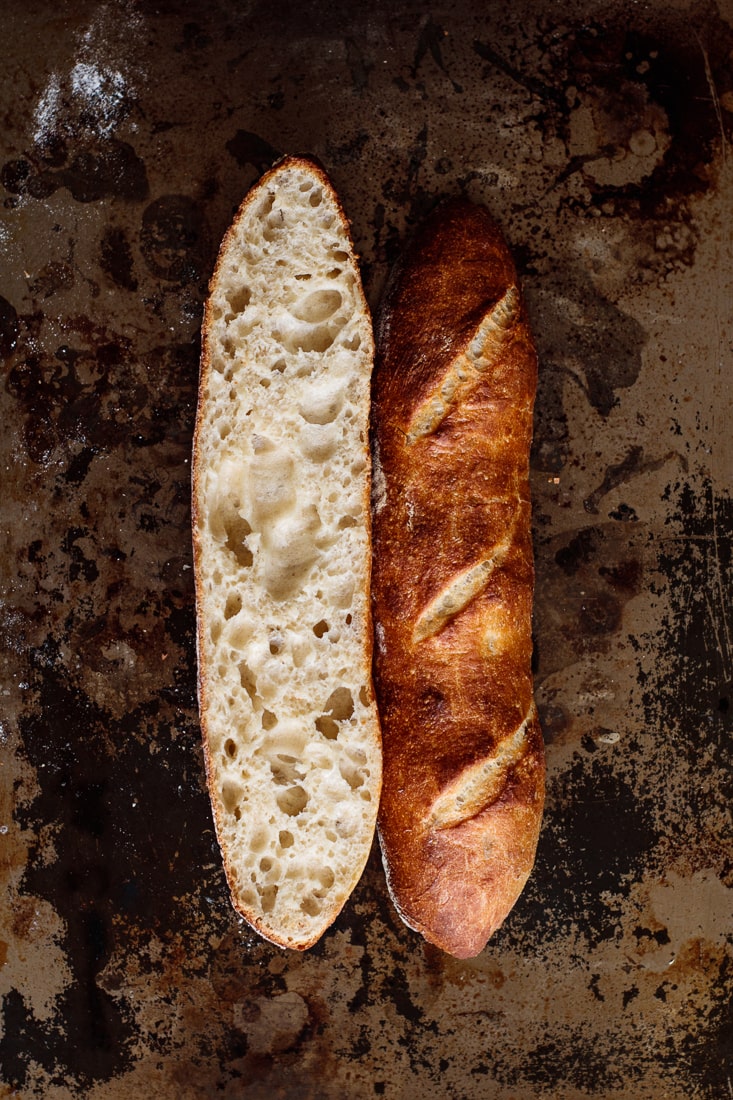
This recipe gives you authentic Poolish French Baguettes, close to the ones you can get at your favorite bakery. The poolish method makes these baguettes have a deep golden crust, an amazing flavor and a soft, chewy interior.
Don’t know what poolish is? I have a post explaining all you need to know about this preferment!
I love bread, and I love baking bread and understanding how to improve a recipe. Like my famous sourdough dinner rolls, this baguette took me a few tries to make, especially to get the poolish right! But every try was worth it after I got the result I wanted.
There are a few tricks and secrets to get the perfect French baguette, and I'll share every single one below, so you can get yours at home.
Jump to:
🥖What defines a French baguette
According to Wikipedia, a baguette is a long, crusty and thin loaf of French bread, made from basic lean dough.
A basic lean dough is made only with flour, water, yeast and common salt. It's incredible how only four ingredients can make such a delicious and unique bread!
Did you know it’s possible to make a good baguette with only an oven, a spray bottle and 4 ingredients? No baking stone needed! With this recipe, you'll get a French baguette full of flavor, chewy and crusty, no need to knead!
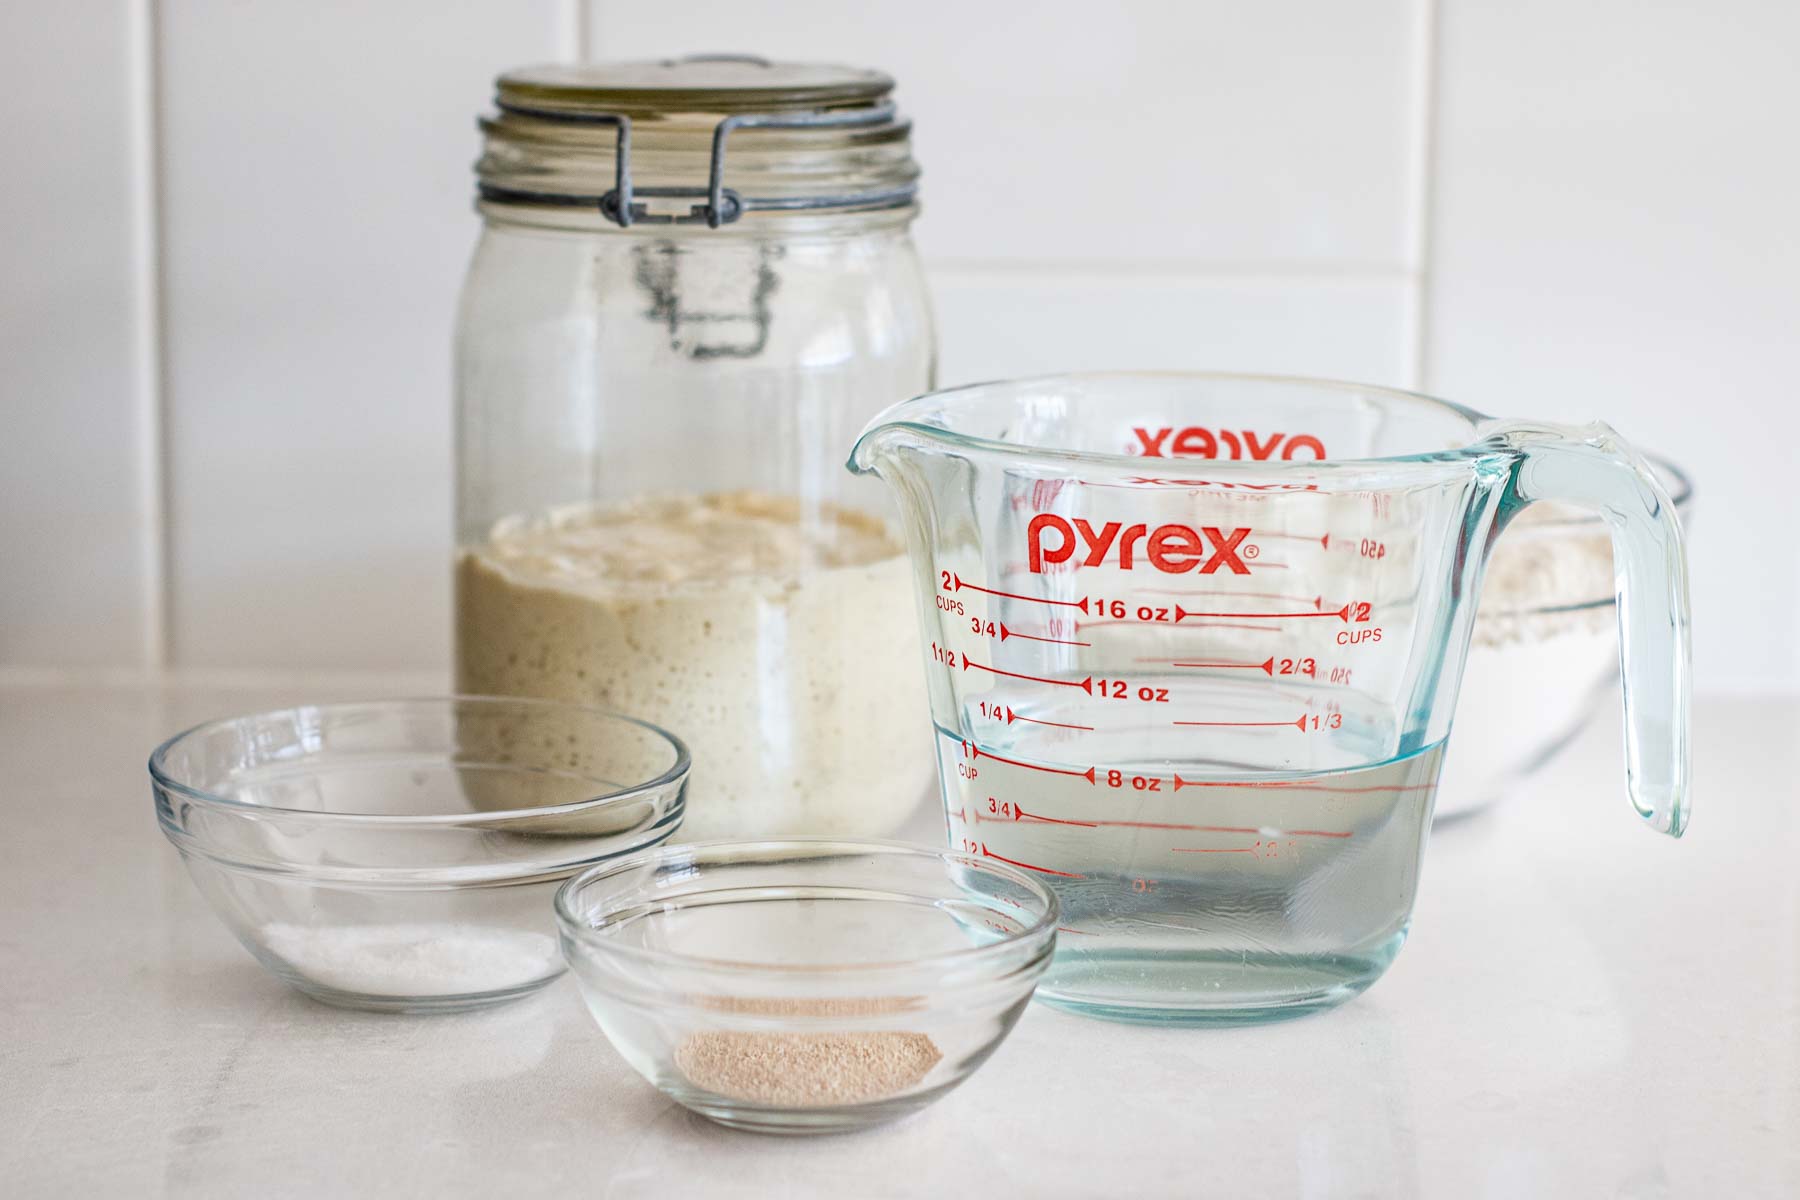
📃Ingredients
All-purpose flour. I make this recipe with unbleached all-purpose flour.
Yeast. Use instant dry yeast for poolish and final dough.
Water. A chlorine-free water always produces the best results when baking bread.
I like my baguettes with no sugar or honey. But if you prefer bread with a hint of sweetness, it is possible to add 1 tablespoon of honey or half tablespoon of sugar to the final dough.
🫙How to make poolish
This recipe uses a starter known as poolish.
Poolish is a preferment that has a high ratio of hydration, making it easier to incorporate to the final dough. Using it for baking gives the baguettes much more flavor and chewiness, as a beautiful deep golden crust.
We’re using 30% of the total flour amount to make the poolish. So, as we have 500g of total flour, poolish will be made with 150g of flour, plus 150g of water.
I like to do an overnight fermentation to get a lot of flavor and a delicious aroma, but you can choose less fermentation time: 6 to 8 hours also work perfectly. I wouldn’t go as little as 2 to 3 hours, as it doesn’t do much for the recipe.
If fermenting overnight (12 to 16 hours), we’re using 0.15g of yeast. Yes, I know, it’s so little! Let me help you to visualize how much 0.15g of yeast is:
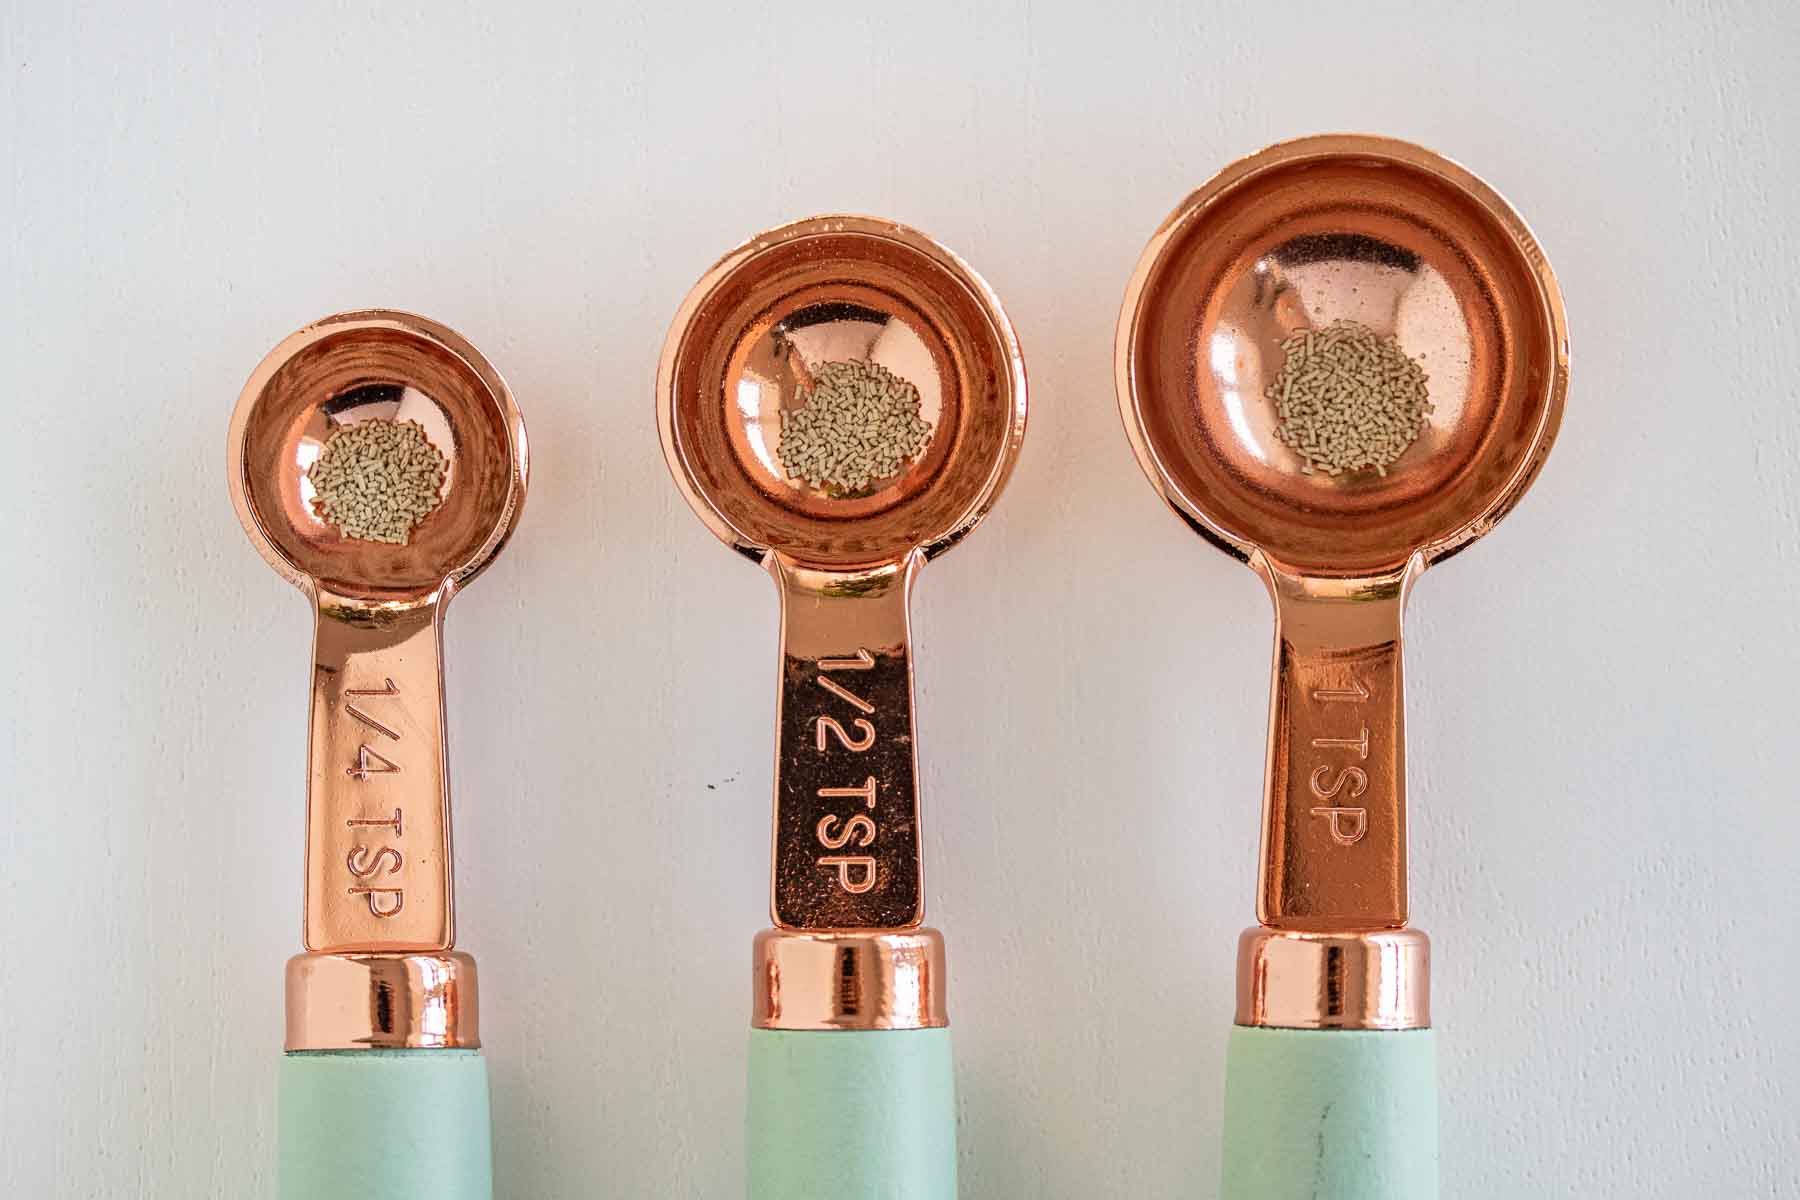
I like to use mini measuring spoons for recipes asking so little of an ingredient, as I do not have a precision scale, just a regular digital one.
But there’s a method that mixes flour and yeast that can give you a close result. I talk about it in my poolish guide, as well as how to calculate how much yeast to use for different fermentation times.
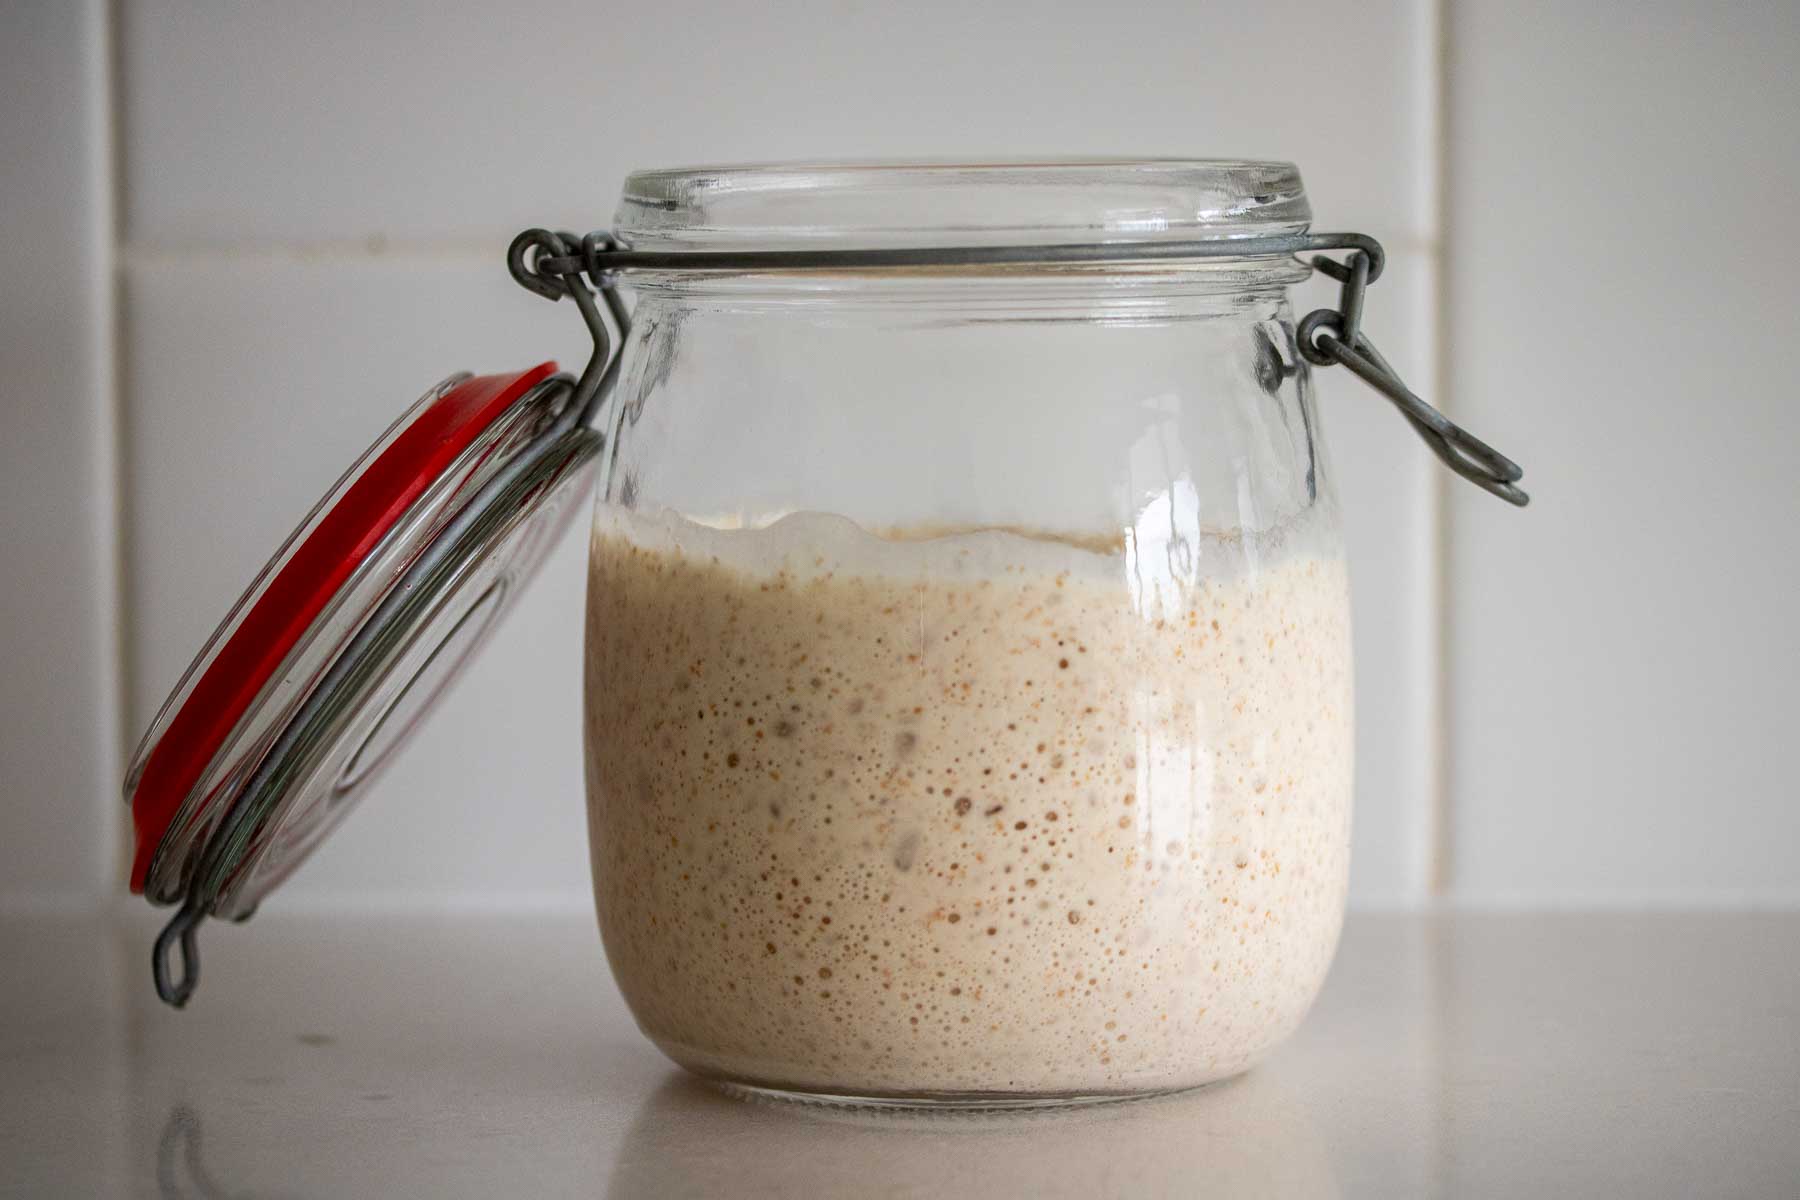
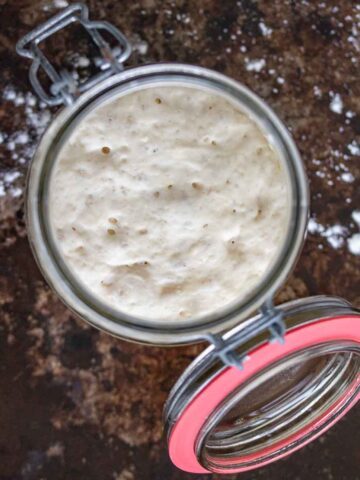
Step 1. When making poolish, add flour, water and yeast in a clean jar, mixing it well with a spoon until a shaggy dough is formed.
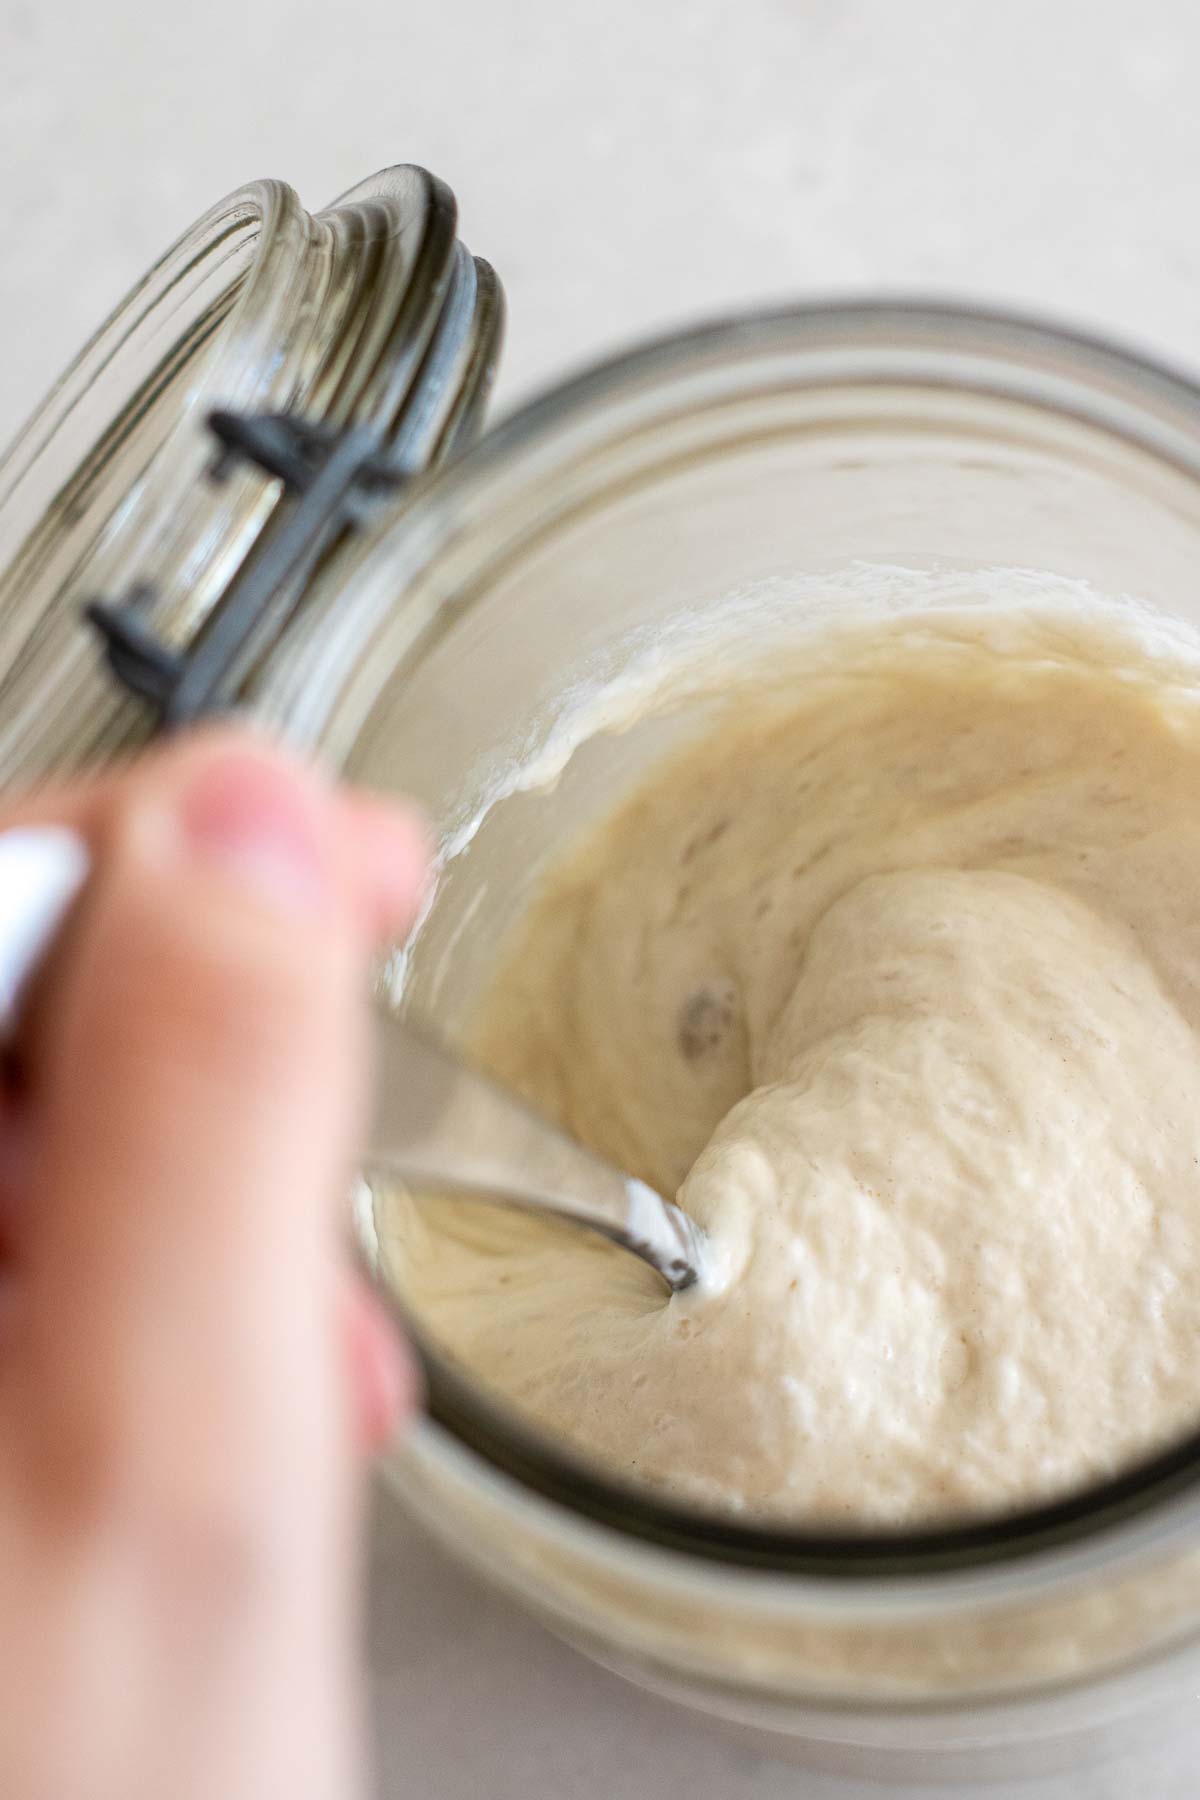
Step 2. Cover, and let it ferment for 12 to 16 hours. Poolish is ready when it stops to rise and starts to collapse. If in a bowl, you will notice a slight dip in the middle of it.
How to make the dough
Start the dough the day after, as soon as poolish is ready.
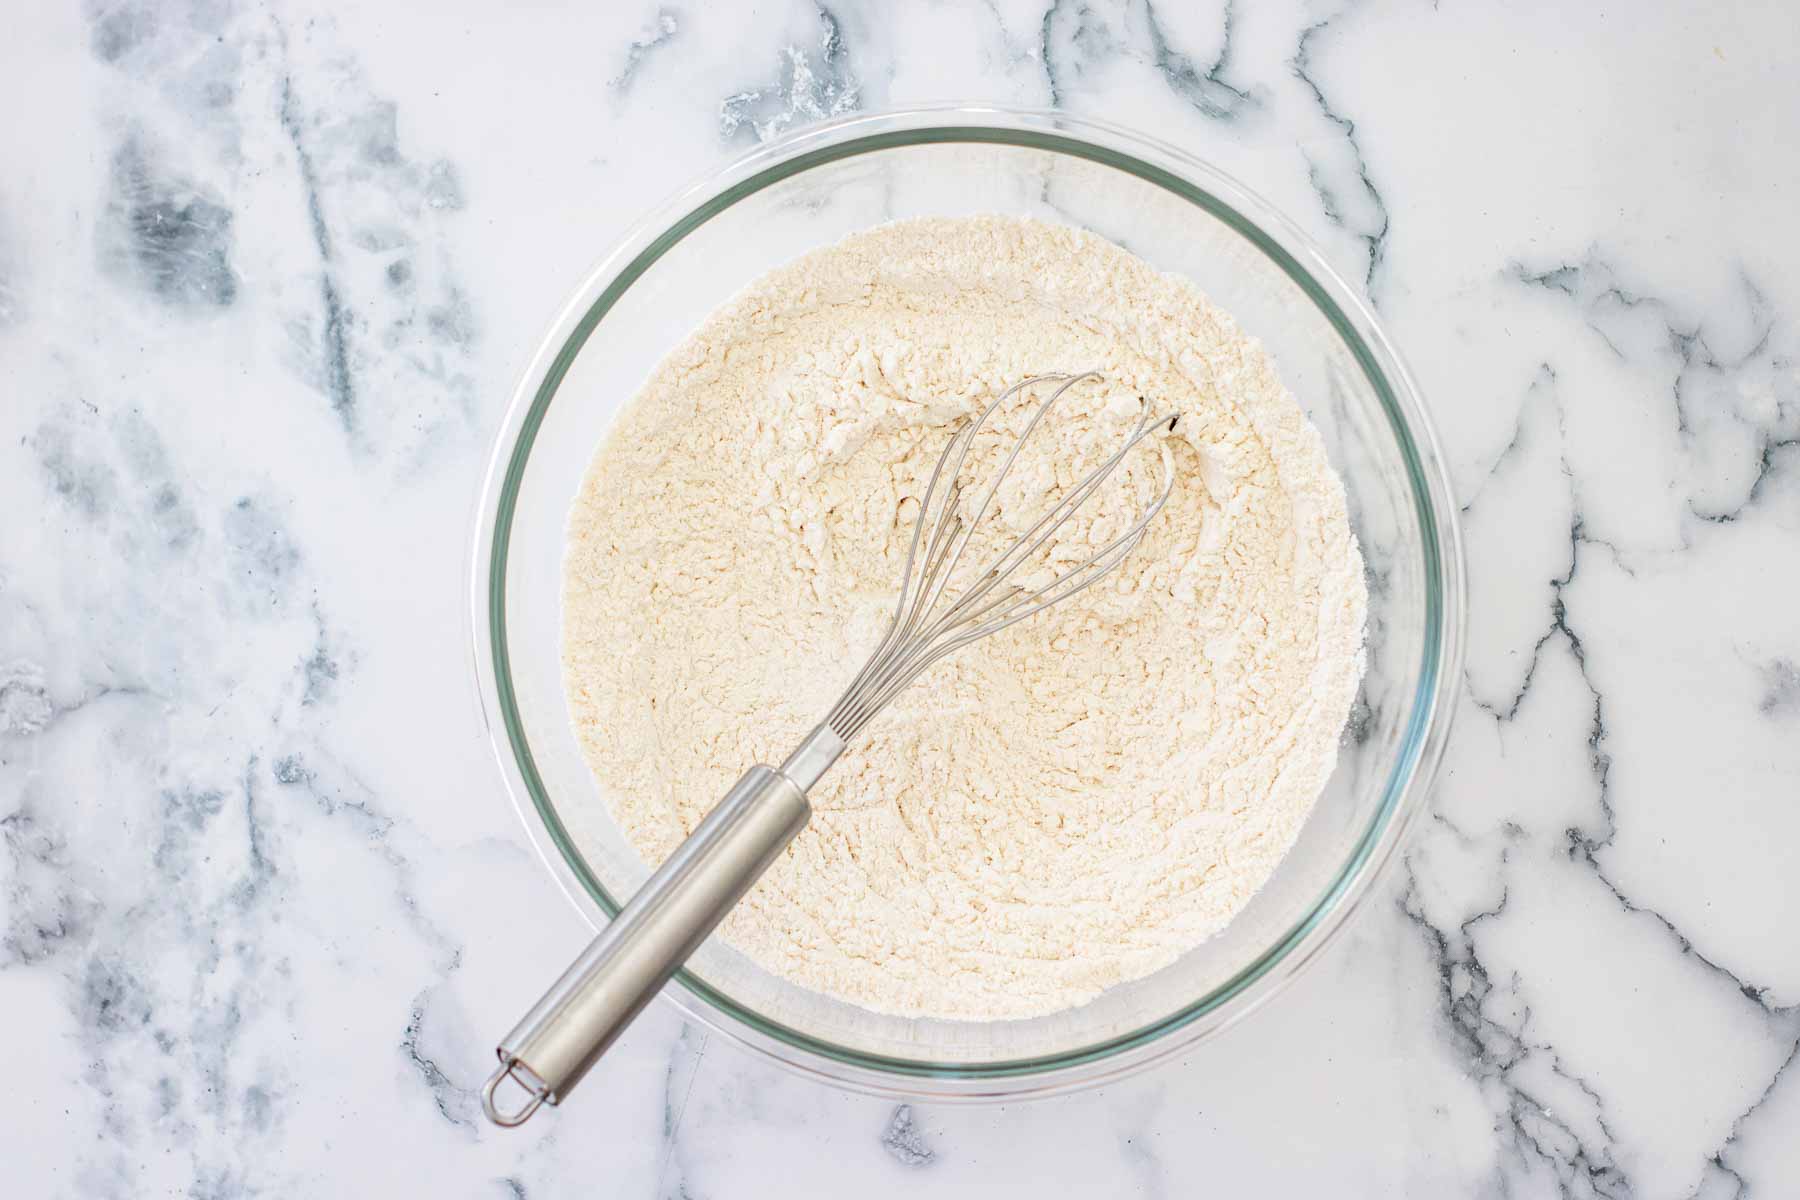
Step 01. In a large bowl, mix flour, yeast and salt.

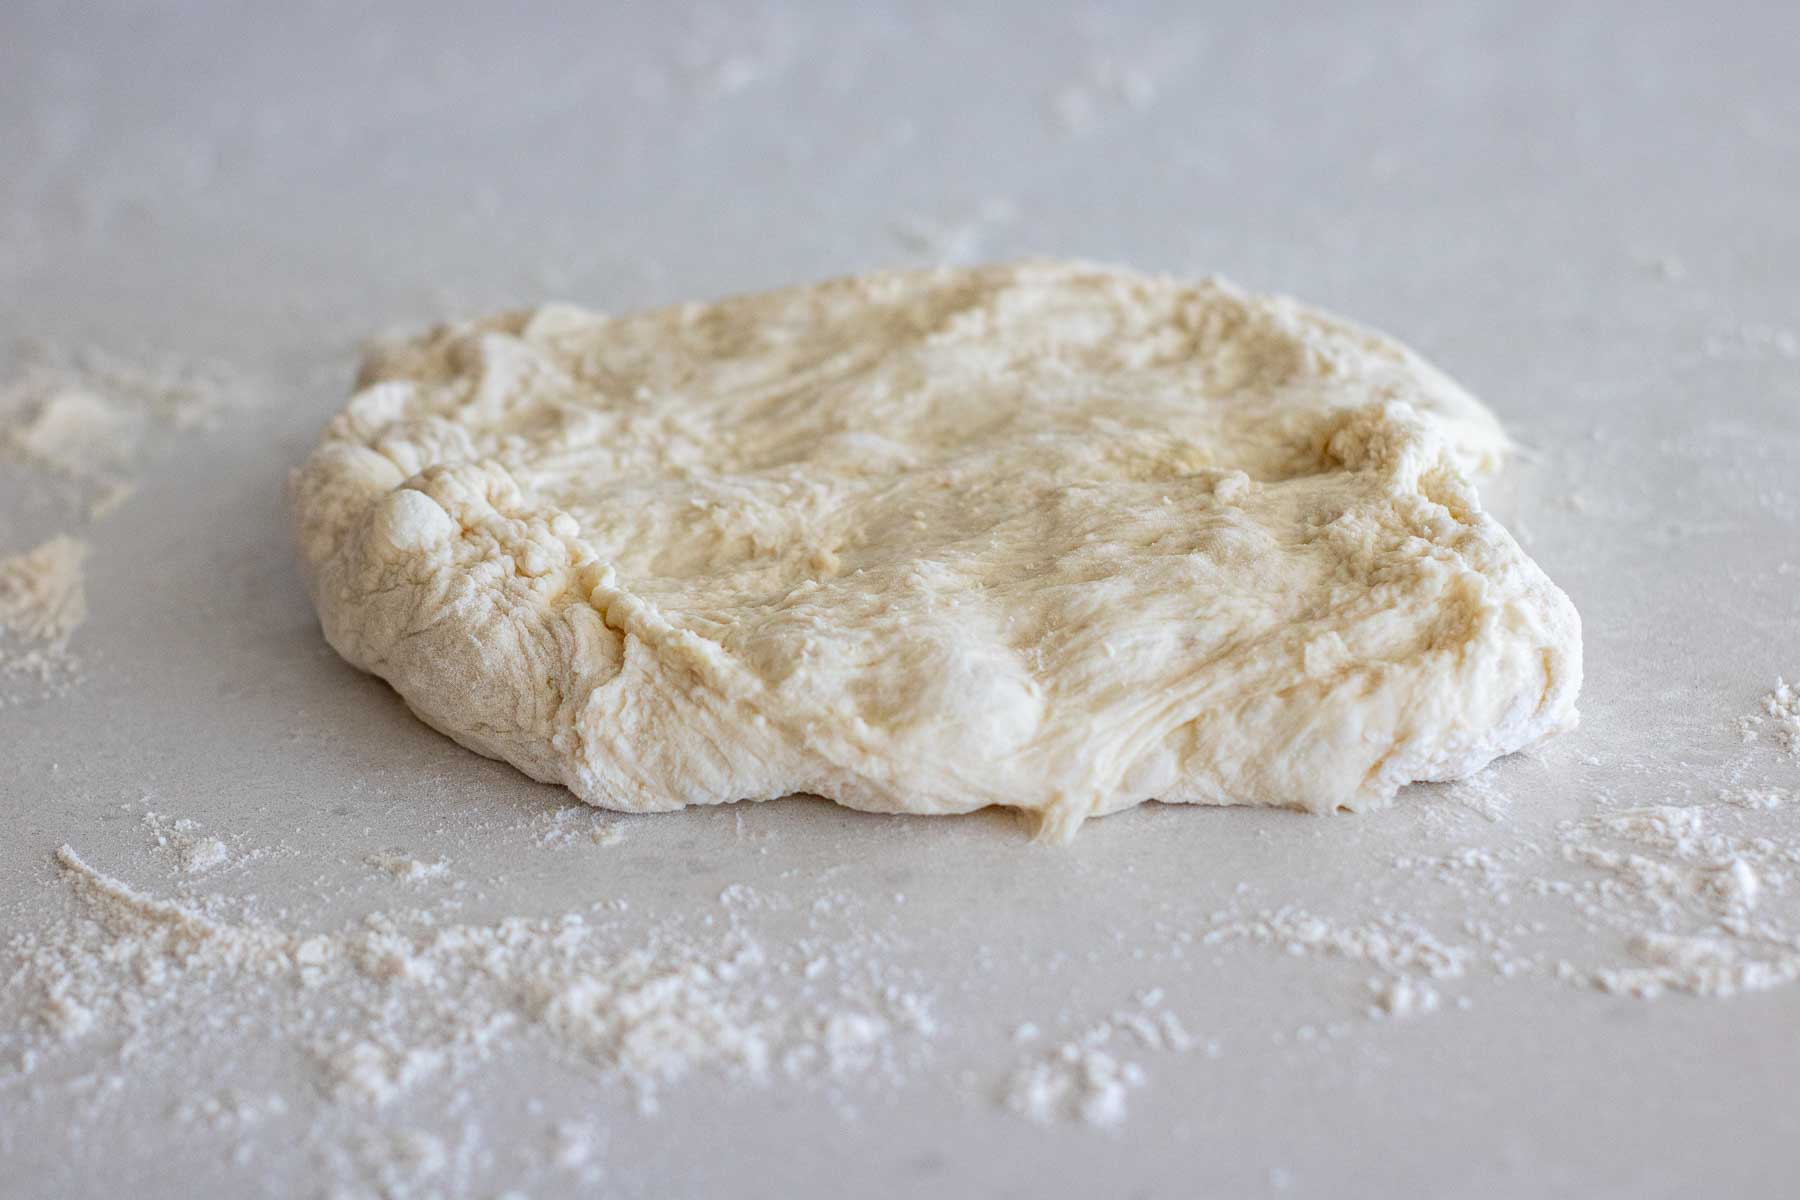
Step 02. Add poolish and water, mixing with a spoon or using your hands until a shaggy dough is formed. Let it rest for 30 minutes.

Dough will be easier to work with after this time. After 30 minutes, we’ll start to stretch and fold.
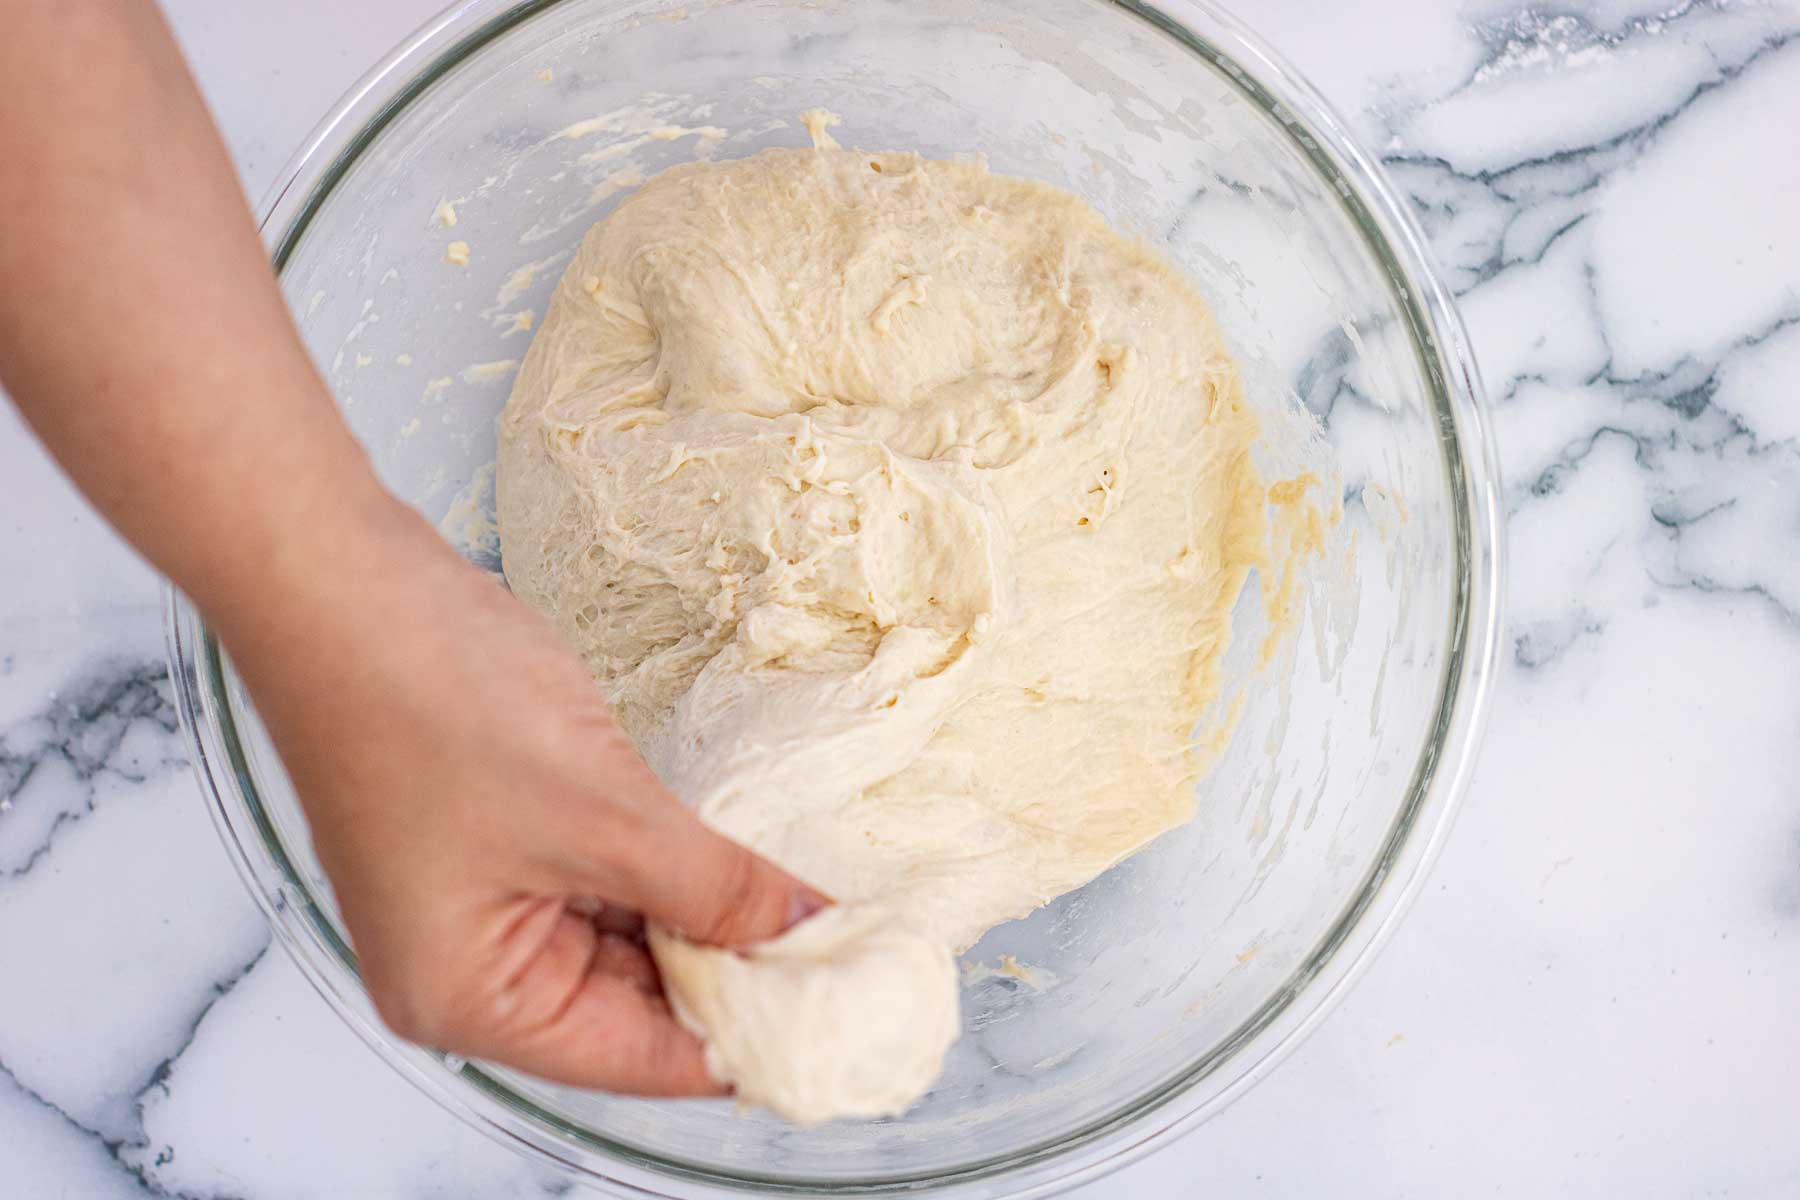
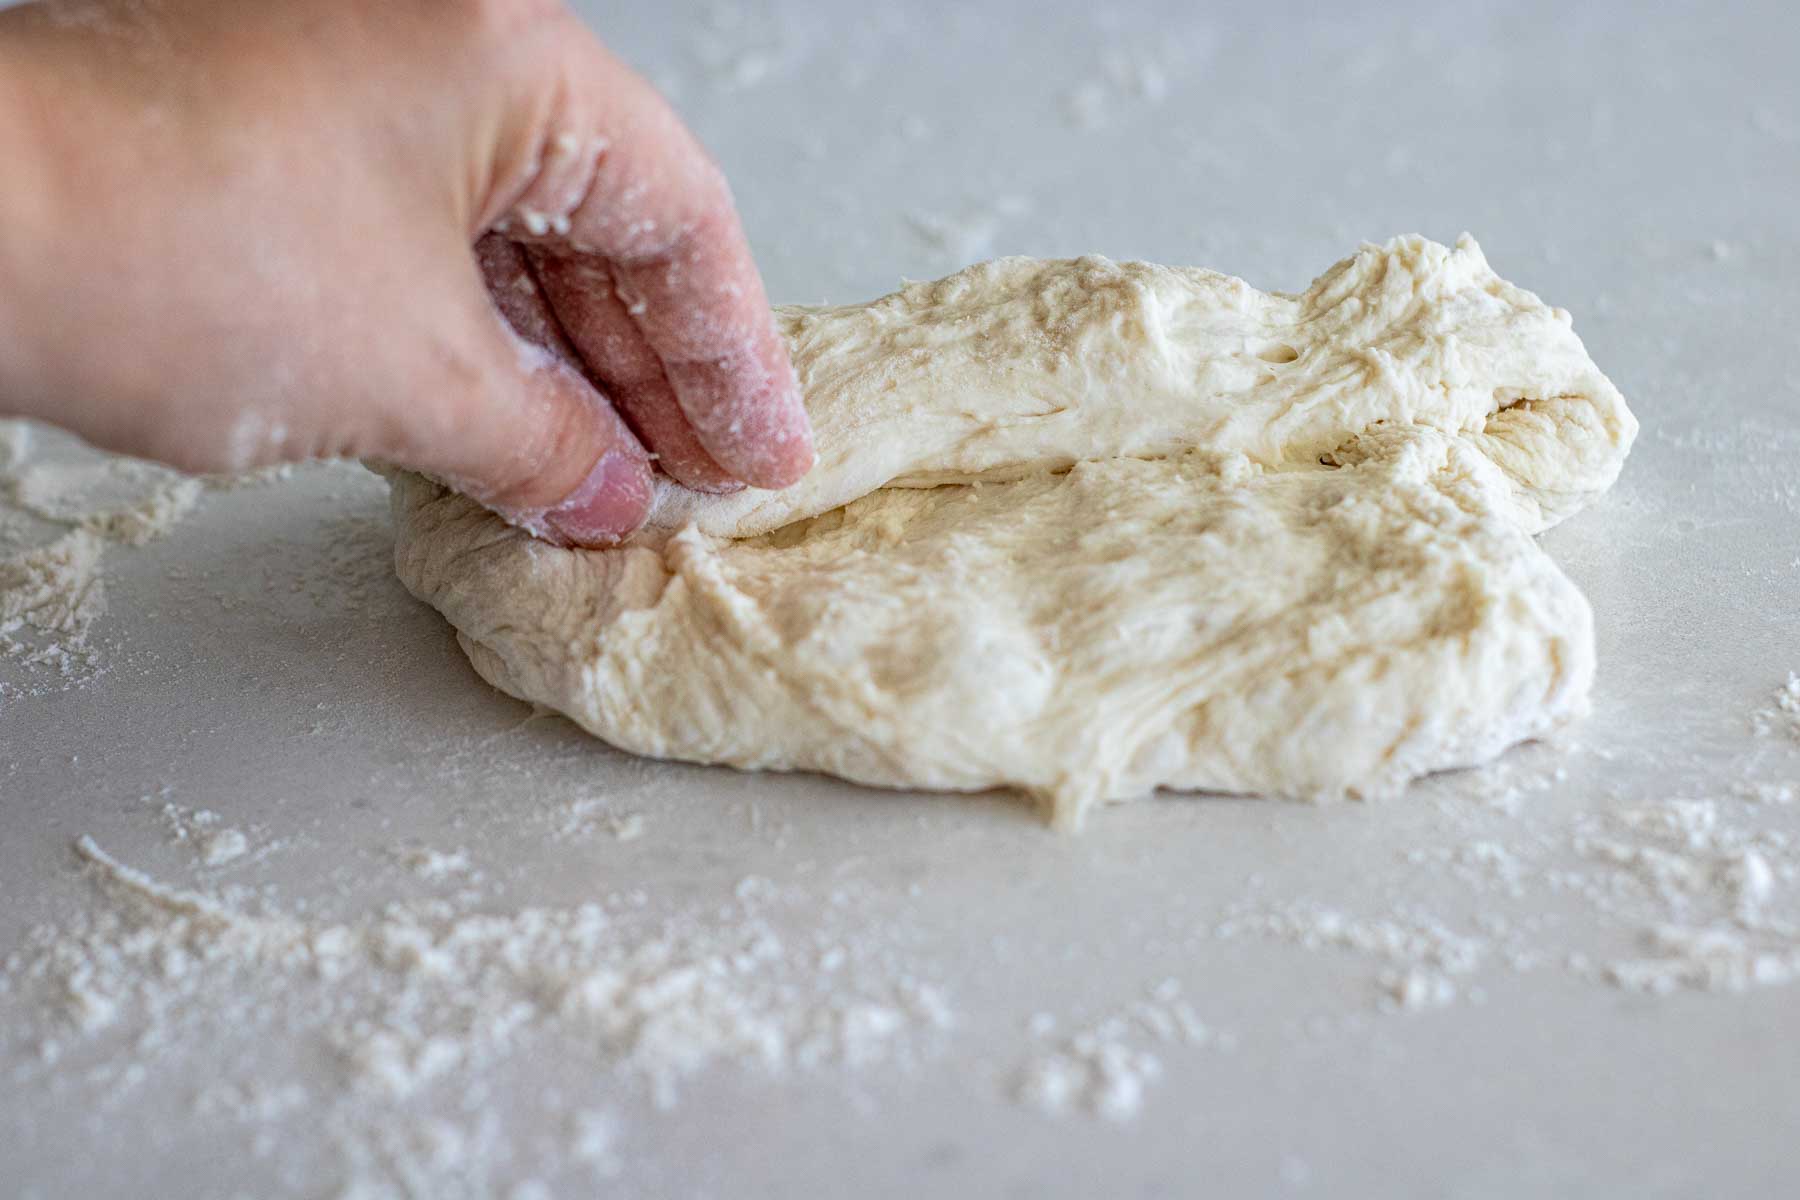
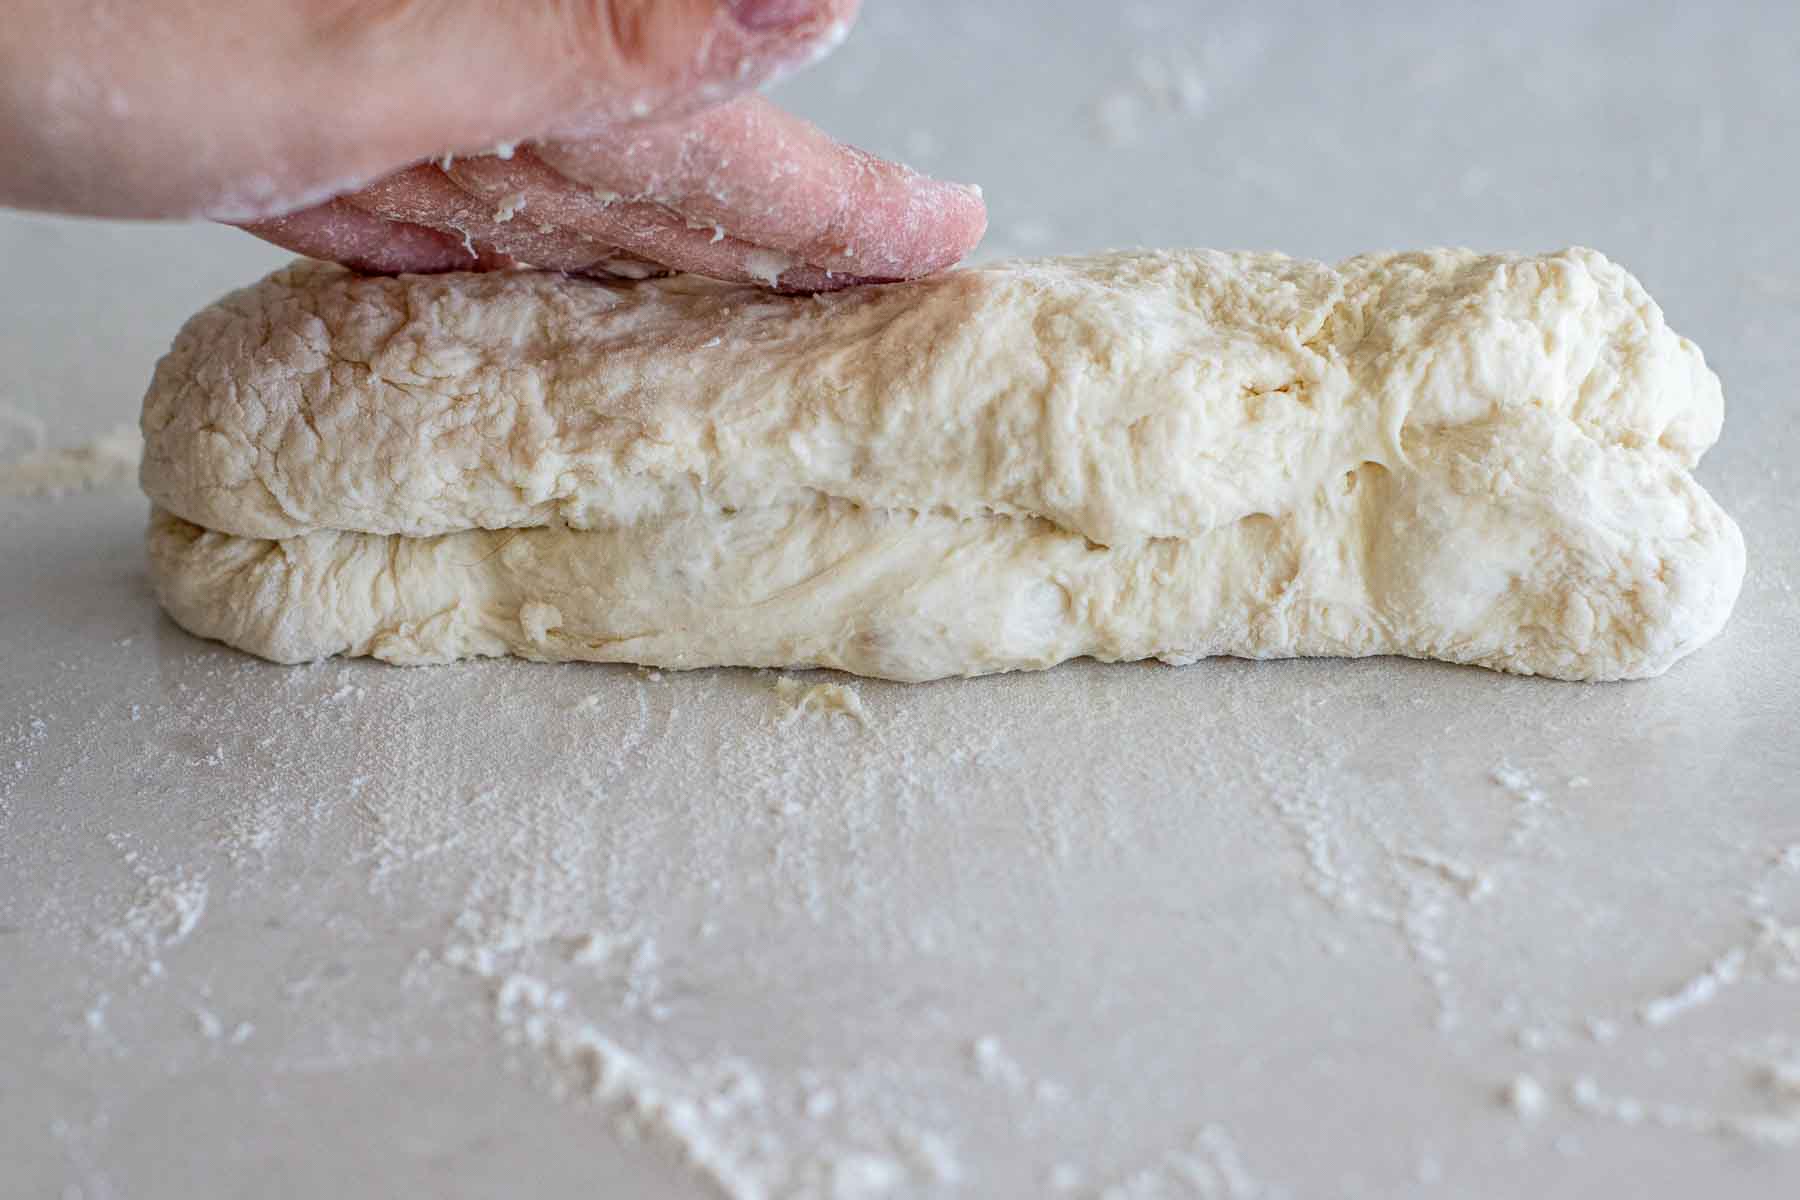
Step 03. To stretch and fold, start by pulling up on one side of the dough.

Step 04. Then, fold it back down on itself. Repeat it 4 to 6 times, equally through all the sides of the dough.
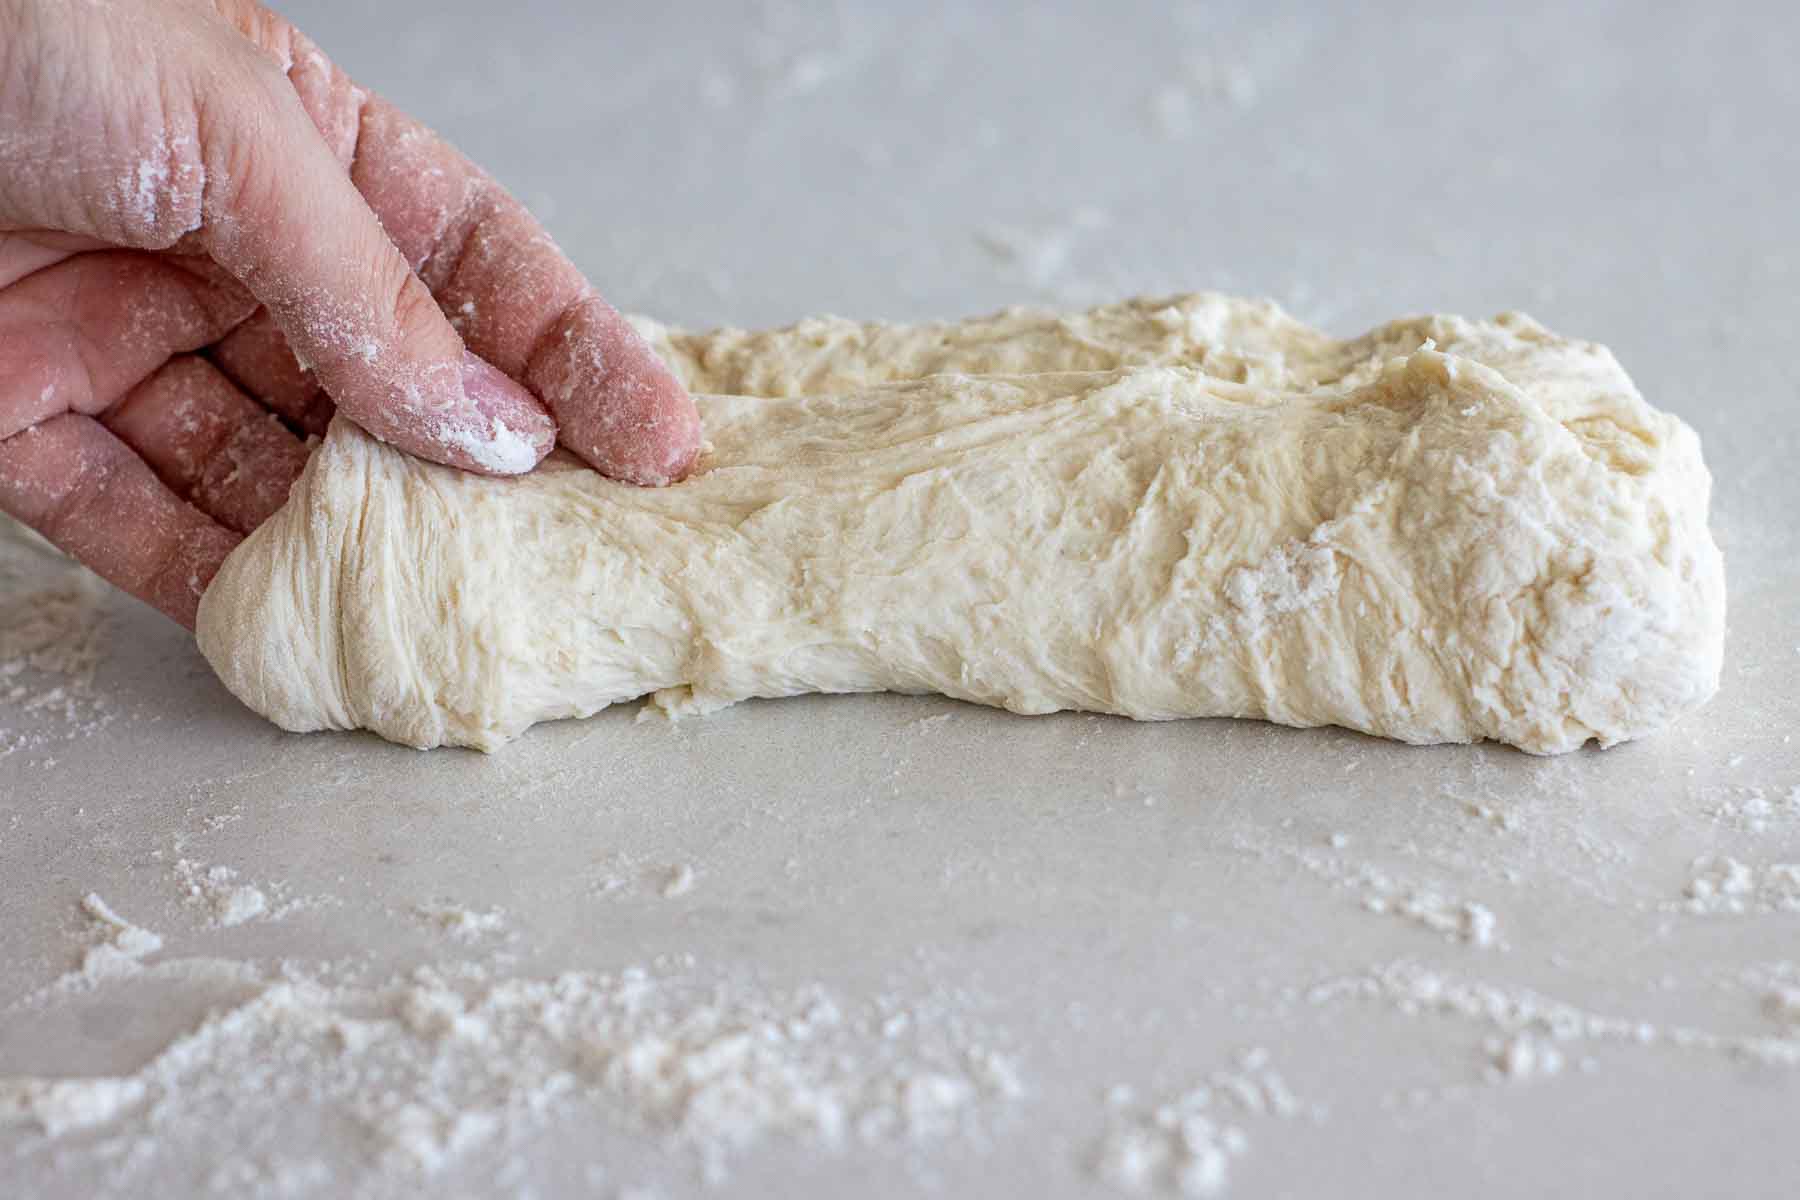
We’re stretching and folding the dough 4 times, with a 20 minute pause between each. Keep the dough covered between each interval.
After the last stretch and fold, cover the dough and let it rest for 15 minutes.
Tip: if you find the dough too sticky to work with in the first and second stretch and fold, wet or flour your hands to make it easier.
How to shape baguettes
Baguettes need some support when proofing after they are shaped, so you’ll need a baguette pan, clean linen or kitchen towel to proof the dough.
If you plan to bake often, I recommend getting a baguette pan, as it can go straight to the oven!
Flour evenly the tool you’re using, careful to not add too much flour. If using a linen, fold the cloth into a series of wavy creases (they will hold the dough while proofing).
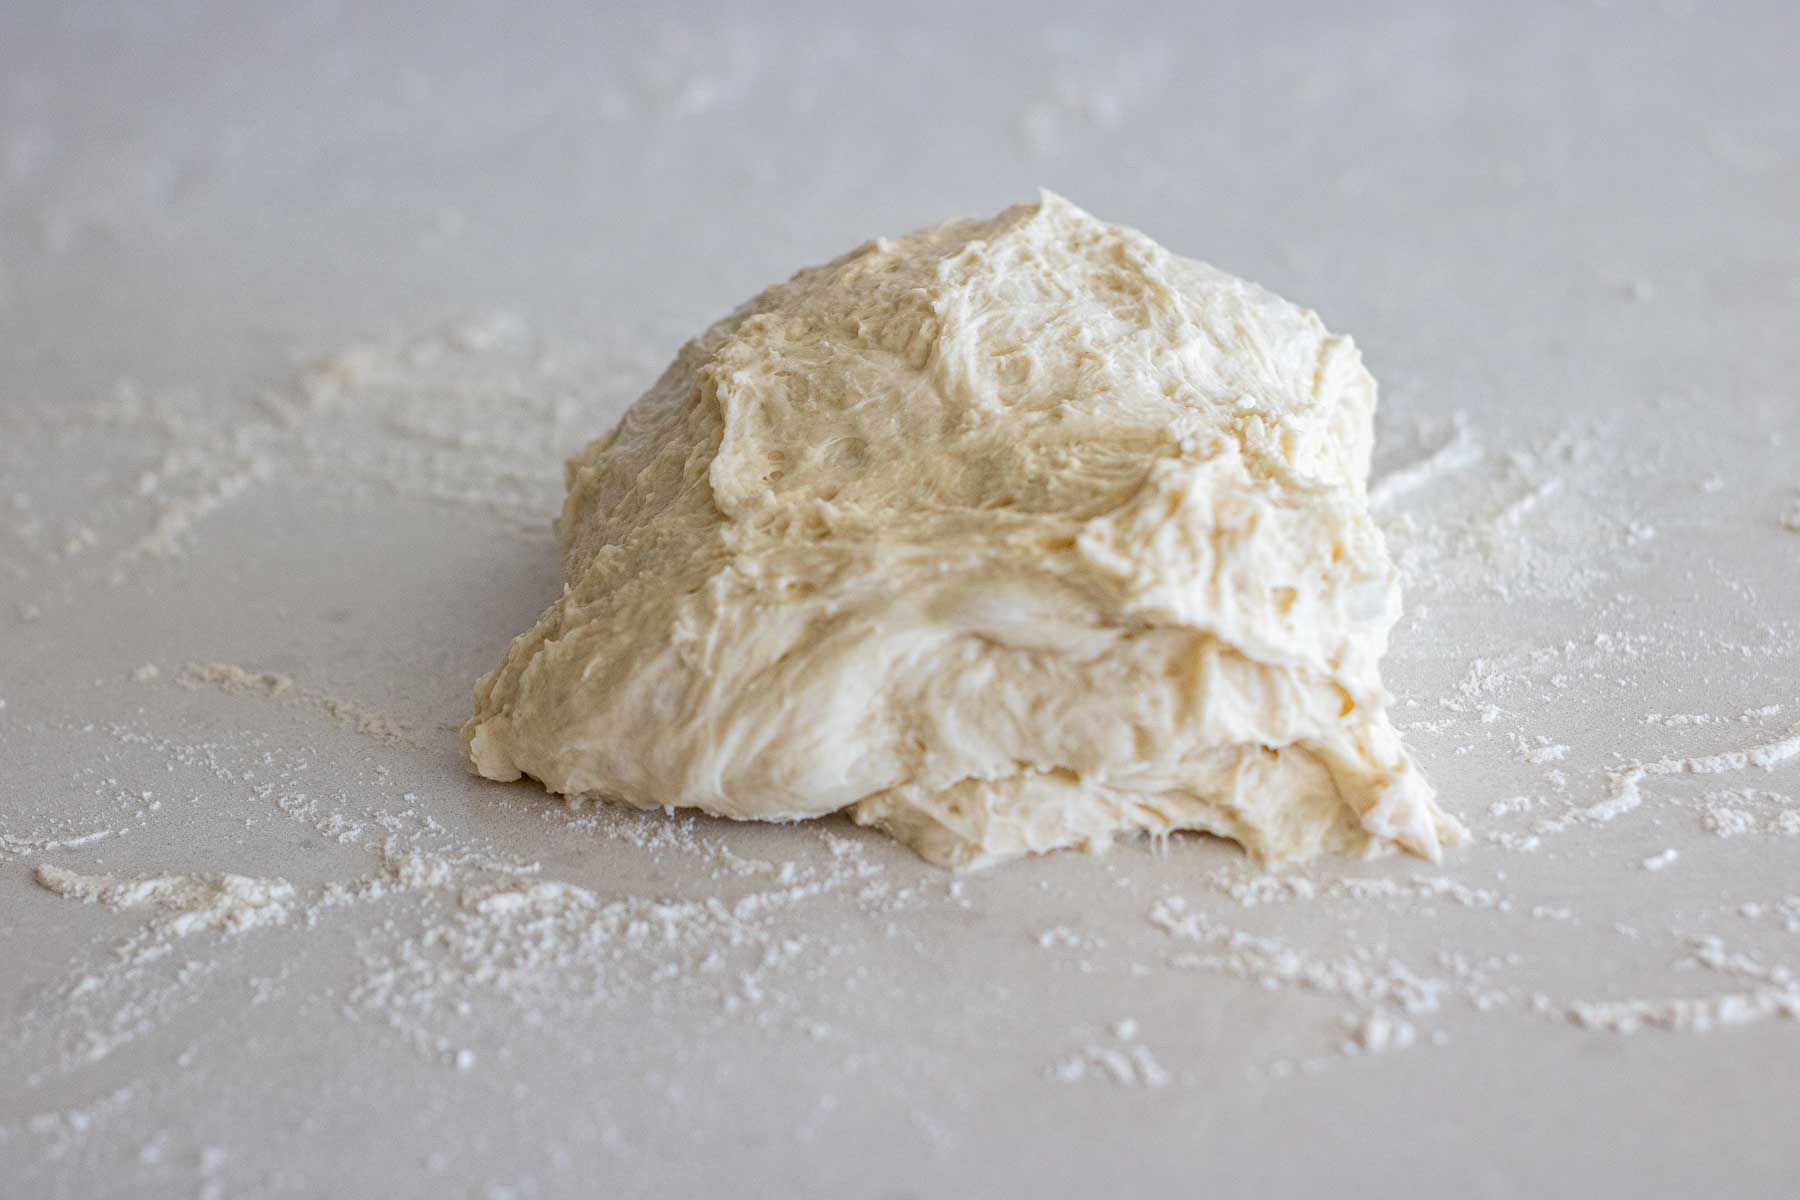
Step 01. Divide dough into 3 equal parts, and let them rest for 10 minutes.
Step 02. On a lightly floured surface, open one part of the dough into a rectangle.
Step 03. Starting with the longer side, fold over ⅓ of the dough, pressing gently to seal.
Step 04. Repeat on the other side.
Step 05. Now, fold the dough in half, pressing the edges gently to seal. You should have a cylinder-like shaped dough.
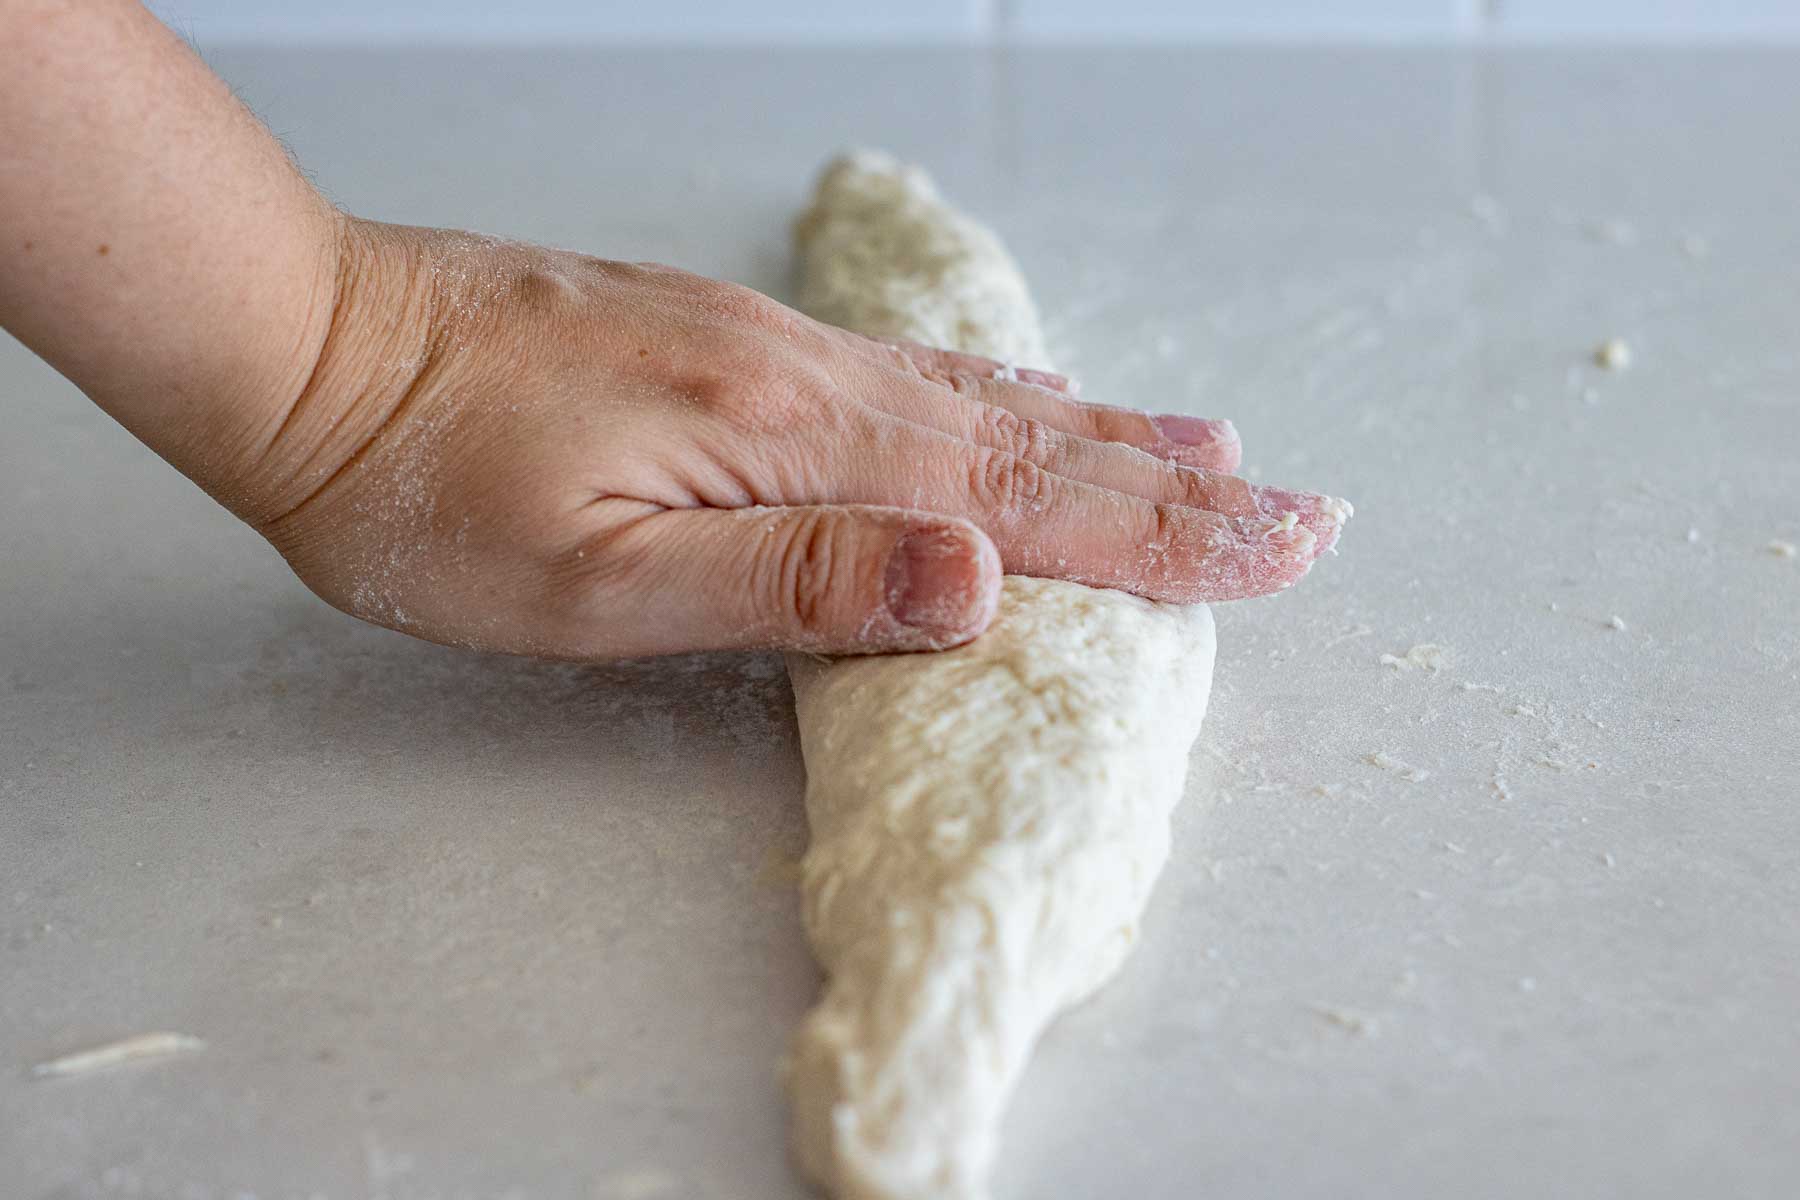
Step 06. Stretch the cylinder to the desired length, rolling it gently.
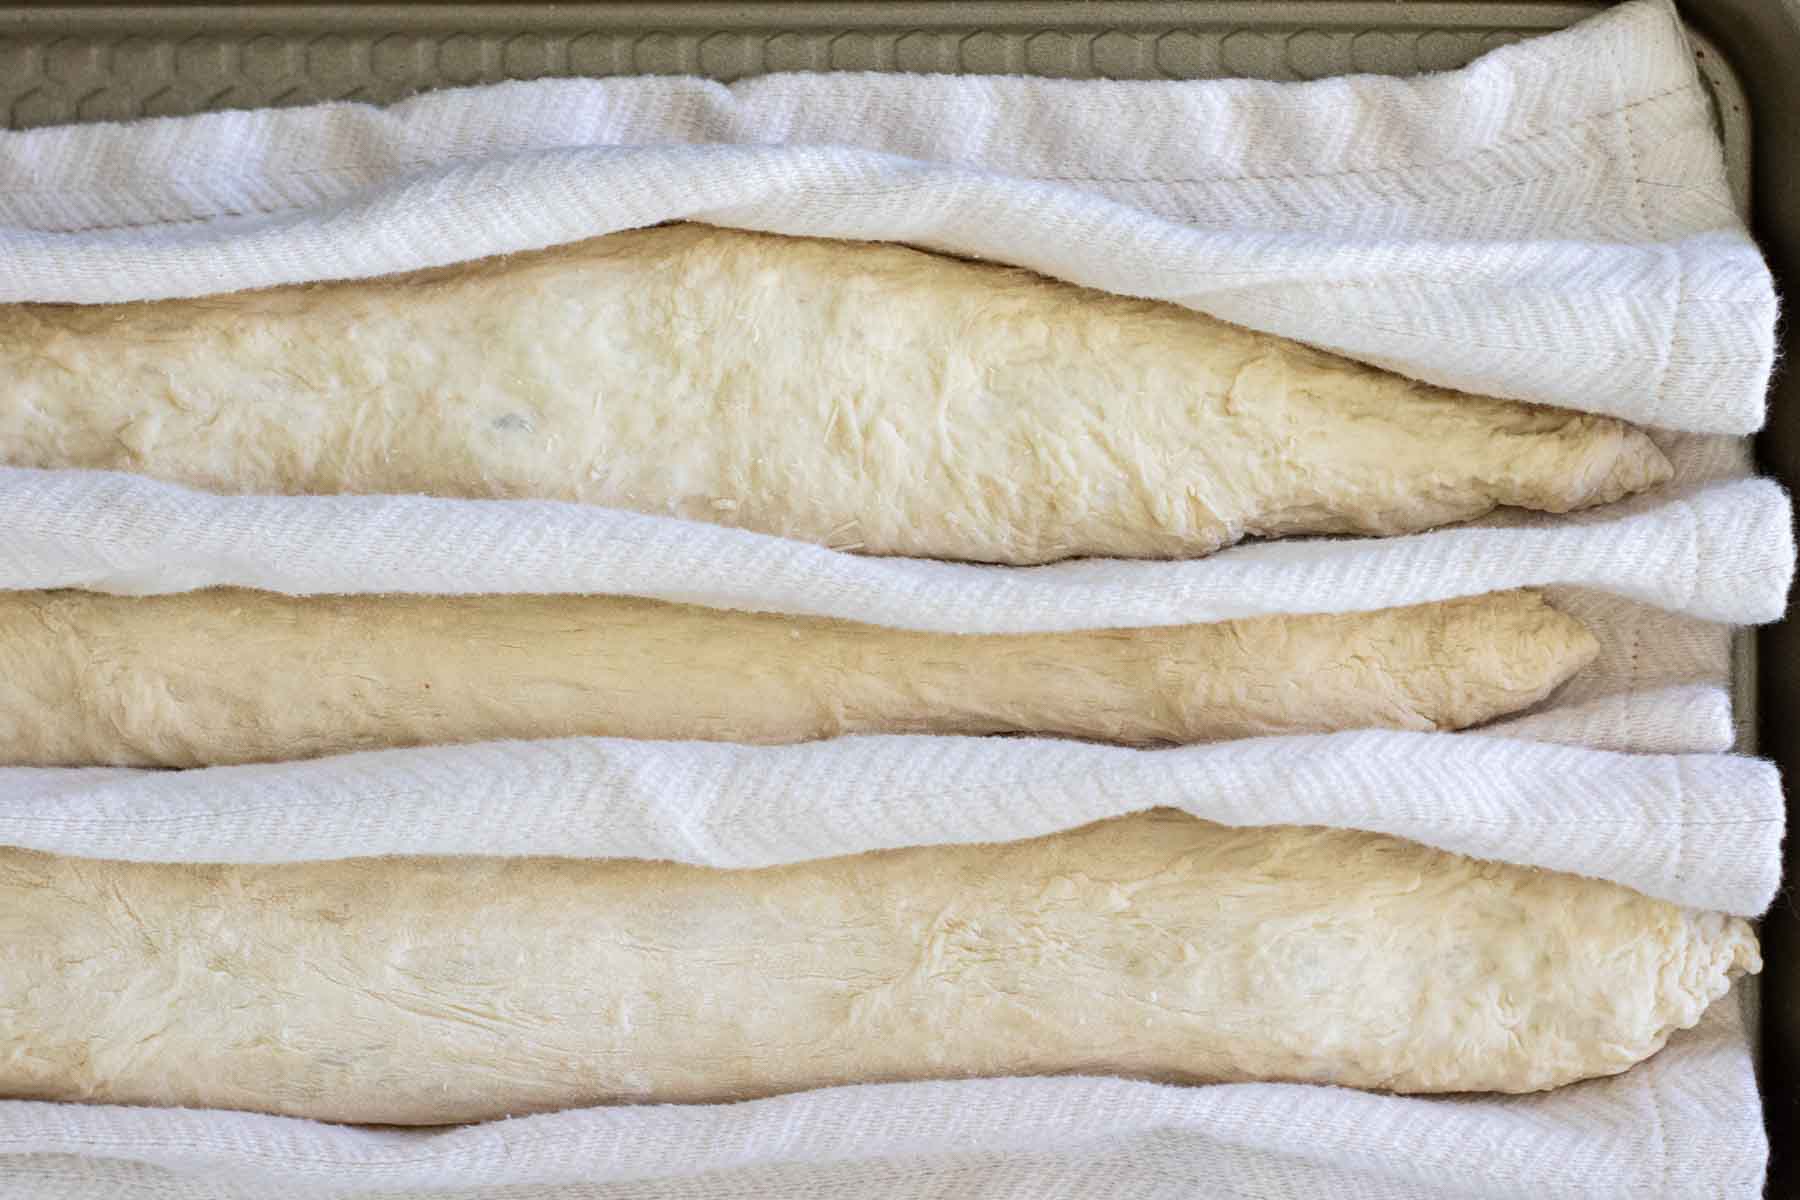
Step 07. Place baguette in the floured linen or baguette pan with seam side down. Cover, and let them rest for 40 minutes. They should almost double after that time.
Step 08. Just before baking, using a sharp blade, slice diagonally the top. For baguettes, depending on their size, three to five slices are enough.
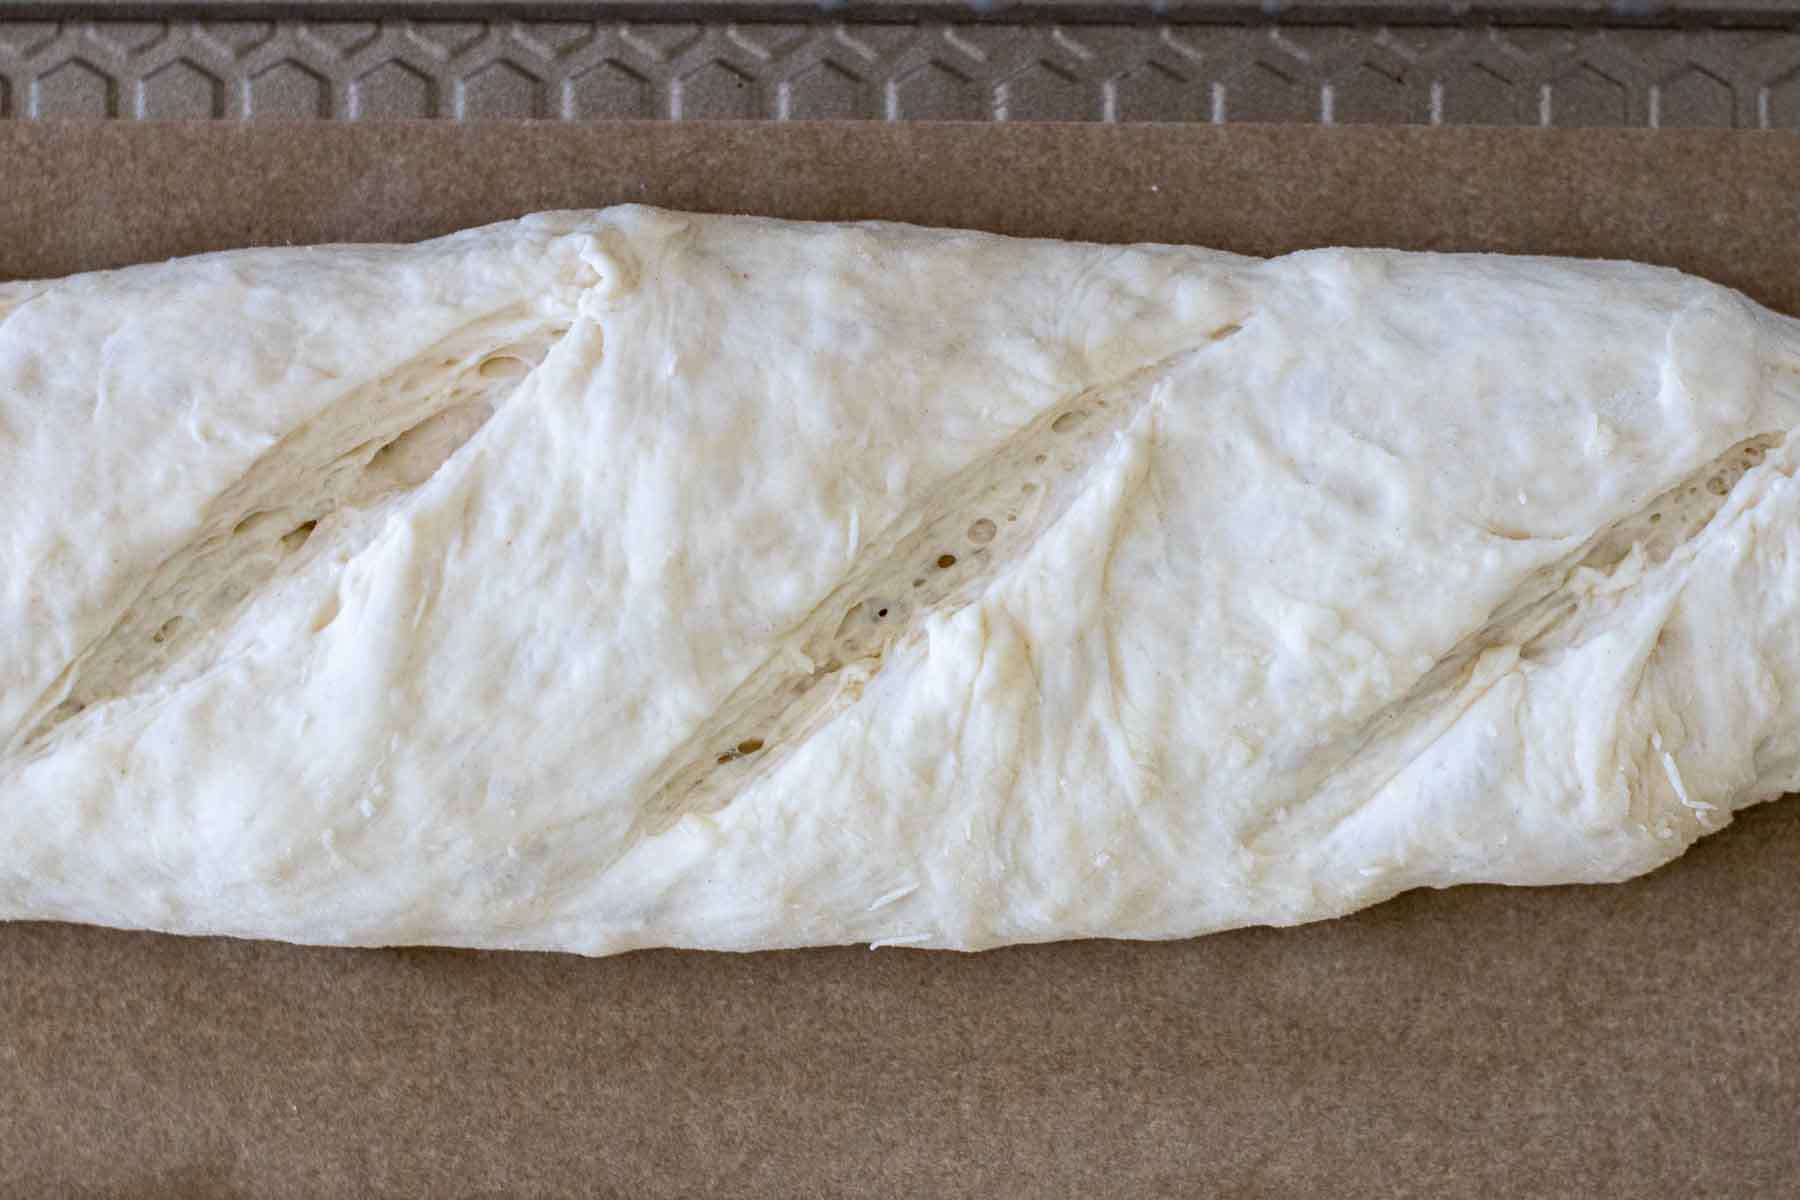
You can spray your scoring knife/lame with cooking spray just before scoring a sticky loaf or baguette.
How to bake baguettes
To bake perfect baguettes without a baking stone, it’s essential to preheat the oven and create steam.
To create steam, first you need to preheat the oven. While preheating, leave a baking sheet at the bottom rack (baguettes will bake in the middle rack). You can also use the steam tray, if your oven has a rack for that.
After placing baguettes on the oven, add about 300ml of water to the baking sheet at the bottom rack and close the oven’s door.
Now, be careful: steam can burn you badly. When opening the oven, be mindful that the steam will come out.

Expert tips
- Do not use glass bakeware for this recipe! Glass might explode when making a recipe with too much steam or too high temperatures.
- A chlorine-free water makes better bread (and poolish). Chlorine can affect the final taste of bread. If you live in a city where tap water has a high amount of chlorine, opt for bottled or filtered water. You can also leave your water sitting overnight so the chlorine can evaporate.
- Know when poolish is done. If it’s still rising, it’s underproofed. If it has risen and then collapsed down, it’s overproofed.
- Careful to not overproof the preferment. To prevent overproofing poolish, don’t let it fermenting over direct sun, and don’t leave it in a warm spot in your kitchen during summer/hot weather.
- It’s better to use underproofed poolish than an overproofed one. A preferment that’s overproofed will make it harder to shape bread, weakening the dough structure.
Wanna learn more about bread baking? Check out my bread secrets for beginners and bake a successful loaf every time!
Storing and freezing
Bread are always best on the day they're baked, but thanks to the poolish, these homemade baguettes keep good for a couple of days.
The crust will lose its crispness the day after, but you can fix that by putting the baguettes back into the oven over low temperature. Spray the crust with water, and bake the baguette for 5 to 8 minutes.
Store them at room temperature for 2 to 3 days, using a bread box or bag. You can check good methods for storing bread and choose the best for you.
You can freeze these loaves. Bake them and let them cool completely. Place each in a freezer safe bag, push all air out and store it in the freezer. This recipe keeps for up to 3 months frozen.
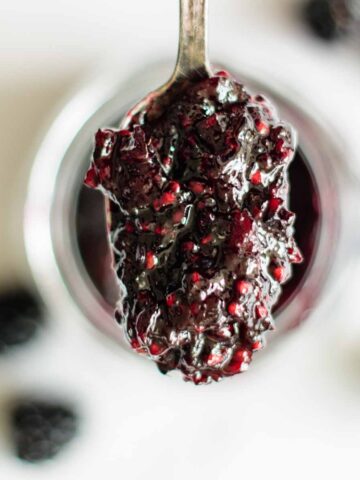
What to eat with it
Baguettes are great for sandwiches, soups, or just plain butter when out of the oven.
Some of my favorite dips and jams to serve along with it are:
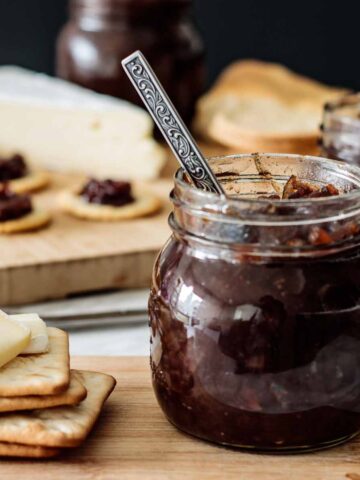

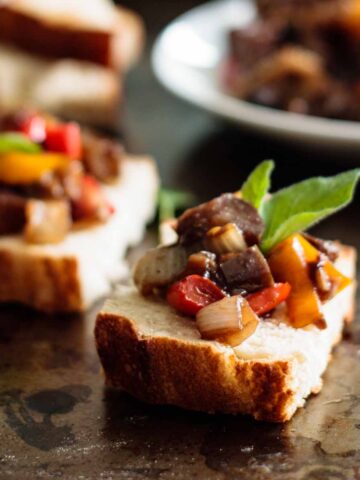
Got any leftover bread? Use it to make homemade crostini! Homemade crostini is more delicious and way cheaper than the ones you buy in the grocery store.
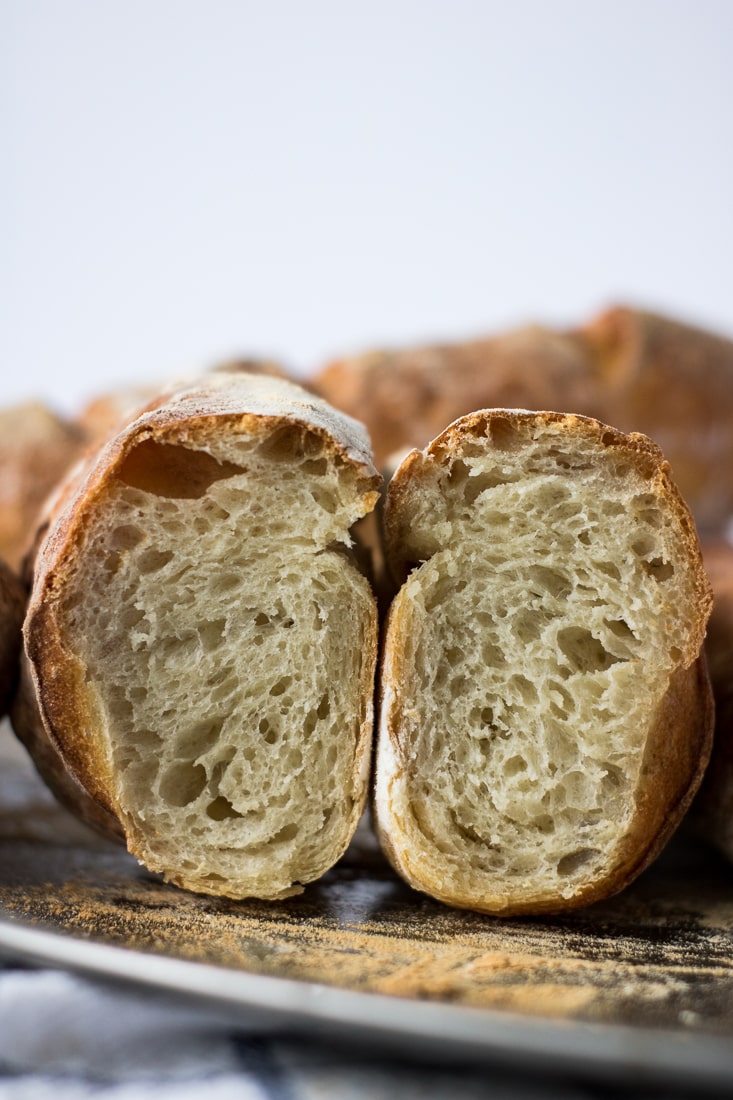
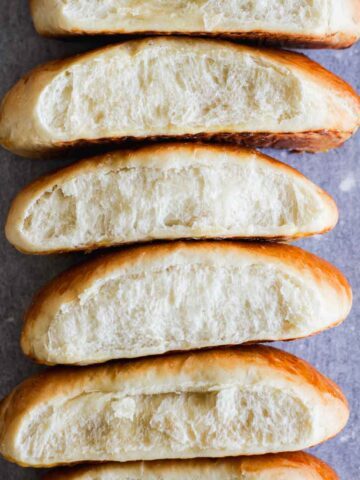
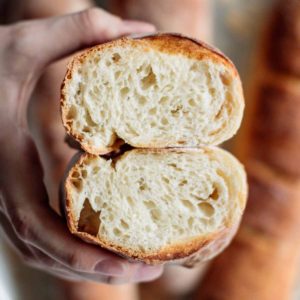
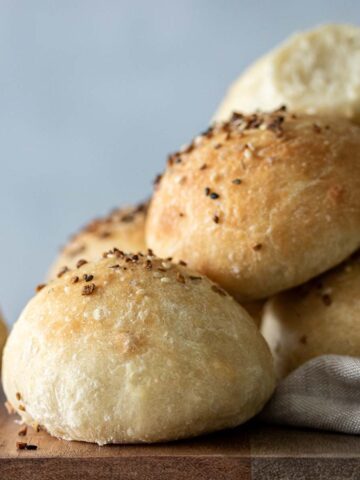
After all that information, take a good look at what you will get:

Gorgeous, right?
More bread recipes
If you tried this Poolish Baguette Recipe, please leave a 🌟 star rating and let me know how it goes in the comments below!
📖 Recipe
Authentic Crusty French Baguette (with poolish)
Equipment
- 1 Baguette Pan or linen/firm kitchen towel
Ingredients
Poolish Preferment
- 150 g all-purpose flour
- 150 g water room temperature
- 0.15 g instant yeast
Dough
- 350 g all-purpose flour
- 230 g water
- 3 g instant yeast
- 10 g salt
- poolish
Instructions
Poolish
- In a clean jar or bowl, add flour, water and yeast, mixing it well with a spoon until a shaggy dough is formed.
- Cover, and let it ferment for 12 to 16 hours.
- Poolish is ready when it stops to rise and starts to collapse. If in a bowl, you will notice a slight dip in the middle of it.
Making the dough
- Start the dough the day after, as soon as poolish is ready. In a large bowl, add flour, water, yeast, salt and the poolish. Mix it with a spoon or using your hands until a shaggy dough is formed. Let it rest for 30 minutes, covered.
- This dough is sticky in the beginning, but it gets easier to work with as it “matures”. After 30 minutes, we’ll start to stretch and fold.
- To stretch and fold, start by pulling up on one side of the dough, folding it back down on itself. Repeat it 4 to 6 times, equally through all the sides of the dough, until it is tight enough you can't stretch and fold anymore.
- We’re stretching and folding the dough 4 times, with a 20 minute pause between each. Keep the dough covered between each interval.
- After the last stretch and fold, cover the dough and let it rest for 15 minutes.
Shaping
- Divide dough into 3 equal parts. Cover, letting them rest for 10 minutes to make shaping the baguettes easier.
- On a lightly floured surface, open one part of the dough into a rectangle. Starting with the longer side, fold over ⅓ of the dough, pressing gently to seal. Repeat on the other side.
- Now, fold the dough in half, pressing the edges gently to seal. You should have a cylinder-like shaped dough.
- Stretch the cylinder to the desired length, rolling it gently with both hands.
- Place baguette in the floured linen or baguette pan with seam side down. Cover, and let them rest for 40 minutes. They should almost double after that time.
- Just before baking, using a sharp blade, slice diagonally the top. For baguettes, depending on their size, three to five slices are enough.
Baking
- Preheat the oven to 475 degrees Fahrenheit, placing a baking sheet in the bottom rack.
- After placing baguettes on the middle rack of preheated oven, add about 1 cup of water to the baking sheet at the bottom rack and close the oven’s door.
- Bake baguettes for 15 minutes, then lower the temperature to 450 degrees Fahrenheit.
- Bake for 10 minutes more. Baguettes are ready when the interior temperature is 190 degrees Fahrenheit, or the crust gets to a deep golden brown color.
- Let them cool for 1 to 2 hours before slicing.
Video
Notes
- For baguettes, you’ll need a baguette pan, clean linen or kitchen towel to proof the dough.
- If you pretend to bake often, I recommend getting a baguette pan, as it can go straight to the oven.
- Flour evenly the tool you’re using, careful to not add too much flour. If using a linen, fold the cloth into a series of wavy creases (they will hold the dough while proofing).
- Know when poolish is done. If it’s still rising, it’s underproofed. If it has risen and then collapsed down, it’s overproofed.
- To prevent overproofing poolish, don’t let it fermenting over direct sun, and don’t leave it in a warm spot in your kitchen during summer/hot weather.
- It’s better to use underproofed poolish than an overproofed one. A preferment that’s overproofed will make it harder to shape bread, weakening the dough structure.

Cassie
Hello, baguettes came out tasting great but did not seem to rise during the last rest in baguette pan. Ended up being pretty small but still very good. Maybe it didn’t rest enough? I did about 50 mins
Tatiana Kamakura
Hi Cassie!
So happy you enjoyed the flavor!
The final rise for baguettes is usually modest. If your kitchen was cool, they may have needed a little more time. They should feel lighter and slightly puffy, not doubled in size.
Joshua
Hi, I just tried to make this. And my crust didn’t brown at all. I followed the temperature change and the time in the oven precisely.
I made the POOLISH last night and let it sit for 16 hours. And for whatever reason the all purpose king Arthur flower I was using was nowhere near stretchy as what I’ve seen in your video and others using that technique.
Are we supposed to leave the pan of water in the oven the entire time? Because at 15 minutes I still have water in the pan so I just took the pan out.
Thanks I appreciate any assistance you got.
Tatiana Kamakura
Hi Joshua,
It sounds like a couple of things might be affecting your crust color and dough texture. For browning, keeping the pan of water in the oven for too long can slow down crust development. Steam is great for the first part of baking because it helps with oven spring, but after about 10–15 minutes, it’s best to remove the water so the crust can dry out and brown properly. When I bake, the water in my pan usually evaporates within 15 minutes, but if you still have water left at that point, you may want to remove it to help with browning. If your oven runs a bit cool, you might also try increasing the temperature slightly toward the end of baking.
Temperature is always important when baking, and it also affects how long your dough ferments—warmer temperatures speed up fermentation, while cooler temperatures slow it down. Since you let your poolish sit for 16 hours, if your kitchen was on the warmer side, it may have over-fermented, weakening the gluten. That could be why your all-purpose flour didn’t feel as stretchy. A shorter fermentation (closer to 12 hours) might help, or you could try using bread flour for more strength.
I use Rogers All-Purpose Flour, which has about 13% protein, so King Arthur AP Flour, which has about 11.7% protein, might have a little less strength. That difference could also contribute to a softer, less stretchy dough. I hope this helps, and let me know if you have any other questions!
Sarah
Hi! Thanks for sharing this recipe, I baked 4 baguettes and they taste incredible. But I can’t seem to get a nice open crumb like yours, do you have any tips?
Tatiana Kamakura
Hi Sarah,
For an open crumb:
1. Make sure your dough is proofed just right - if your dough overproofs a bit, it will affect how much spring you'll get when they're in the oven.
2. When shaping, handle the dough as gently as possible to avoid deflating.
3. Preheat the oven and add water to create steam. Steam in the oven during the first 10-15 minutes of baking to help the baguettes rise fully before the crust sets.
4. And when scoring, make a deep cut with a bread lame/blade. Using a sharp knife and/or scissors is fine, but I don't get the same result.
Lastly, what really matters is that they tasted amazing. Congrats!!
Sarah
Thanks for that! I’ll give those tips a go, can’t wait to try this recipe again. I’ve received lots of good feedback on these baguettes, they are my family’s favourite by far!
John
Thanks for the easy instruction and video! What is the reasoning behind lowering the temperature to 450 degrees after the first 15 minutes?
Tatiana Kamakura
Hi John,
I like to lower the temperature after this time to avoid a too dark/burnt crust.
Cheers!
Andrew Chisholm
The recipe sounds great, I'm off to make it now!
One question: In the recipe section you say that 1.5 g of yeast is required.
I think that that should be 0.15 g?
Tatiana Kamakura
Hi Andrew, thank you for pointing out the typo in the recipe.
You're right, it's 0.15g if doing an overnight fermentation. Happy baking!
Andrew Chisholm
I made two baguettes last evening, and we had them for breakfast this morning.
My wife said that they were wonderful.
A sincere compliment for you and for me!
Thanks!
Tatiana Kamakura
So glad you both liked it! Cheers!
Tatiana Kamakura
Hi Melanie,
Instant yeast!
Rick
Do you bake the loaves on a baking sheet lined with parchment, or right on a pizza stone or steel?
Tatiana Kamakura
Hi Rick, I bake mine on a lined baking sheet.
Wayne
This recipe and it's techniques produced the best baguettes I've ever made in my kitchen! Just crispy enough, with nice holes in a tender sponge! My new go to for baguettes! Thank you for sharing!
Tatiana Kamakura
So glad you like it, Wayne! Happy baking!