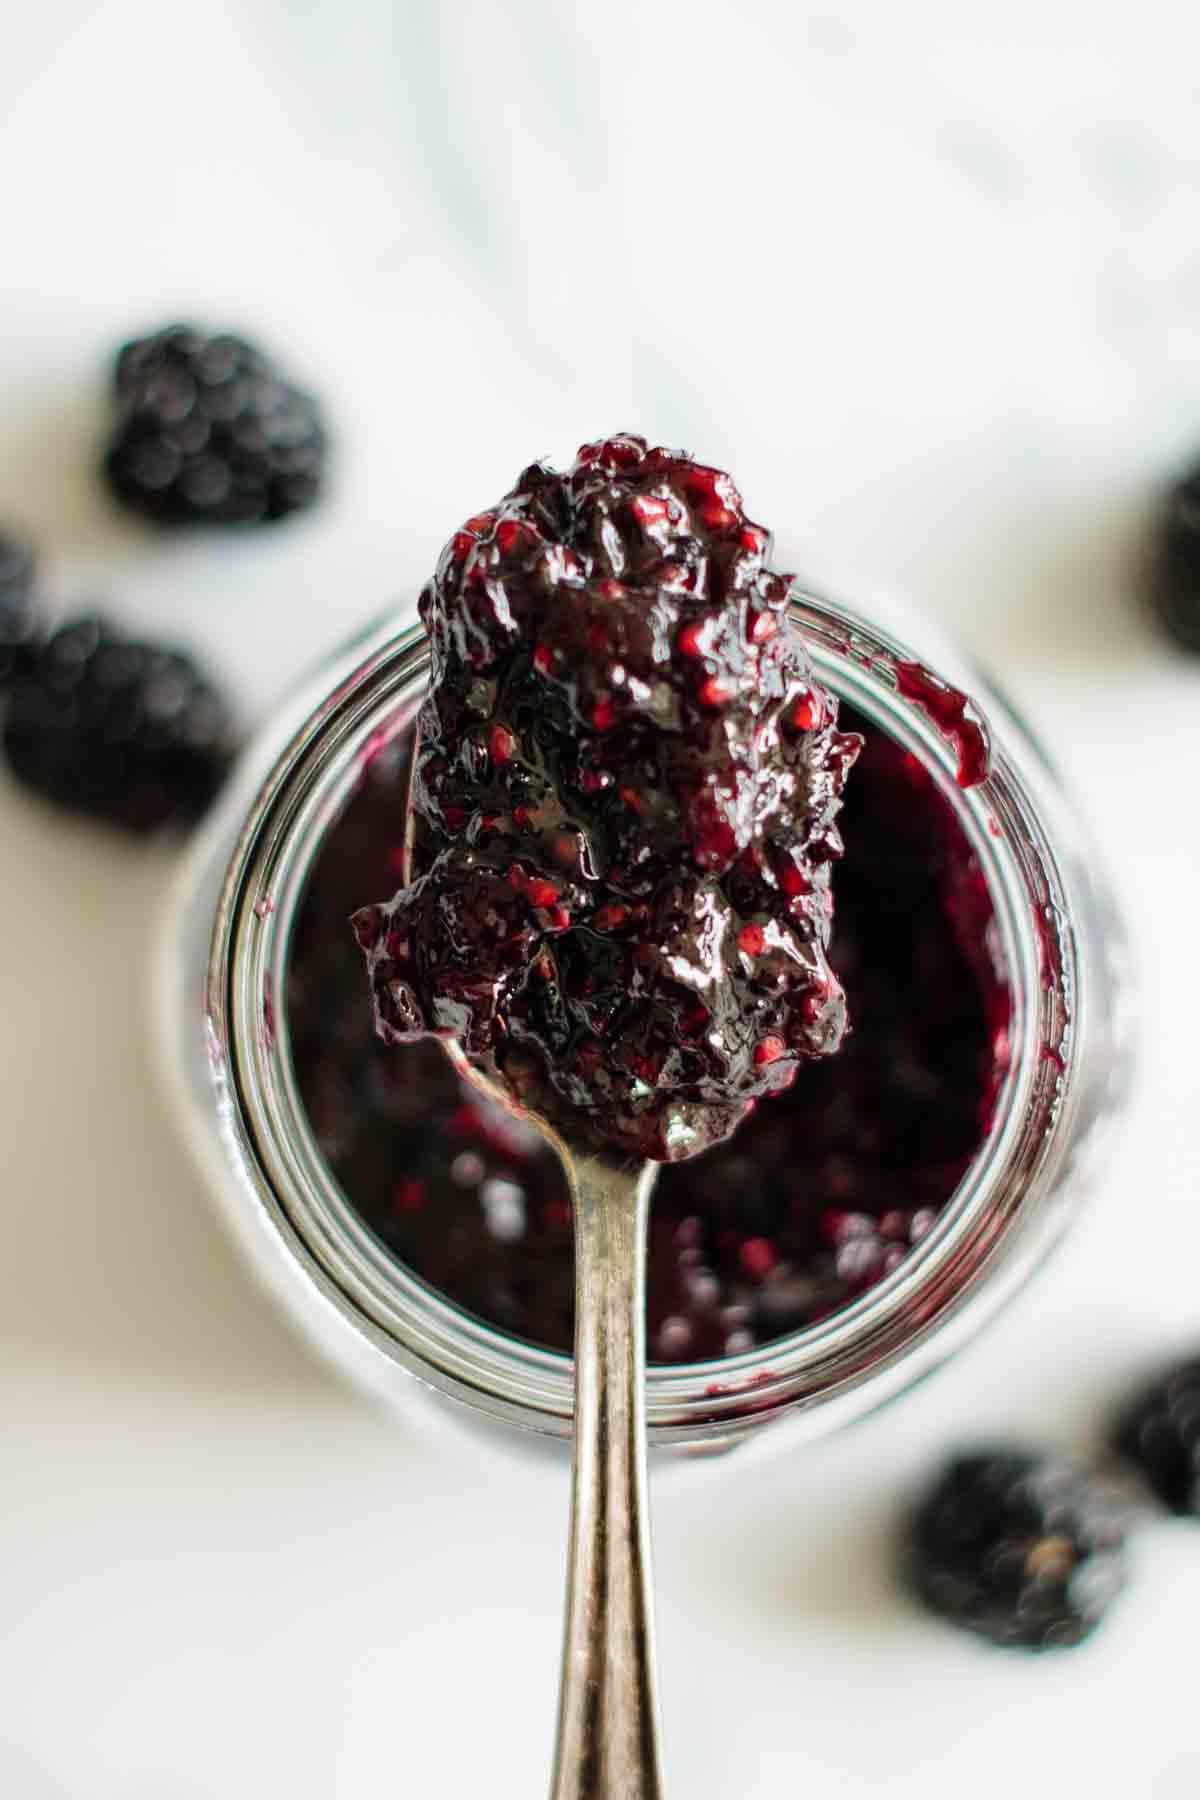
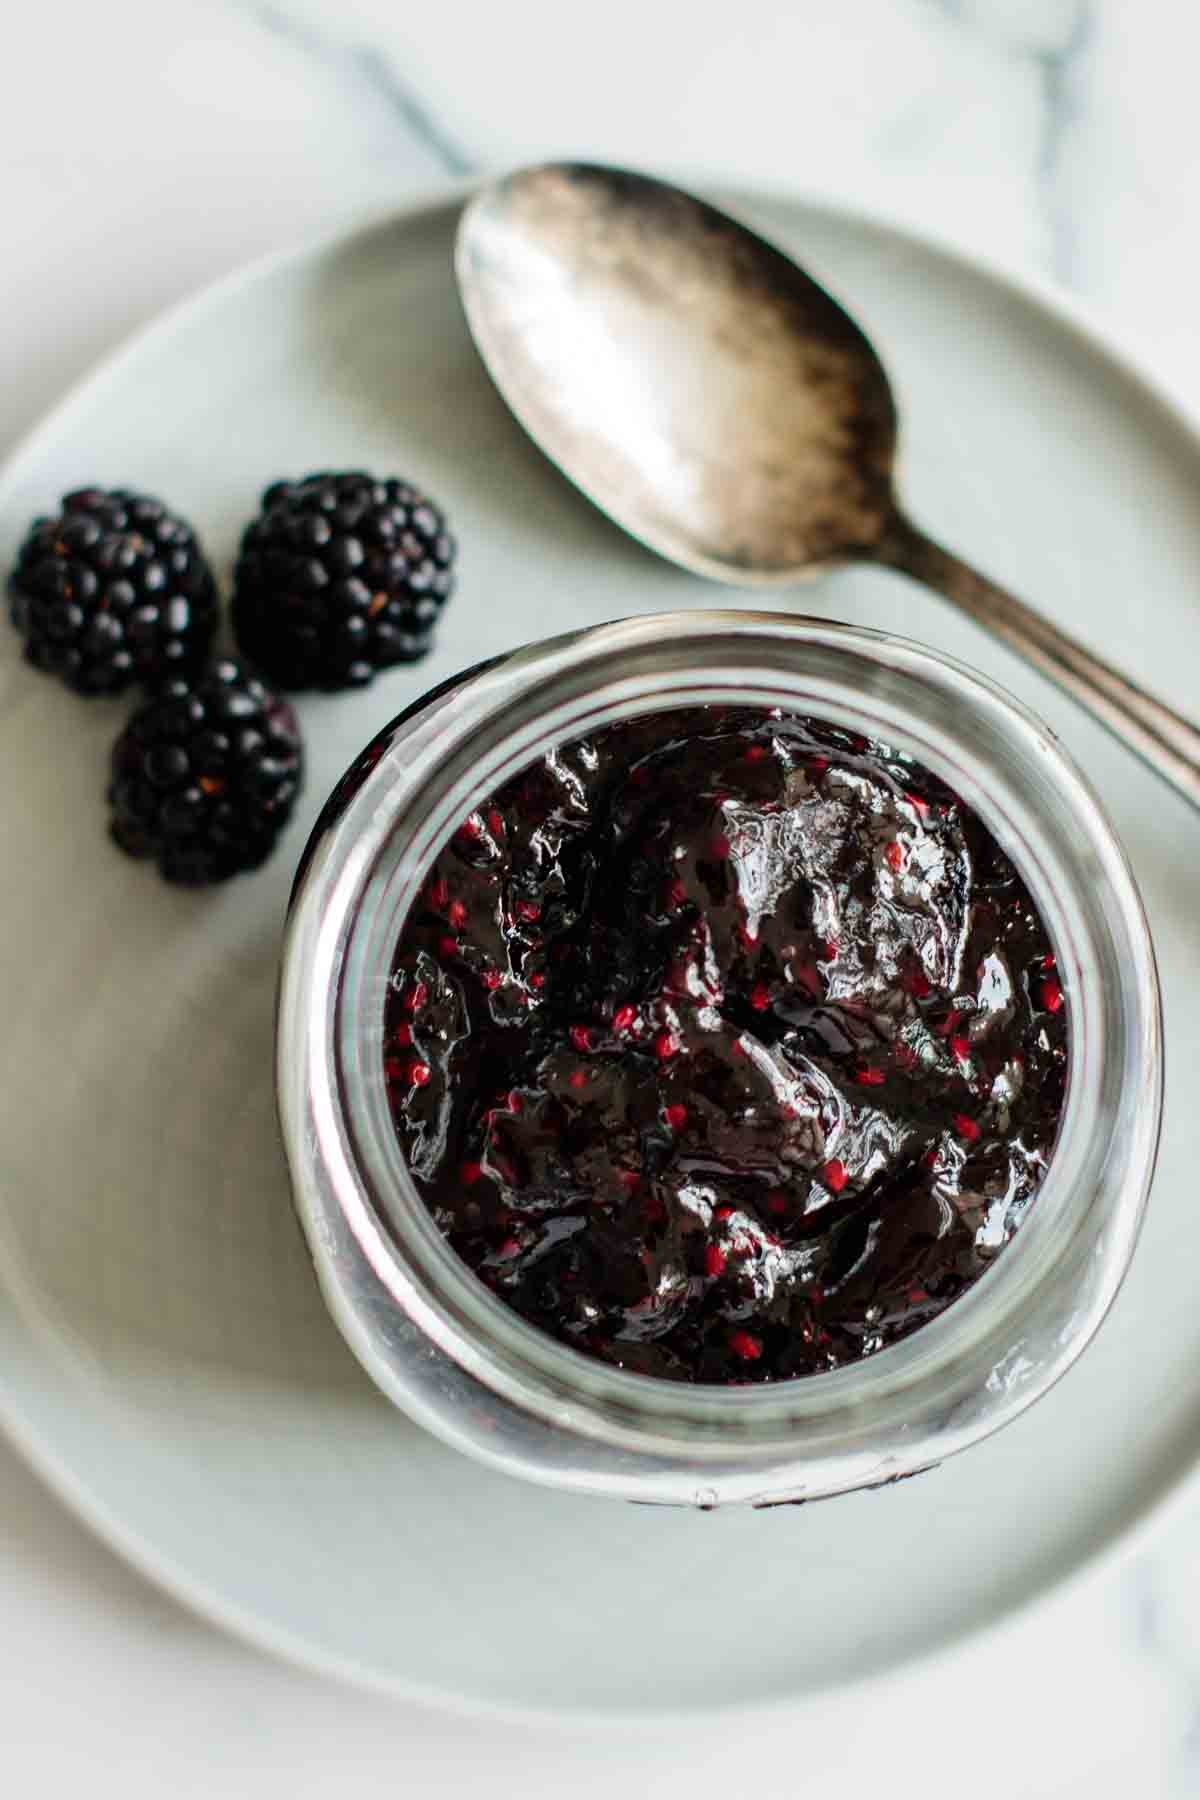
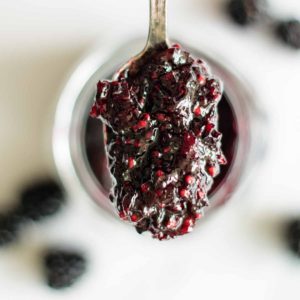
Homemade blackberry jam is easier to make than you think! This jam thickens up without the addition of pectin, has a concentrate blackberry flavor and and can be used in lots of different and delicious ways.
Have it with cream tea biscuits, top my favorite sourdough pancakes or spread it over a delicious and vegan brioche toast! This jam can be canned or you can just keep it well stored inside the fridge, and is an amazing addition to baking good.
Jump to:
Homemade jam is AMAZING: nothing beats the freshness you get when making it at home. Follow this recipe and all the tips to get a great jam with no pectin added and less sugar than its store-bought version.
If you never made jam in your life, this is a good recipe to start. Same if you don’t know how to can a jar of jam. You’ll get about 450g os blackberry jam.
If you know and want to can it, do it! I don’t give instructions to canning, but it is possible, as I use only blackberries, sugar and lemon as ingredients.
🍇 Blackberries
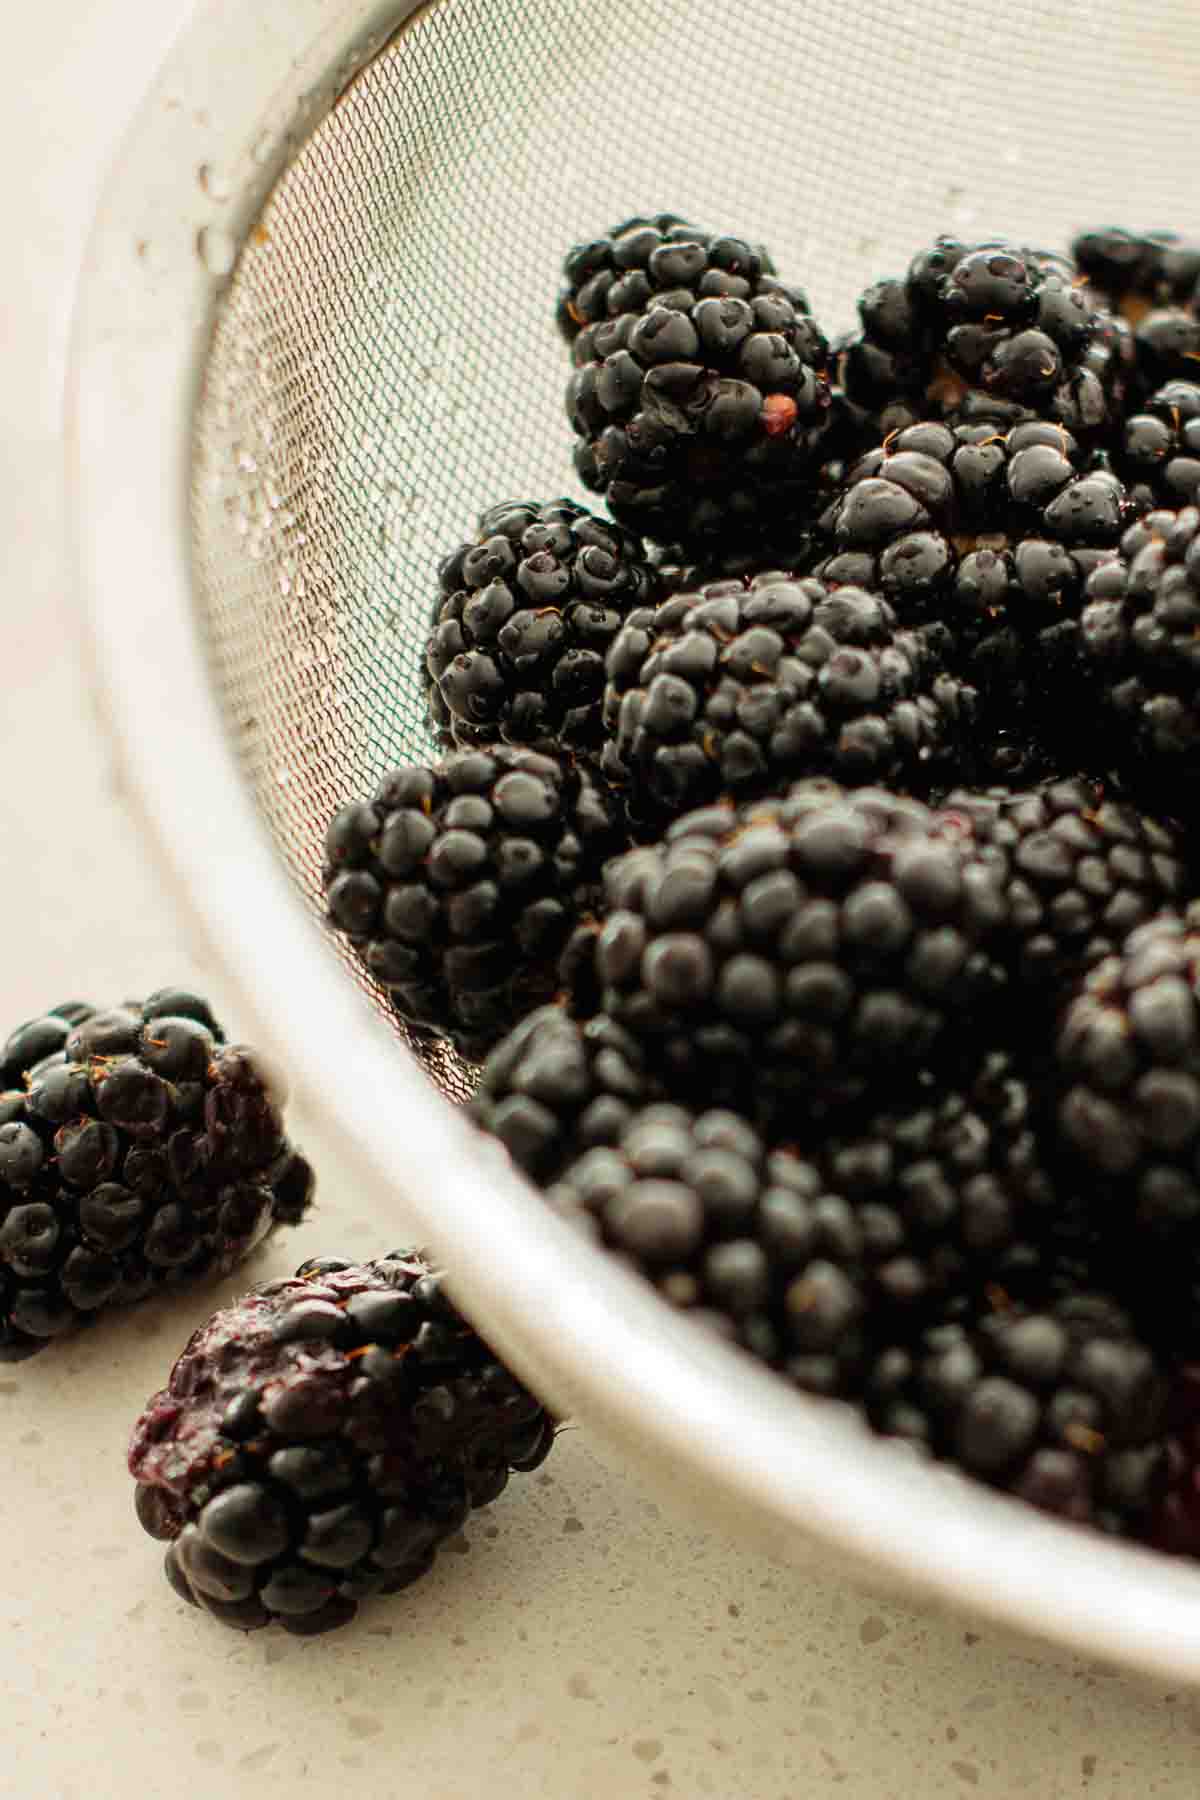
The fresher the fruit, the better the jam. Avoid using overripe blackberries for making jam for a fresher taste as well for the jam to set properly.
Choose deep black, just ripe blackberries for the best blackberry taste. Discard any blackberry that’s dried or spoiled and remove any leaves or stems.
Blackberries should be used when ripe to make jam, so you’ll get the best flavor. But it is good to add some under-ripe berries when making it. If you’ve got it, substitute ¼ cup of ripe berries for ¼ cup of under-ripe fruit.
That helps the jam to set faster, as under-ripe fruit has more pectin than ripe. Just don’t make it only with under-ripe berries, or it will compromise the taste: you need most of it to be ripe for a strong berry taste.
Before cooking, crush your blackberries with a potato masher or in the food processor.
I’m against pureeing them. If using a food processor, pulse twice or three times, or just until the blackberries are lightly crushed. Jams that have bits of fruit are more delicious!
🍯 Sugar
Never made jam in your life? Stick with the amount of sugar this recipe calls for.
Reducing the sugar can make a mess: your jam will take longer to set, and you might accidentally overcook it.
I know: sometimes we just want to reduce the consumption of sugar. But this ingredient has more than one role in this recipe.
The purpose of sugar is not only to make jam sweet: it also makes the jam set properly and acts as a preservative. Lessening the sugar will increase cooking time, and the final product will also not last as long.
What sugar should be used for jam?
If you’re a beginner and still have some trouble recognizing when the jam is set, stick with granulated or caster sugar.
🍋 Lemon juice
You can choose between lemon or lime.
Don’t skip it, though. Adding an acid when making jam is more important than you think for it to set. It’s not only responsible for a well-balanced flavor but also helps to activate the pectin present in the berries, helping the jam to firm up.
🍳 How to make it
It’s better to use a large bottom pan: you want to minimize cooking time and optimize water evaporation, so the more berries in direct contact with the pan, the better.
A flat-ended spatula or spoon is also helpful, as it’s easier to scrap the bottom of your pan with it while the jam cooks.
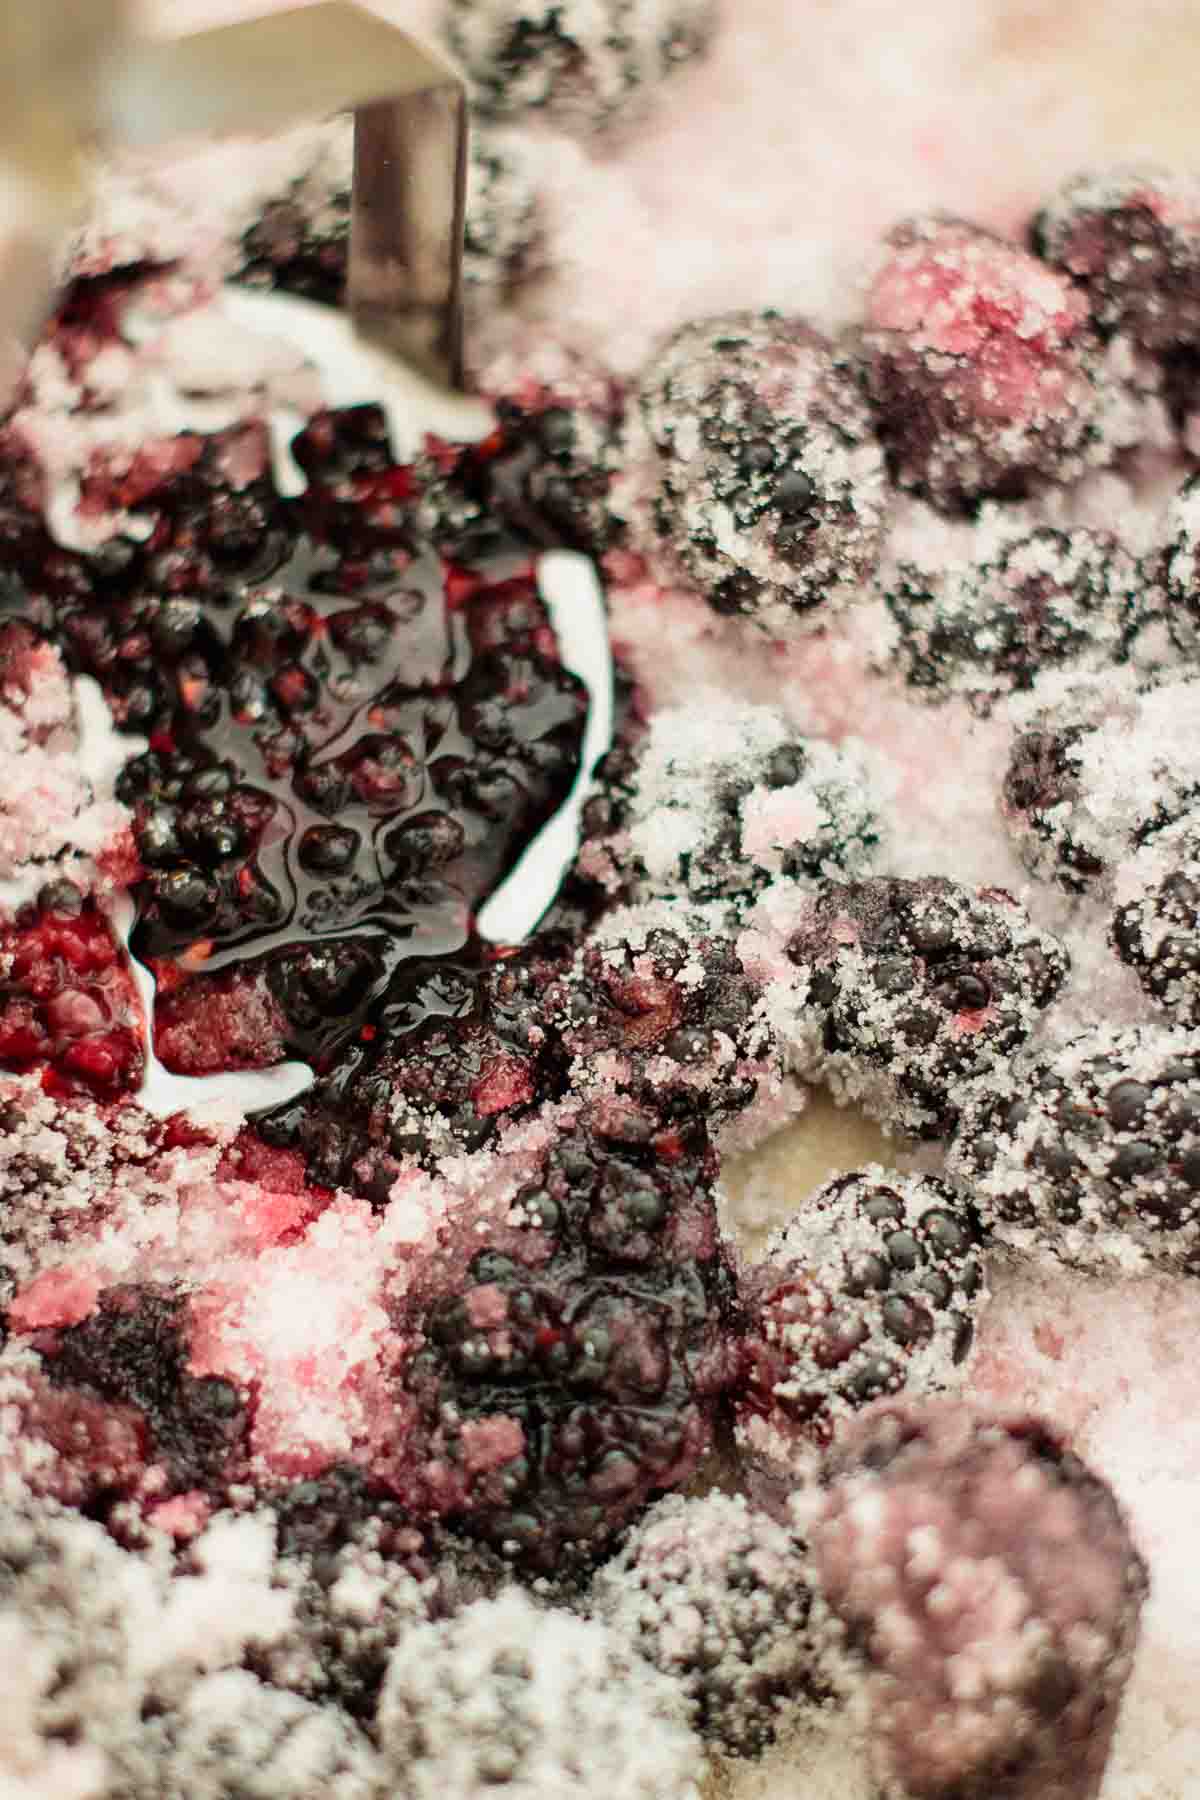
Start macerating blackberries and sugar until berries are crushed and mixed with sugar.
Transfer the berries and sugar mixture to a heavy-bottom pan and add the lemon juice. Cook over medium-low heat for about 15 minutes before testing for doneness.
During cooking, foam will form at the top. You can skim it as it forms, or you can leave it to dissipate while jam cooks.

Also, while hot, jam will look like it’s not set. You’ll know if it’s ready by making one of the two tests below.
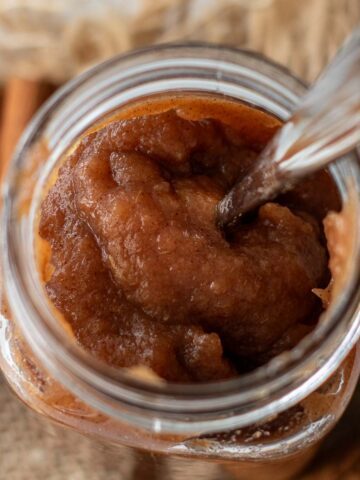
After ready, pour the jam into a sterilized jar, close the lid, wait for it to cool and then store it in the fridge. It lasts for up to 1 month in the refrigerator.
You can double this recipe, but don’t triple if you’re new to this. Pectin is super easy to overcook, and once it happens, it loses all its thickening properties.
Cooking smaller batches allows jam to get an even heat distribution. A larger batch won’t heat equally in the pan, taking longer to cook.
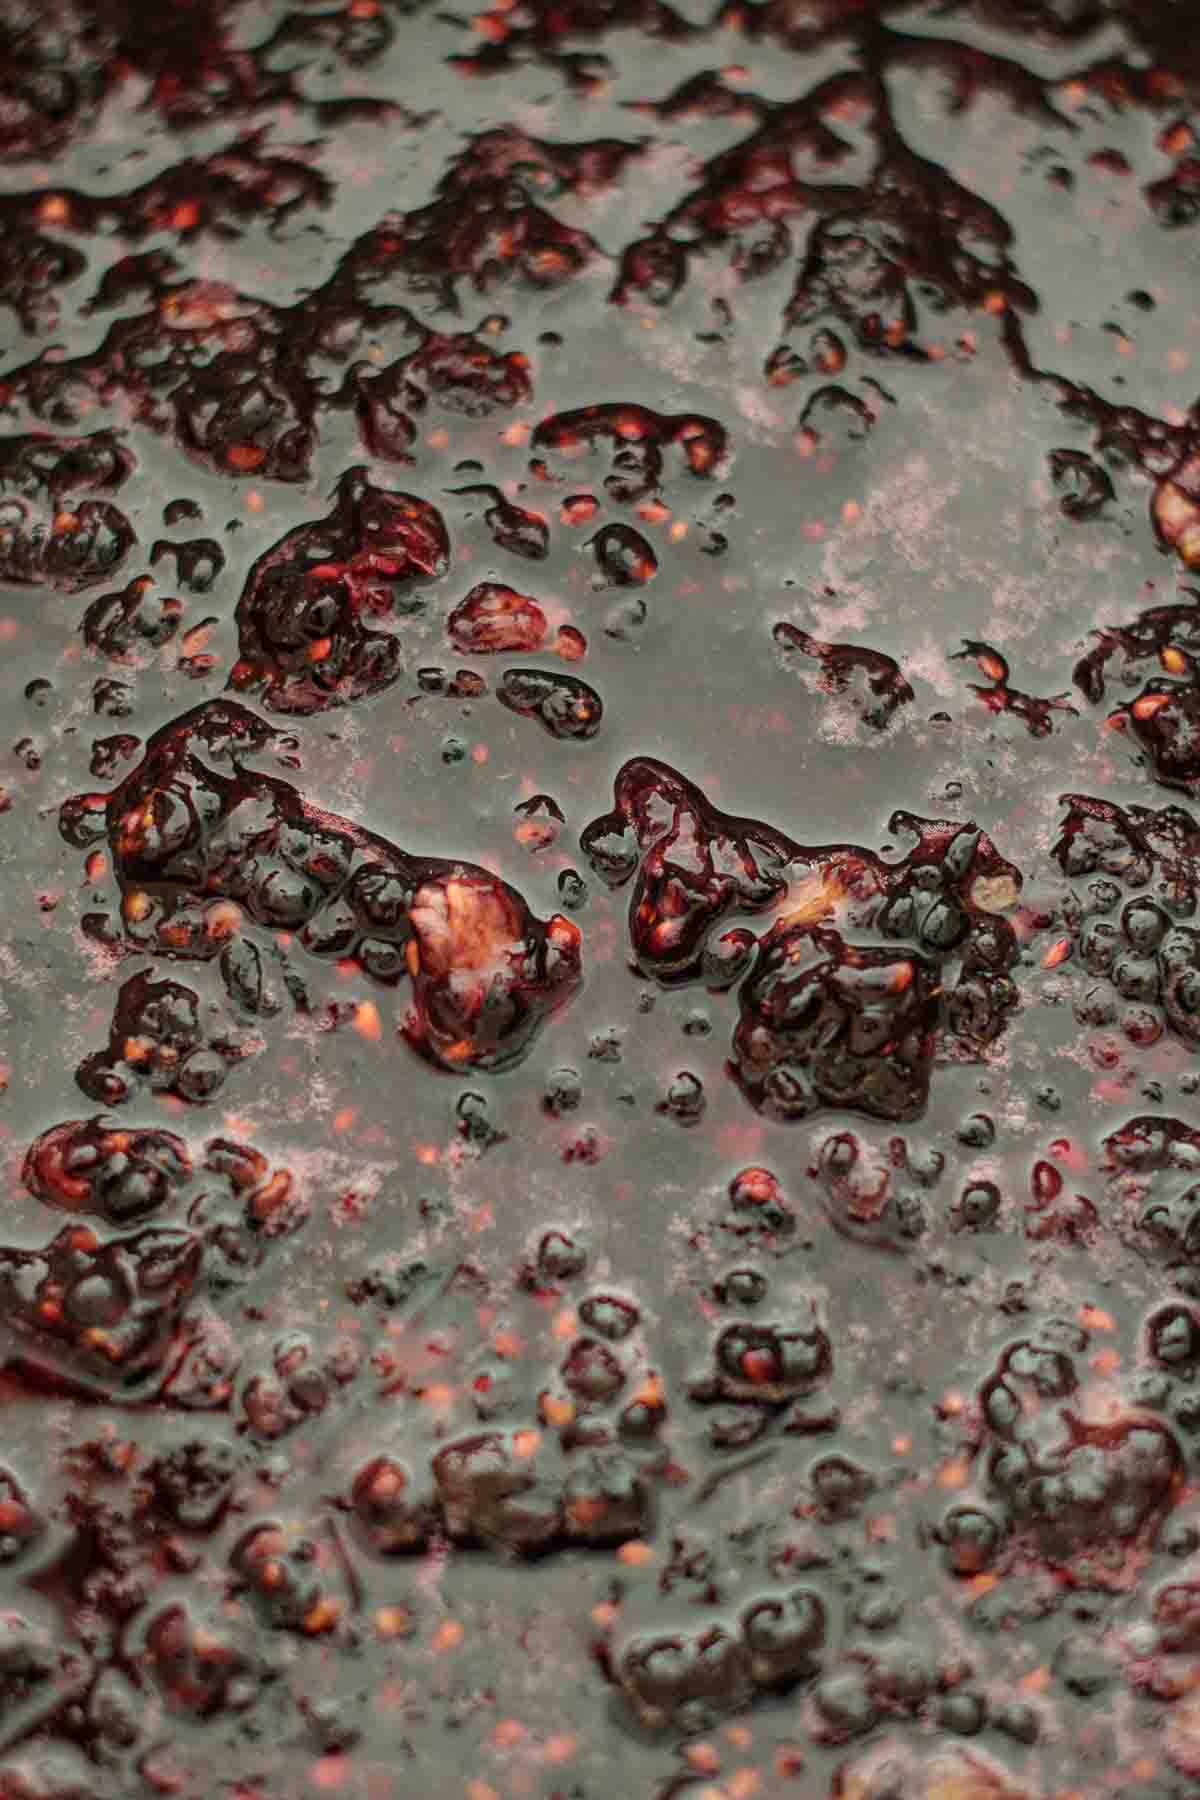
🥄 How to know jam is set
Thick enough to spread, soft enough to spoon: that’s how jam should be.
Lots of factors can affect the cooking time: the pan you’re using, how hot is your stove, if you coated or not the berries.
Always perform these to know if the jam is ready: the spoon and the wrinkle test.
For the spoon test, you’ll need a spoon and a good eye.
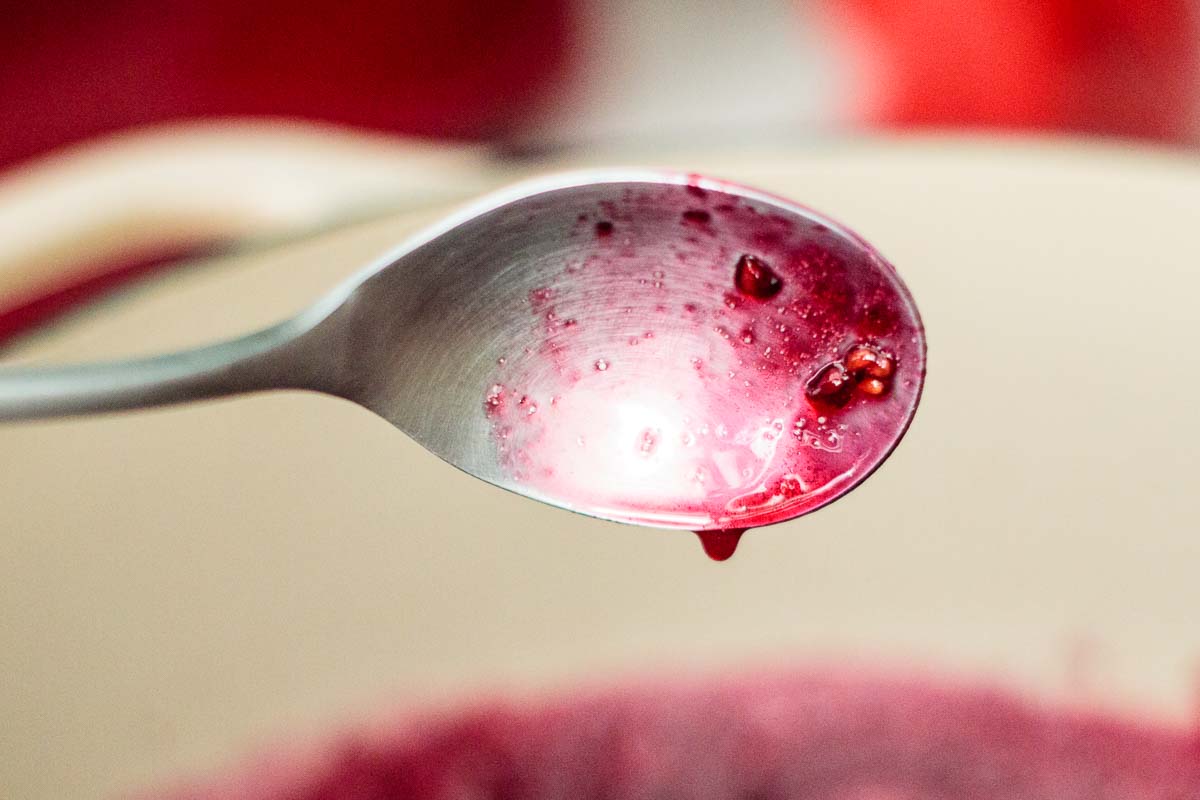
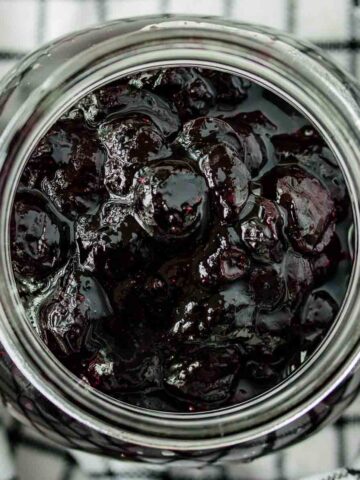
First photo shows jam just after the foam dissipated: still very liquid, definitively not ready.
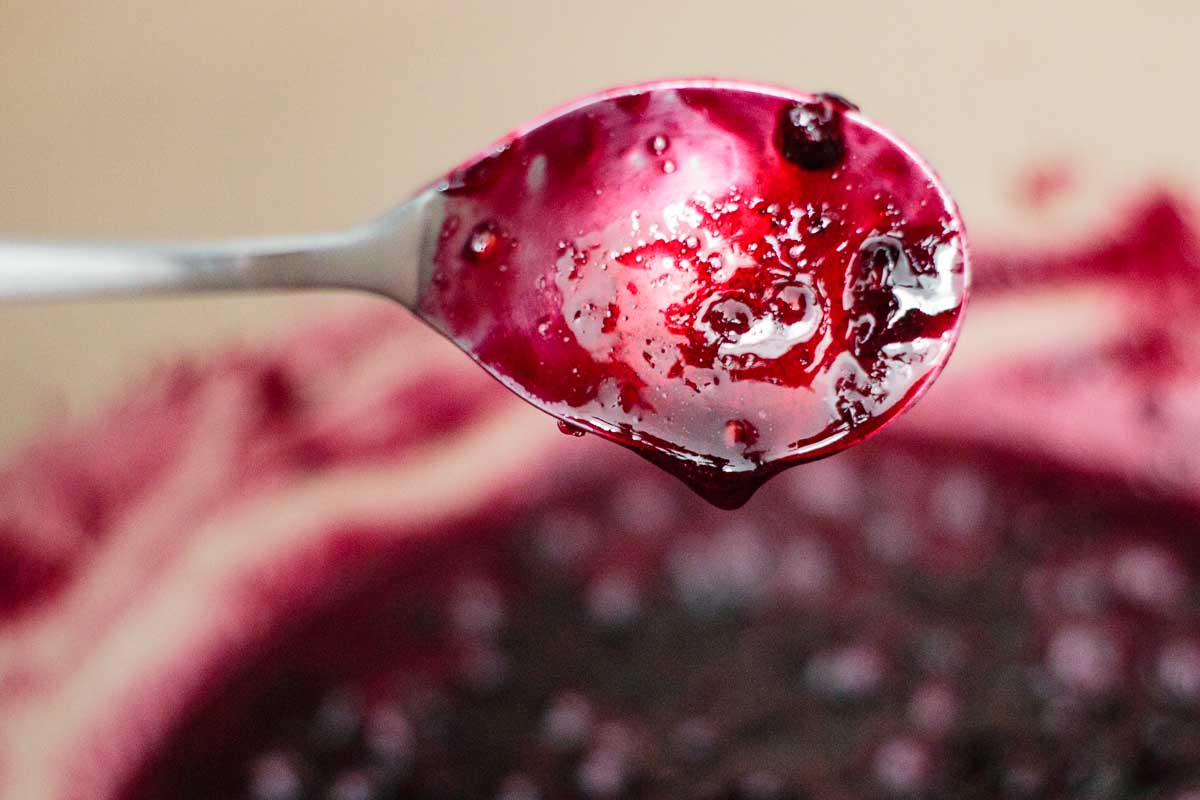
What you’re looking for is this: the jam needs to run down more together than in the first two photos. That usually happens after 20 minutes.
When ready, the consistency of the jam will change. It gets a thicker, glossier look.
For the wrinkle test, you’ll need a cold plate. Store one in the freezer just before beginning the recipe. Test by spooning a small amount of jam onto chilled plate and placing it back into the freezer for one minute.
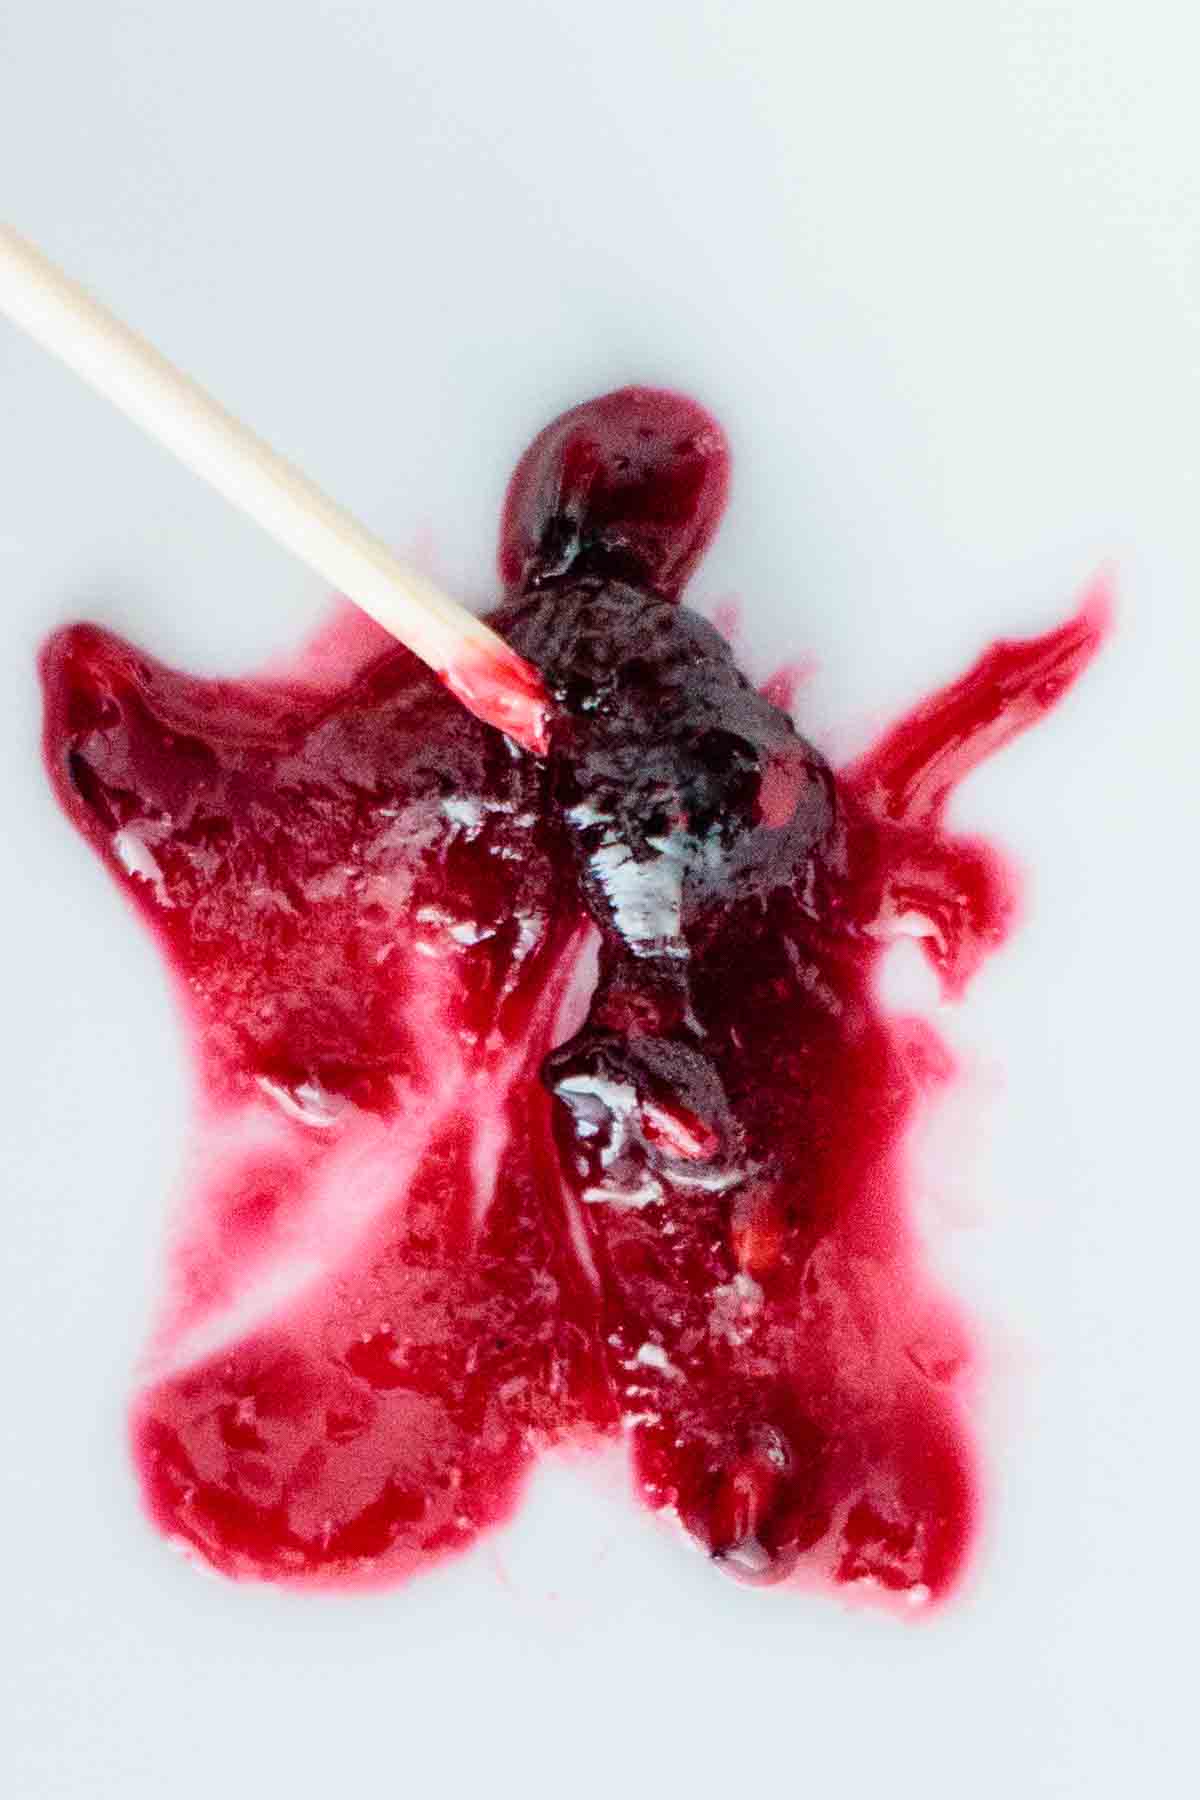
If the jam is ready, it should have a jam-like feel after chilled and when pushed, it should look wrinkled. Tilt the plate: if the jam runs, it’s not yet set.
💭 Tips for success
Sterilize your jars. That’s important both for canned and refrigerator jam. You can do that by running a hot cycle in your dishwasher (both cans and lids).
Sort blackberries. For the best jam, you need to discard bad berries: dried, moldy or mushy ones should go. Also, look for leaves, stems and little bugs, particularly if they were hand-picked.
Macerate blackberries and sugar 30 minutes before beginning. It helps to release juices from the berries, dissolving the sugar faster. It is important to fully dissolve sugar, as that prevents your jam from crystallizing as it cools down.
🍴 FAQ
If you’ve cooked for less than 15 minutes, you might need more cooking time. If you cooked for too long, there’s a risk you might have overcooked the pectin. Once it happens, it loses all its thickening properties.
Yes and no. Lemon helps with the thickening part, as it activates the pectin present in the berries faster. But blackberries have enough pectin to make the acid an optional ingredient regarding that. Lemon or lime juice DOES affect the final flavor, though, and it’s recommended for a tastier jam.
You can use frozen berries when making this blackberry jam. Let berries thaw before starting.
It will. Blackberry is a fruit with a higher pectin amount, so it doesn’t really need added pectin to thicken.
If canned, it should keep for up to 1 year. If stored in the fridge without canning, or after opened, it lasts for up to 1 month. And in the freezer, it lasts for up to 6 months.
If jam is too runny, you might have undercooked it. You can try cooking again and see if it thick.
If your jam is too thick, you probably overcooked it to the point it might have scorched. If the taste is off, there’s not much left to do. If jam tastes good, you can try reheating it with some water or neutral juice (like apple juice), to thin a bit. Or you can use the batch as filling for baked goods, like muffins, cakes or berry jam bars.
Because overripe berries have less pectin than ripe or under-ripe. If you’re using overripe blackberries, there1’s a risk of not get enough pectin from the fruit and the jam might not properly set.
Crushing berries help to release pectin faster, which helps to reduce cooking time and gives you a better jam. It also makes the sugar dissolve faster, preventing crystallization after cold.
📖 Recipe
Blackberry Jam without Pectin
Ingredients
- 2 cup blackberries
- ⅔ cup caster or granulated sugar
- 1 ½ tablespoon lemon or lime juice
Instructions
- Sterilize the jar and lid you’ll be using for storing jam with boiling water, or run a hot cycle into the dishwasher.
- In a large bowl, place blackberries and sugar, macerating the ingredients until all berries are crushed and juices released. Let it rest for 30 minutes.
- Place a small plate in the freezer just before start cooking your jam for the wrinkle test.
- Transfer berries and sugar mixture to a heavy-bottom pan and add lemon or lime juice.
- Cook over medium-low heat for about 15 minutes before checking for doneness for the first time using the spoon test (check notes for how to perform both wrinkle and spoon test).
- After 20 minutes, jam should be close to set, if not ready. Check with the wrinkle test. If it passes, jam is done. Remove from heat.
- Transfer jam to sterilized jar and close the lid. Wait for it to cool before storing in the refrigerator.
Anonymous
Absolutely delicious, I’ll be making this again!
Gordo
Just letting it cool down before I try it. Could you substitute other berries (strawberries, raspberries etc) to make the jam?
Tatiana Kamakura
Yes, you can use other berries for this recipe. Cheers!
Brandi
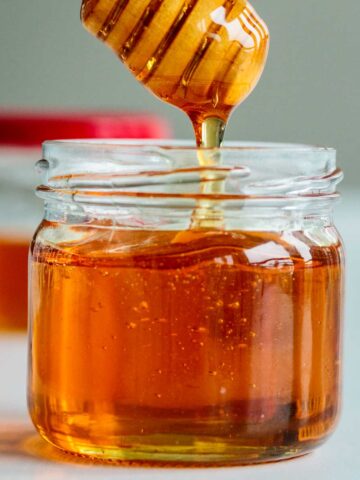
Can you substitute honey for the sugar?
Tatiana Kamakura
Hi Brandi, yes you can substitute sugar with honey. As honey is a bit sweeter, instead of using 2/3 cup, 1/2 cup of it might do the job.
Cheers!
Angel
How long will it keep?
Milk and Pop
Hi Angel!
If stored correctly, it will keep for at least a month in the fridge. You can chose to can it if you know how to, and store it canned in your pantry for about 1 year.
Grandma K
Can’t wait to try your recipe. Have always used pectin.
Milk and Pop
Hi Grandma K!
Hope you make a delicious jam! Tell me how it went 😉
Cheers!