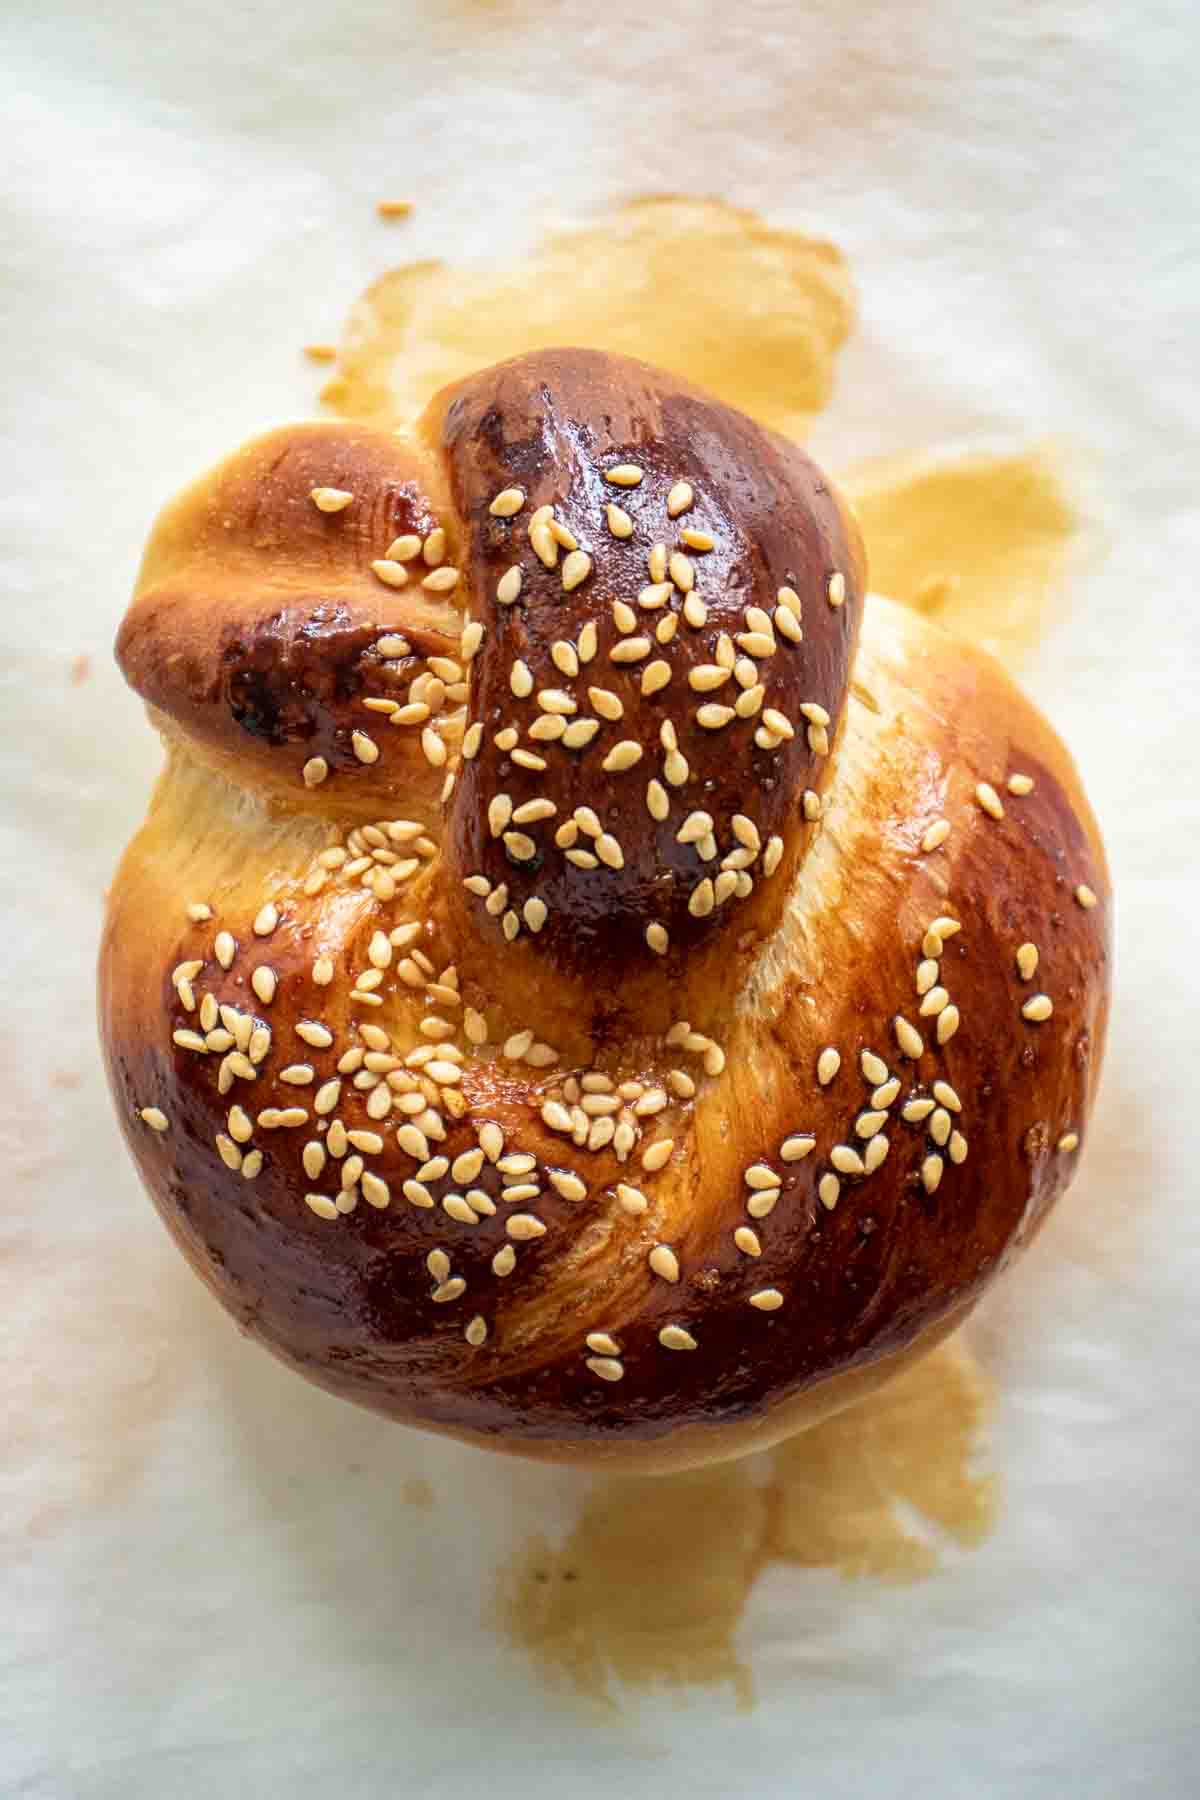
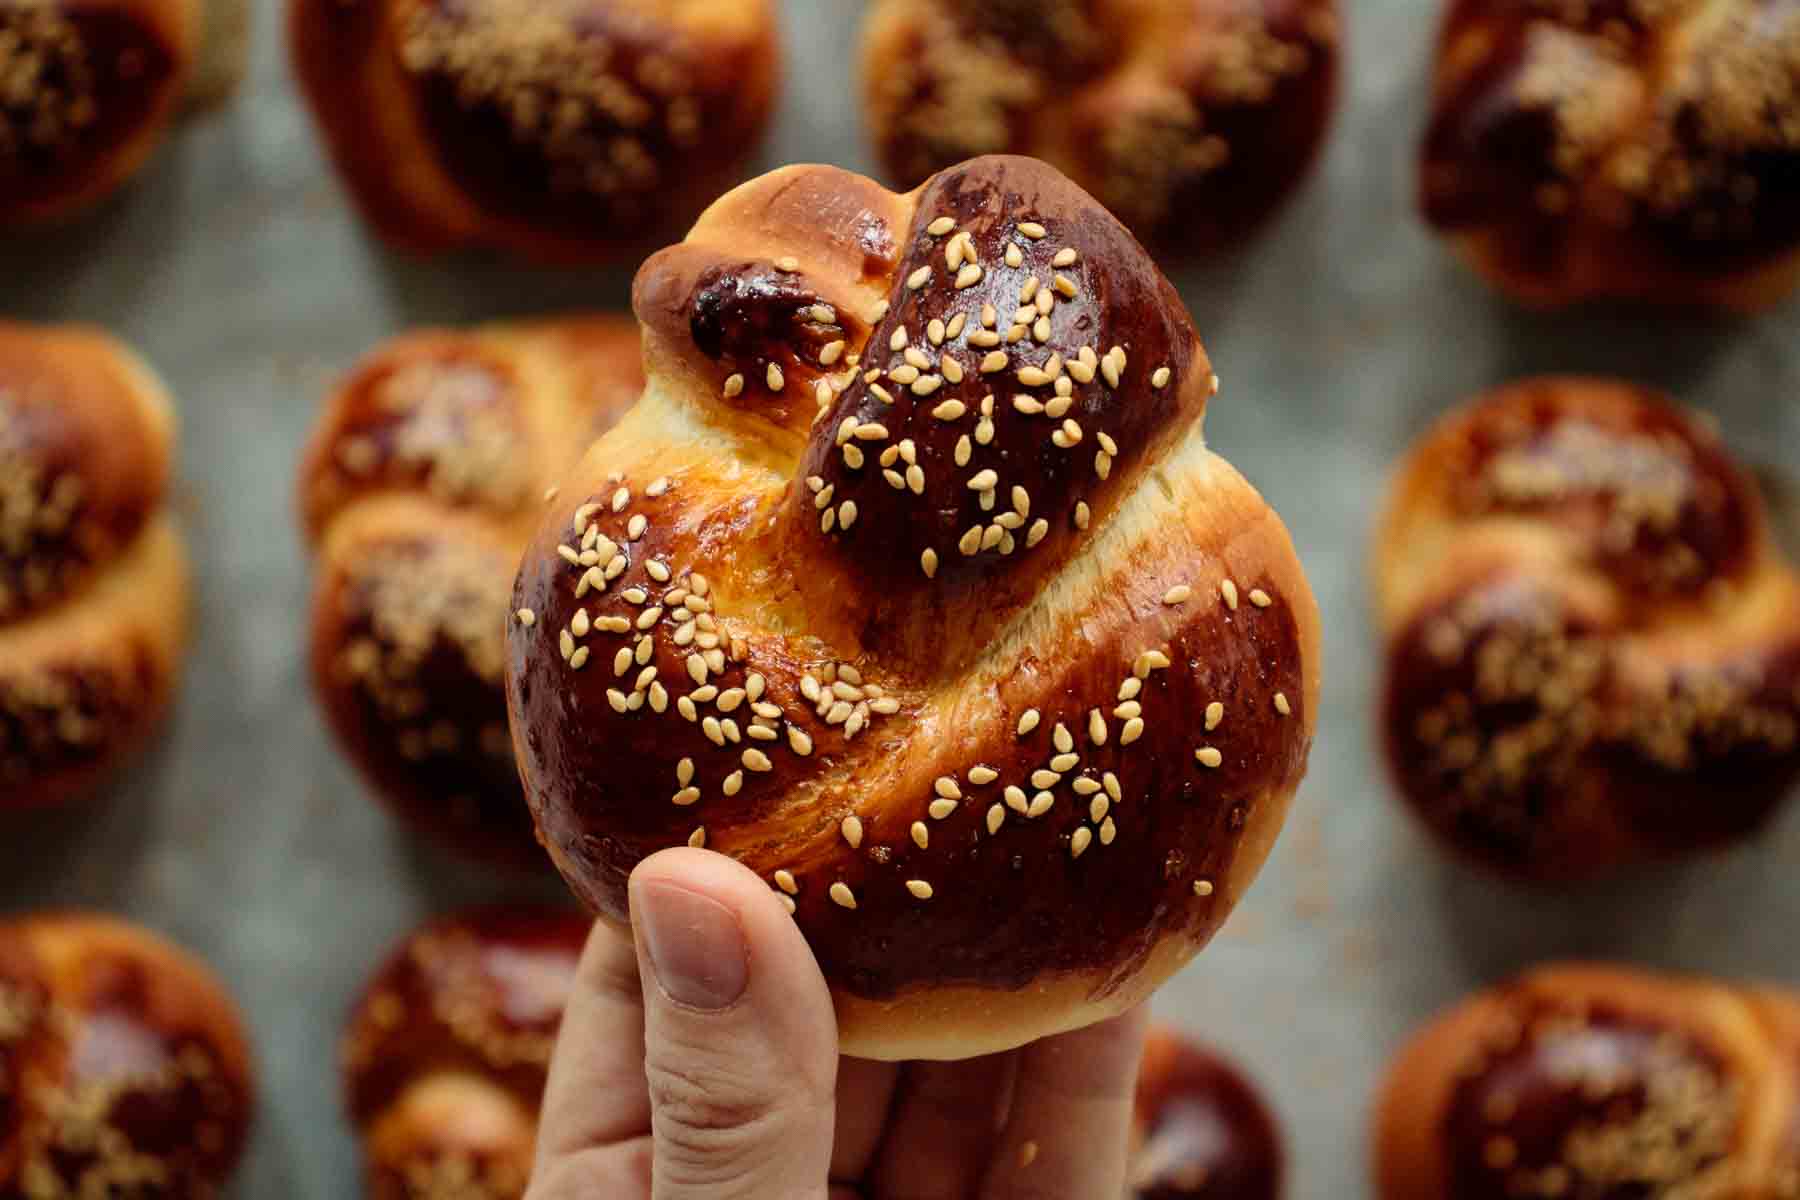
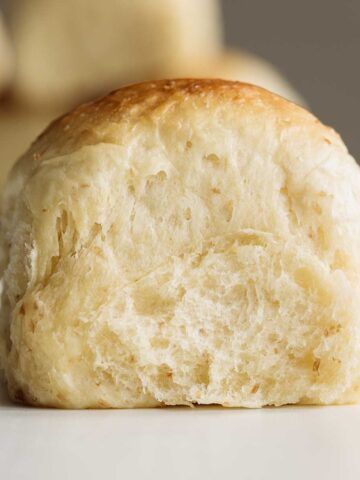
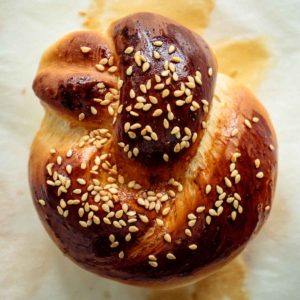
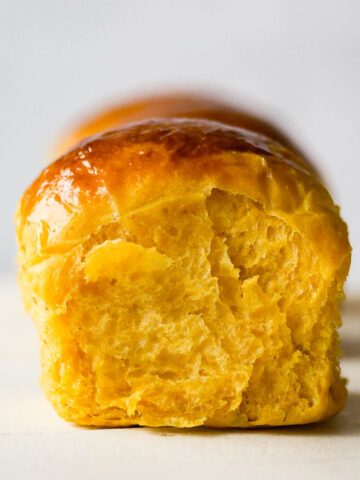
These Challah Rolls are fluffy, dairy-free, and flavorful knotted buns. Baked until golden brown and topped with sesame seeds, they're a great option for weekdays sandwiches, holidays and gatherings.
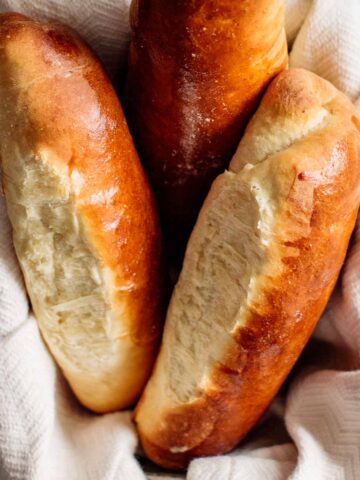
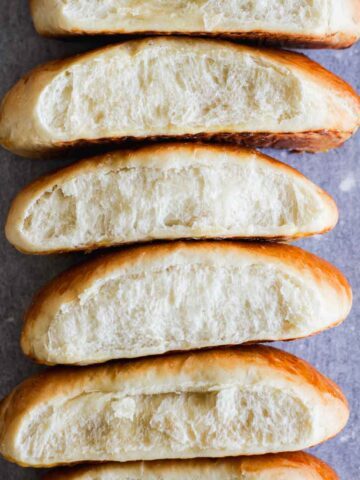
If you're a fan of homemade bread, you should try try this easy and dairy-free sandwich bread! Looking for the perfect cheese bun? I have the best cheddar cheese buns for burgers and sliders!
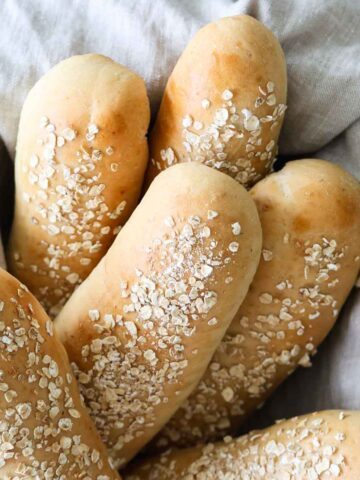
And if you love trying new bun recipes, these focaccia rolls are always a success!
Jump to:
🥐What’s a challah?
Challah, a Jewish bread associated with religious traditions, is a type of yeast bread like a brioche, but with no dairy on it.
The dough is enriched with eggs, but a challah asks for oil in place of butter, and that's the main difference between the two breads regarding ingredients. While brioche has a good amount of dairy, a challah will usually have oil added to the dough.
🥖Why make these mini buns
- These rolls are not just stunning, but perfect for mini sandwiches - just like my crusty sandwich rolls;
- They’re a delicious dairy-free bread option;
- All ingredients used are pantry staples you can find in any grocery shop!
I have a step-by-step both in photos and video below, so you can get this recipe right on your first try.
📃Ingredients and substitutions
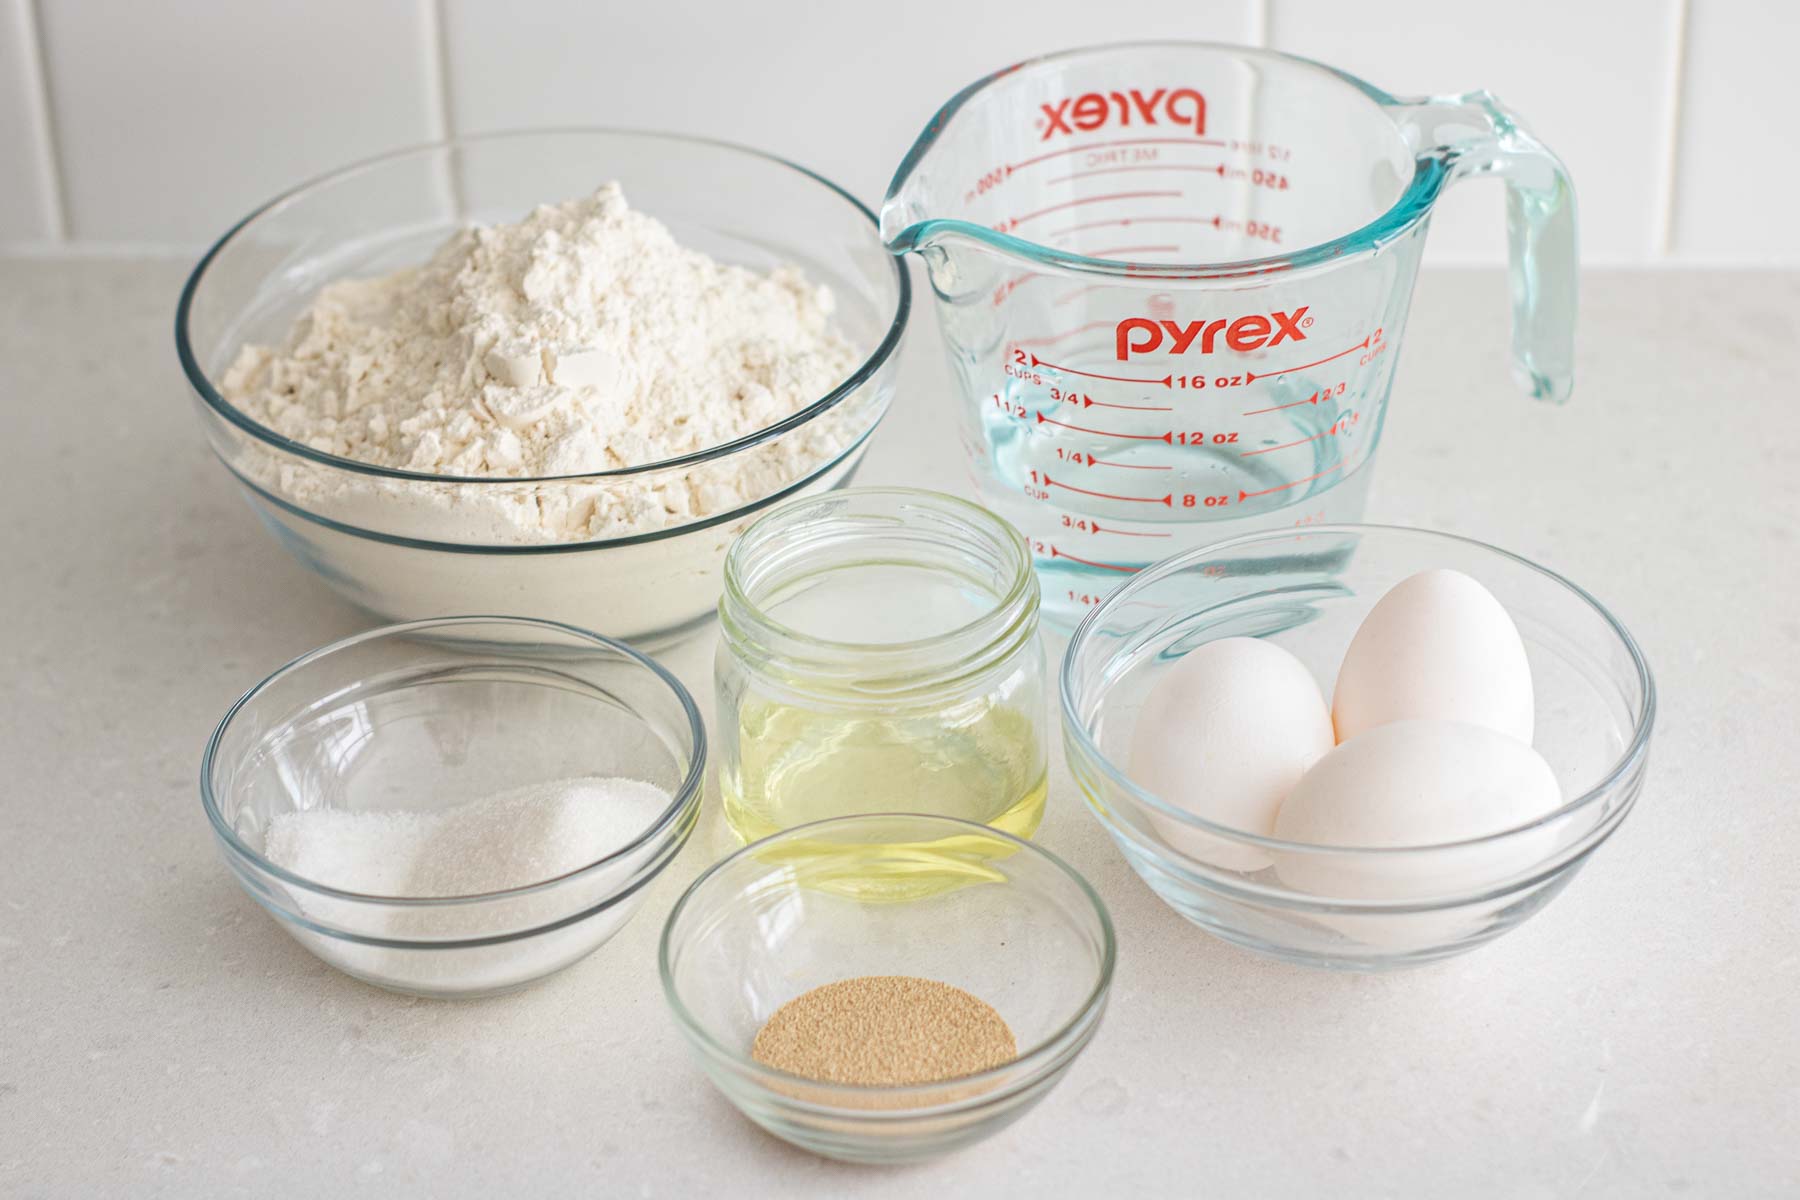
These rolls have a slightly sweet flavor (same level as my famous cheesecake factory brown bread), but they're not a sweet bread. For making them, you'll need:
Flour. We're using all-purpose flour to get a fluffy challah roll. It's possible to make it with bread flour if preferred.
If you want to add whole wheat flour, use no more than half the amount of white flour asked in this recipe. Using whole wheat will make a drier dough, so for each cup (130g) of whole wheat used, add 4 teaspoons more of water.
Salt. I like to use kosher salt, but you can also use fine sea salt.
Sugar. I use granulated or caster sugar for this recipe. Can be substituted for honey or brown sugar. If you use brown sugar, it will add a slightly caramel taste.
Oil. Canola or any vegetable oil, coconut or olive oil works for this recipe. You can substitute it for butter if not making this recipe dairy-free.
Sesame seeds for topping (optional). You can use both black or white sesame seeds.
See the recipe card for full information on ingredients and substitutions.
🥣How to make the dough
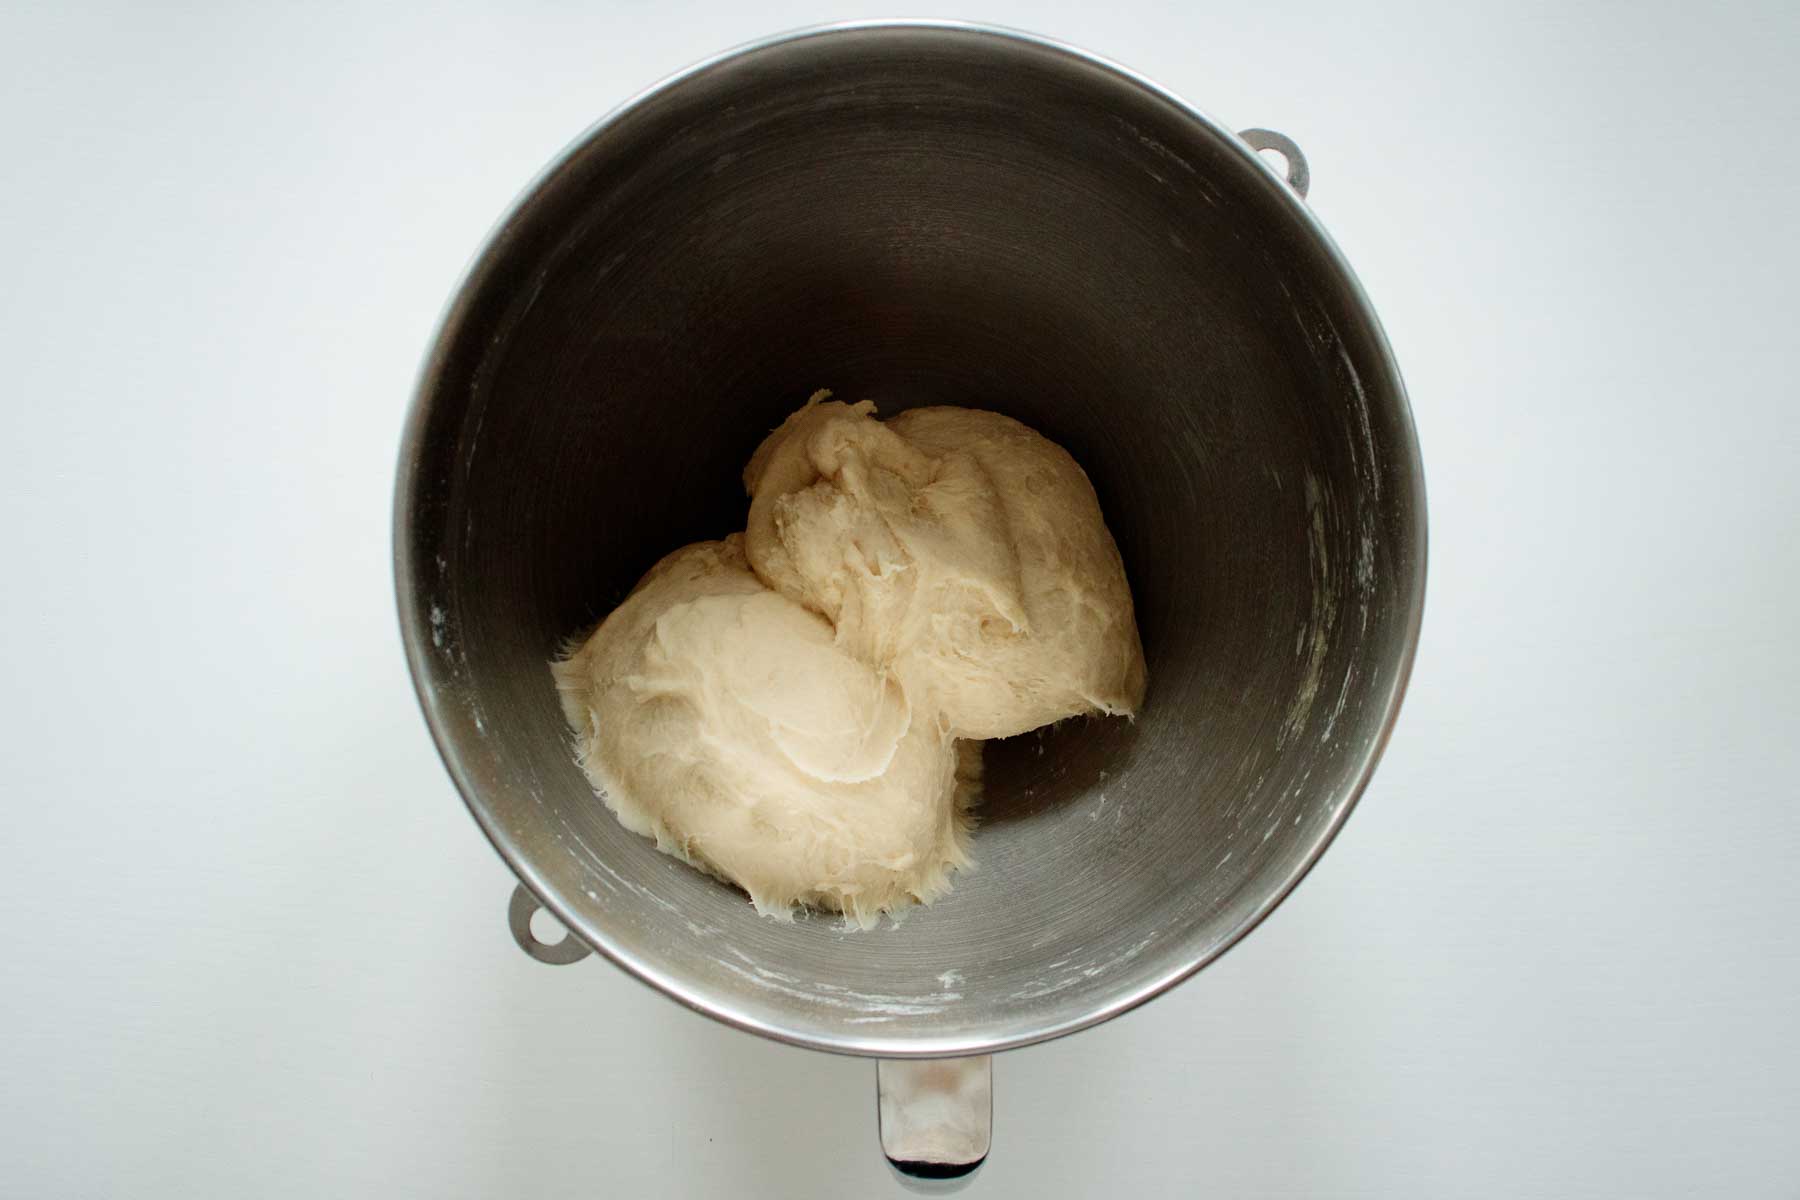
Step 01. Using a standing mixer or hands, knead dough until smooth.

Step 02. Place it in an oiled bowl, and let it rise for 1h30 to 2h, or until it doubles in size.
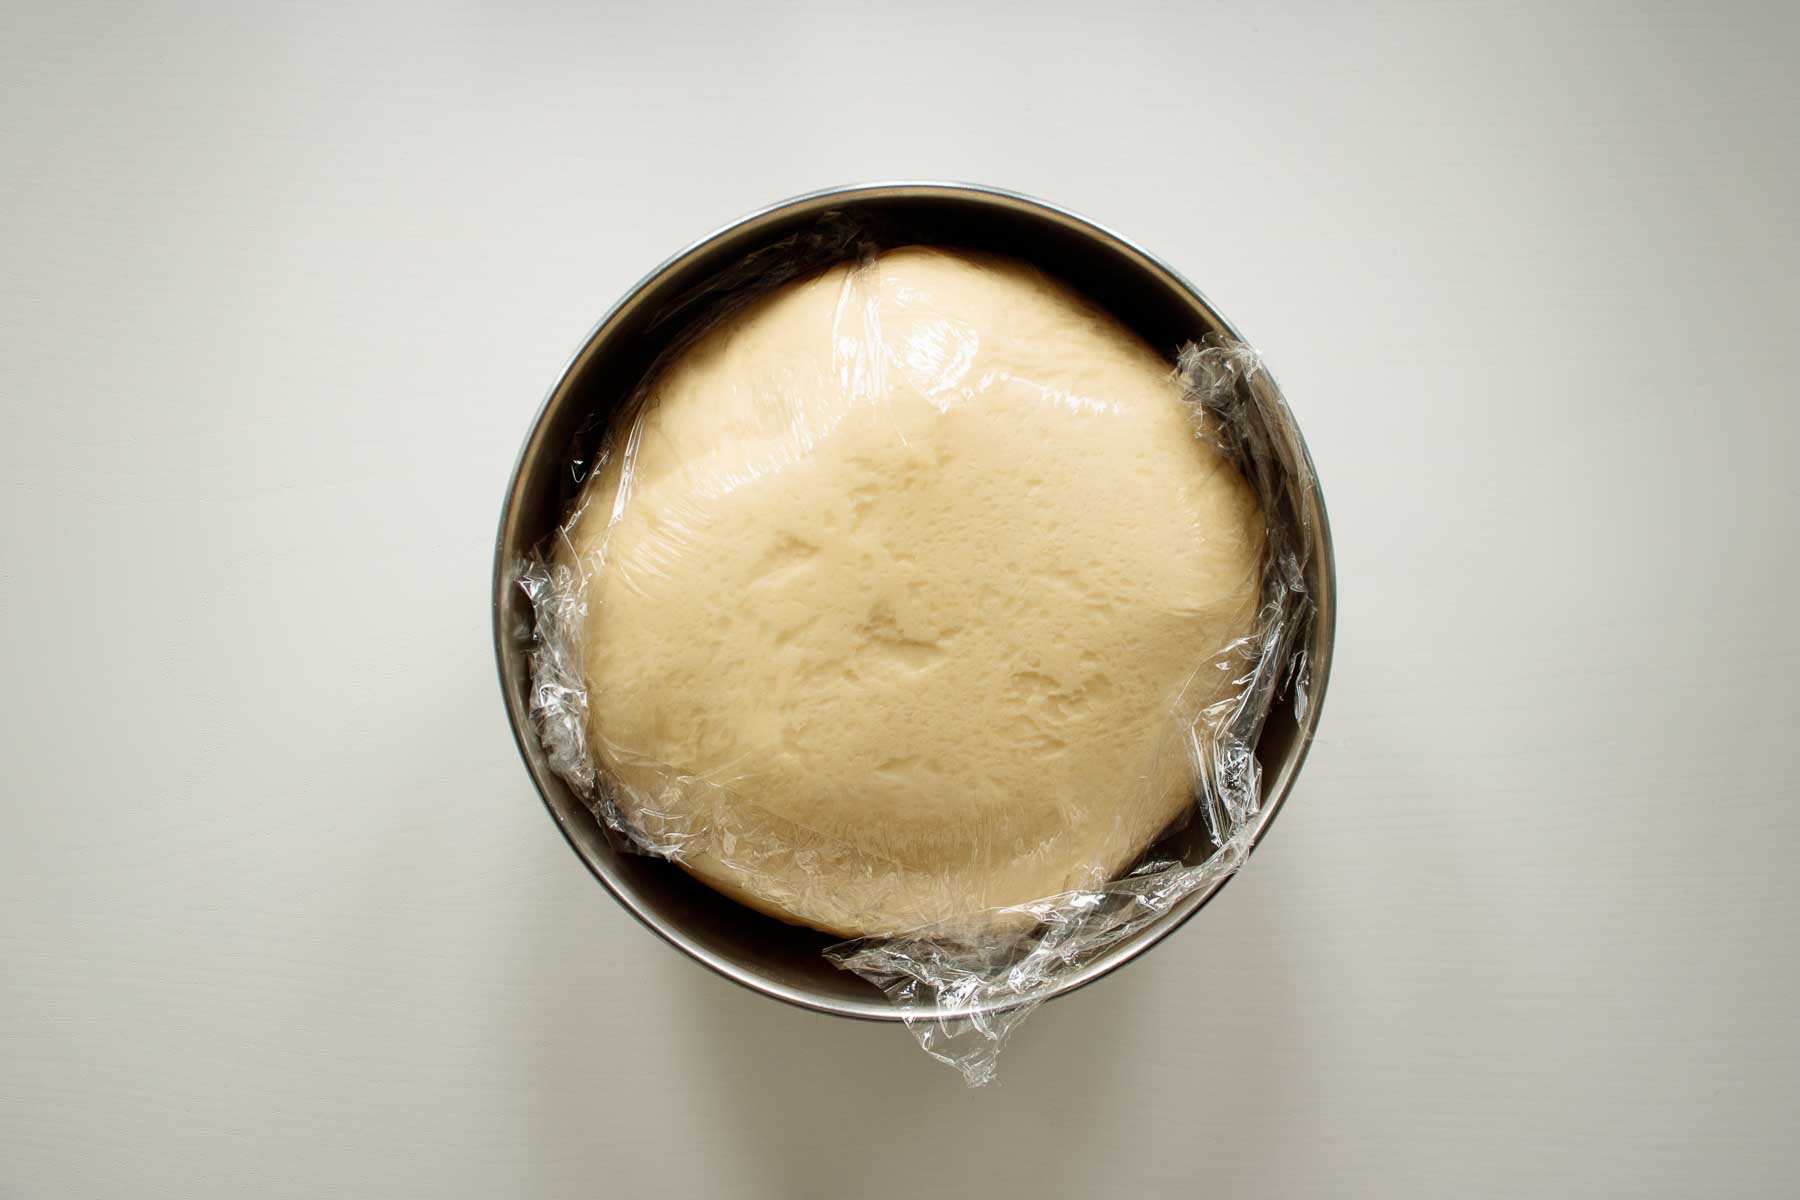
Step 03. After 1h30, dough will be doubled.
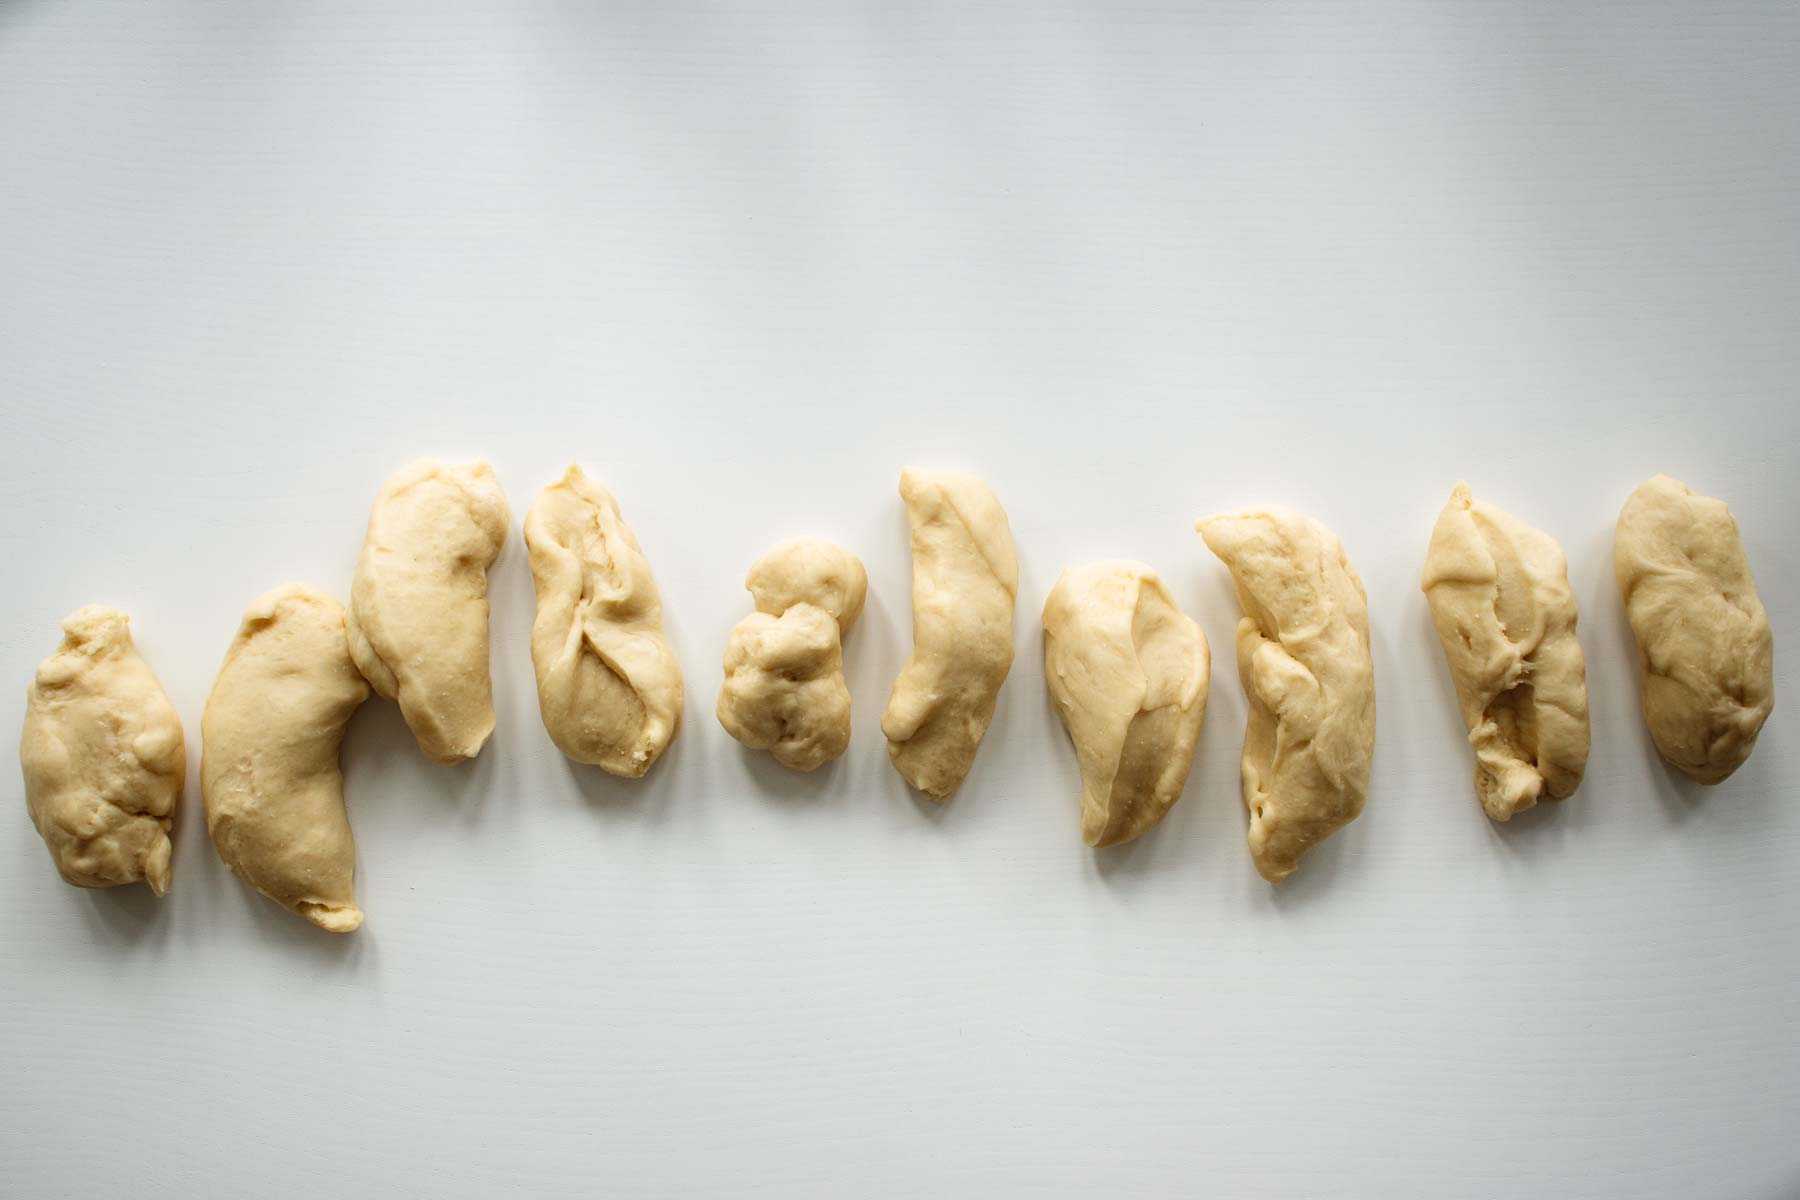
Step 04. Divide into 8 or 10 equal pieces, and let it rest for 5 minutes (it's easier to shape that way).
You can leave the dough rising overnight. After the first rise, when the dough has doubled, store it inside your fridge covered with plastic wrap. The next morning, leave dough at room temperature for 5 to 10 minutes, then resume shaping.
🥐How to shape the rolls
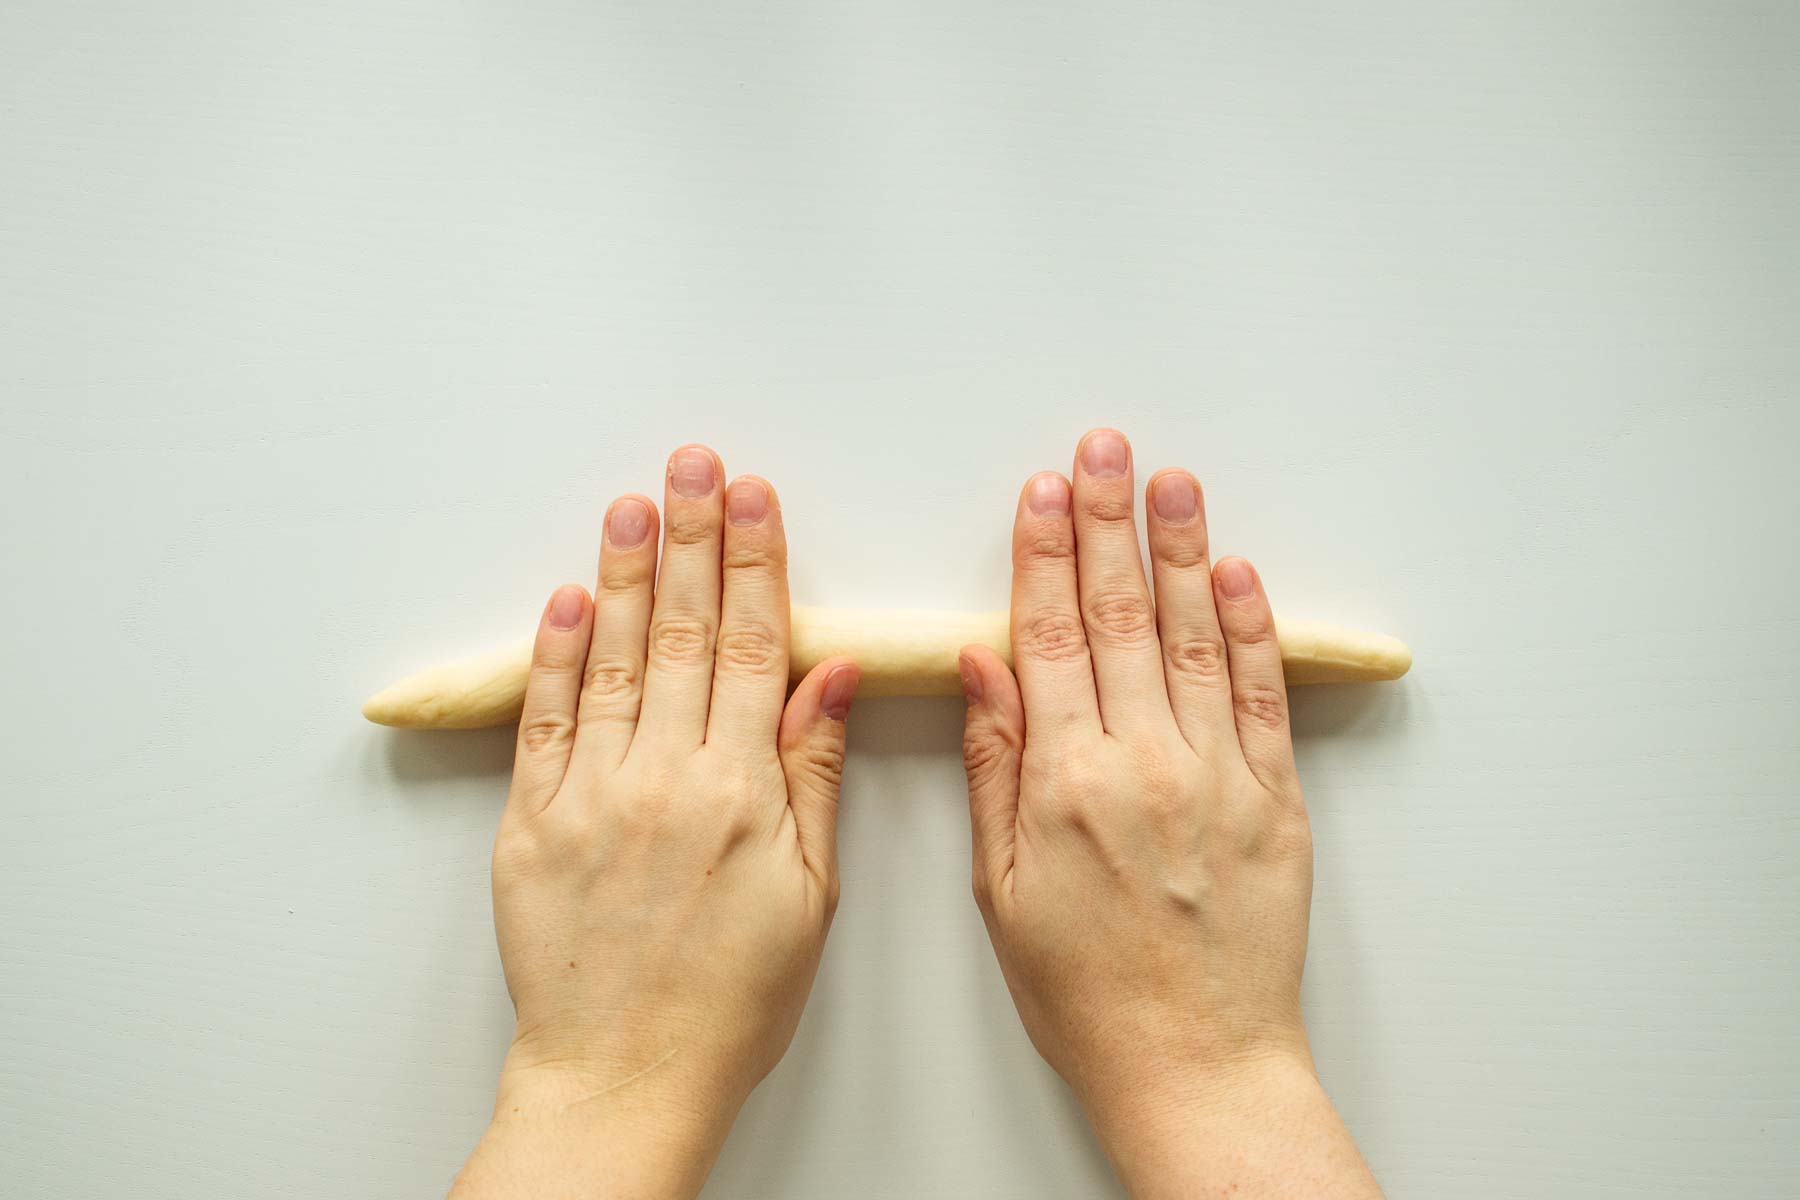
Step 05. Roll each piece open in a long rope.
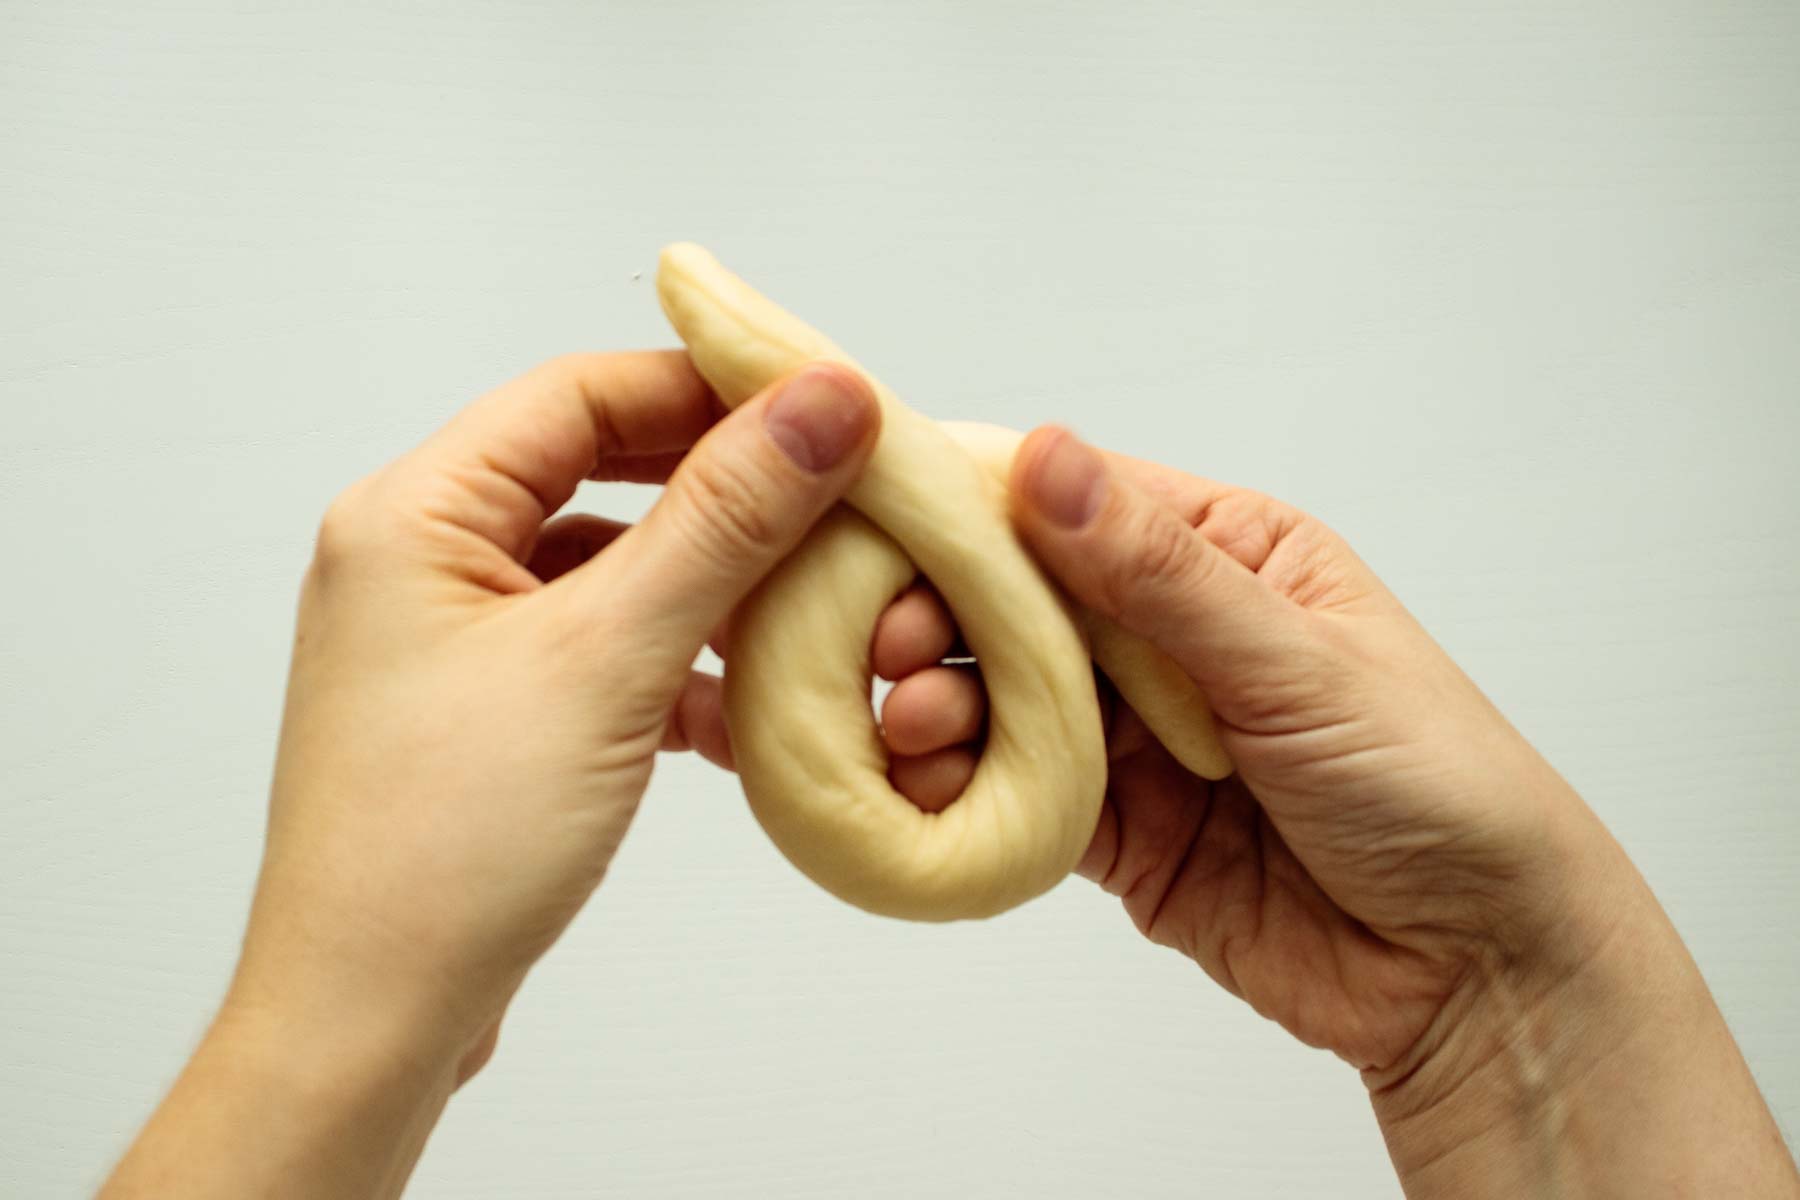
Step 06. Start a knot.
Step 07. Twist it around.

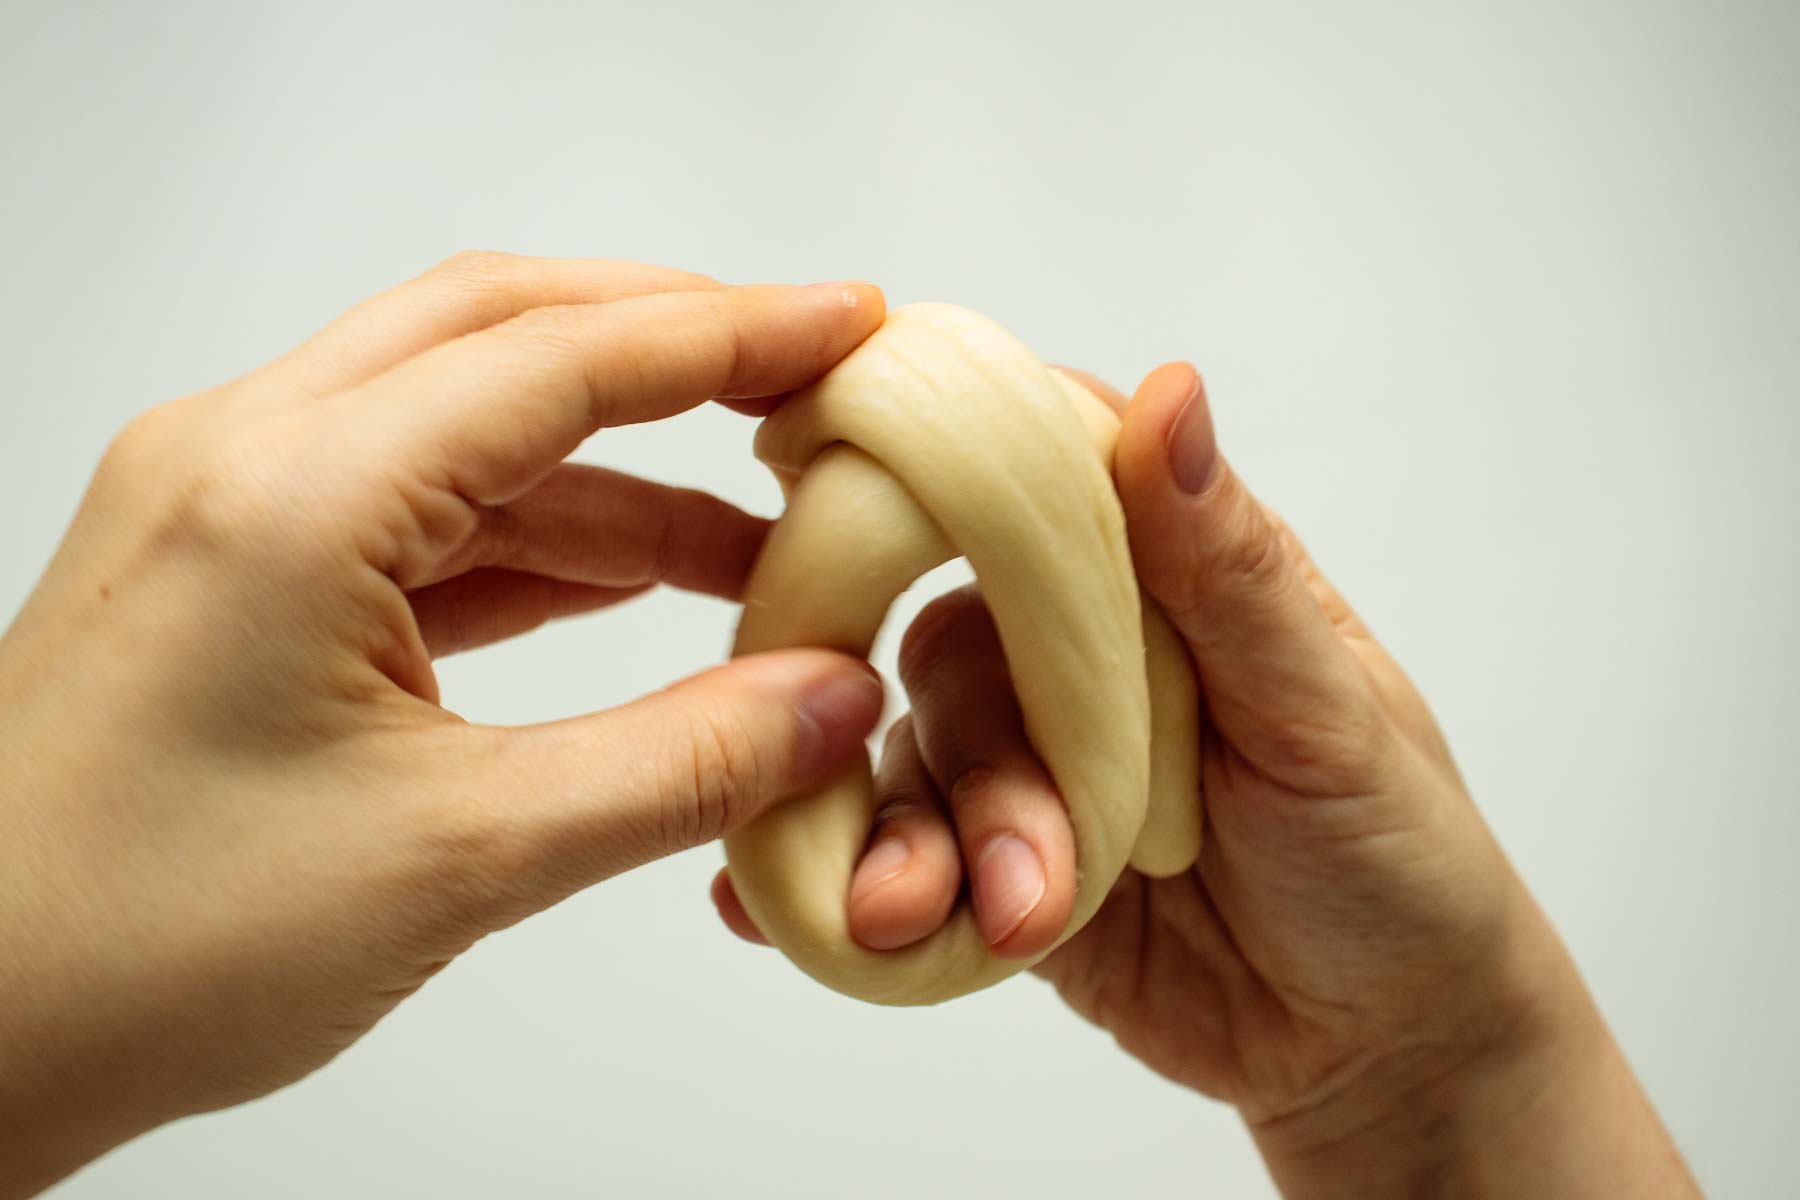
Step 08. Tie the dough, pinching the ends of the knotted dough under itself.
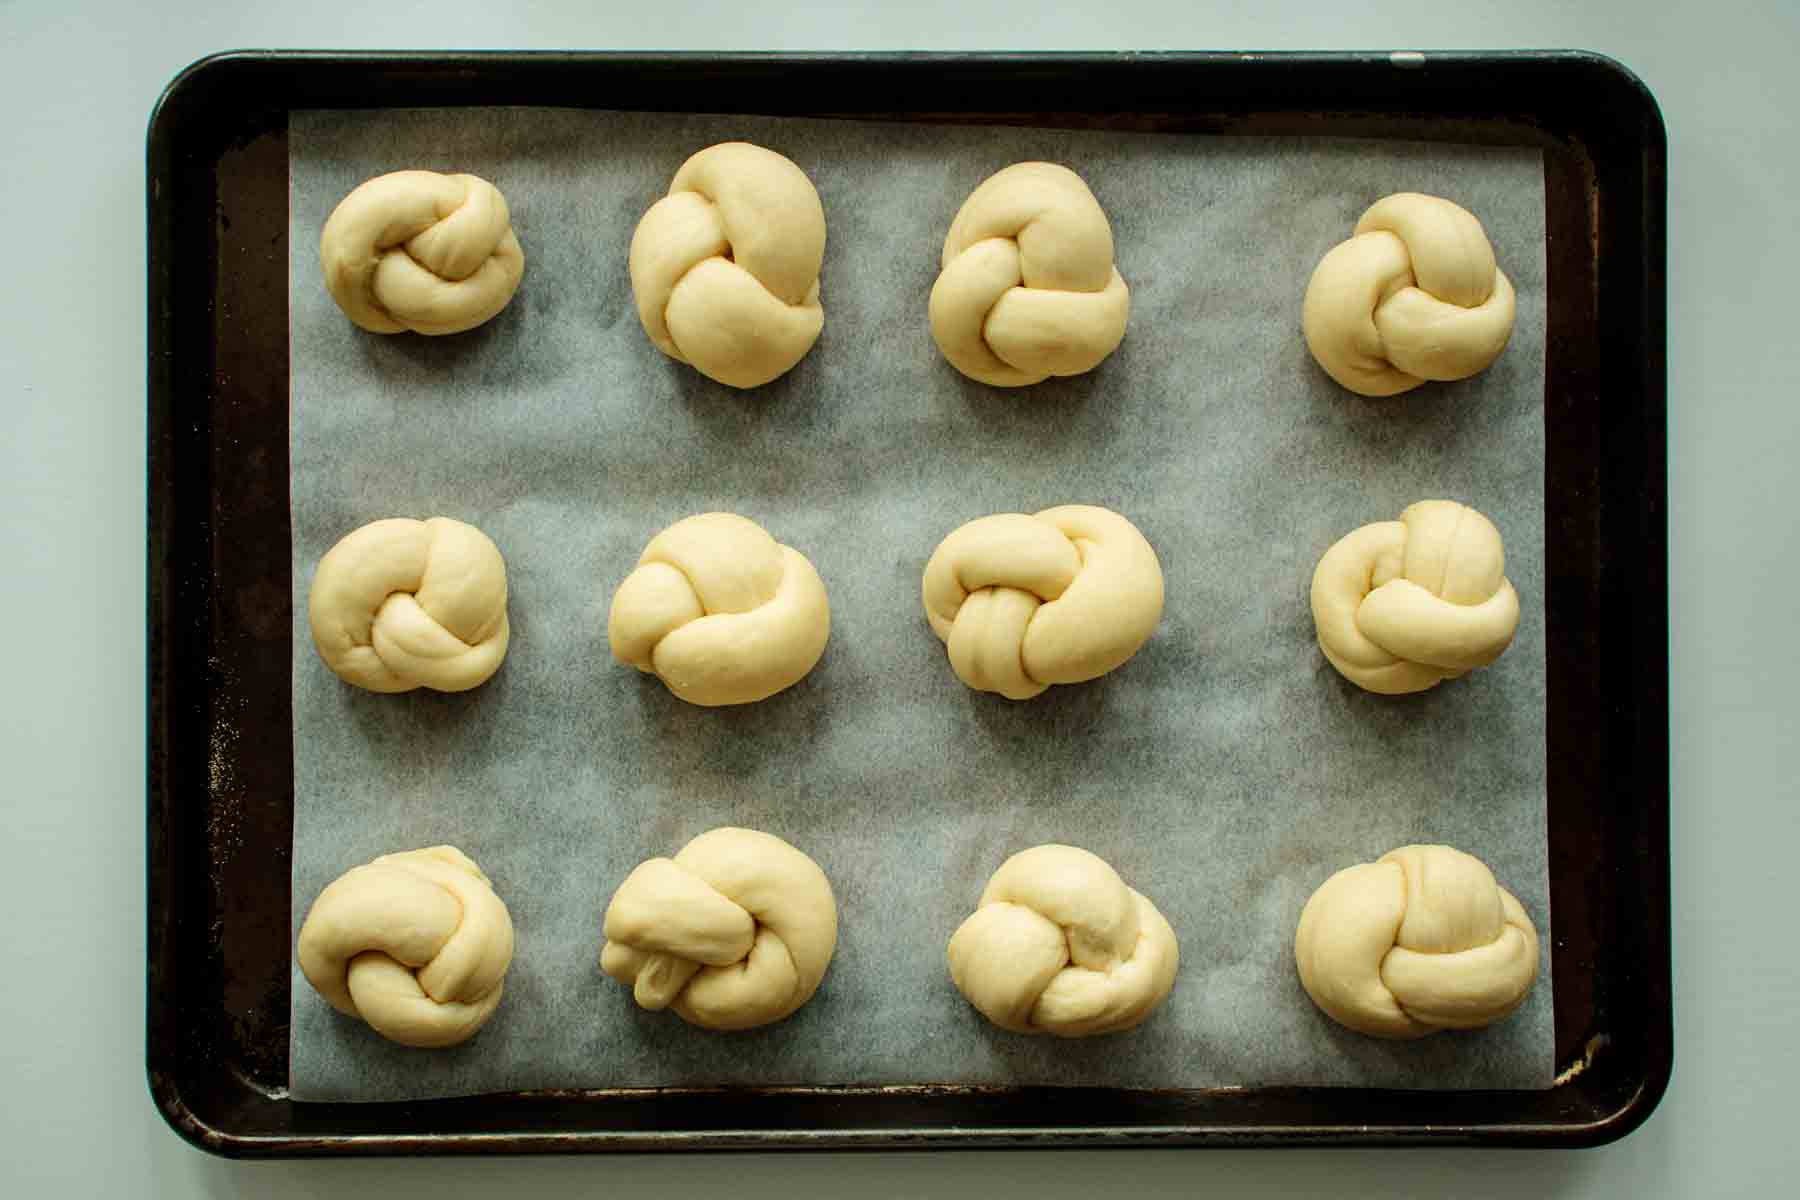
Step 00. Place shaped rolls into a lined baking sheet, letting them rise for 40 minutes. They will look puffy, and feel light.
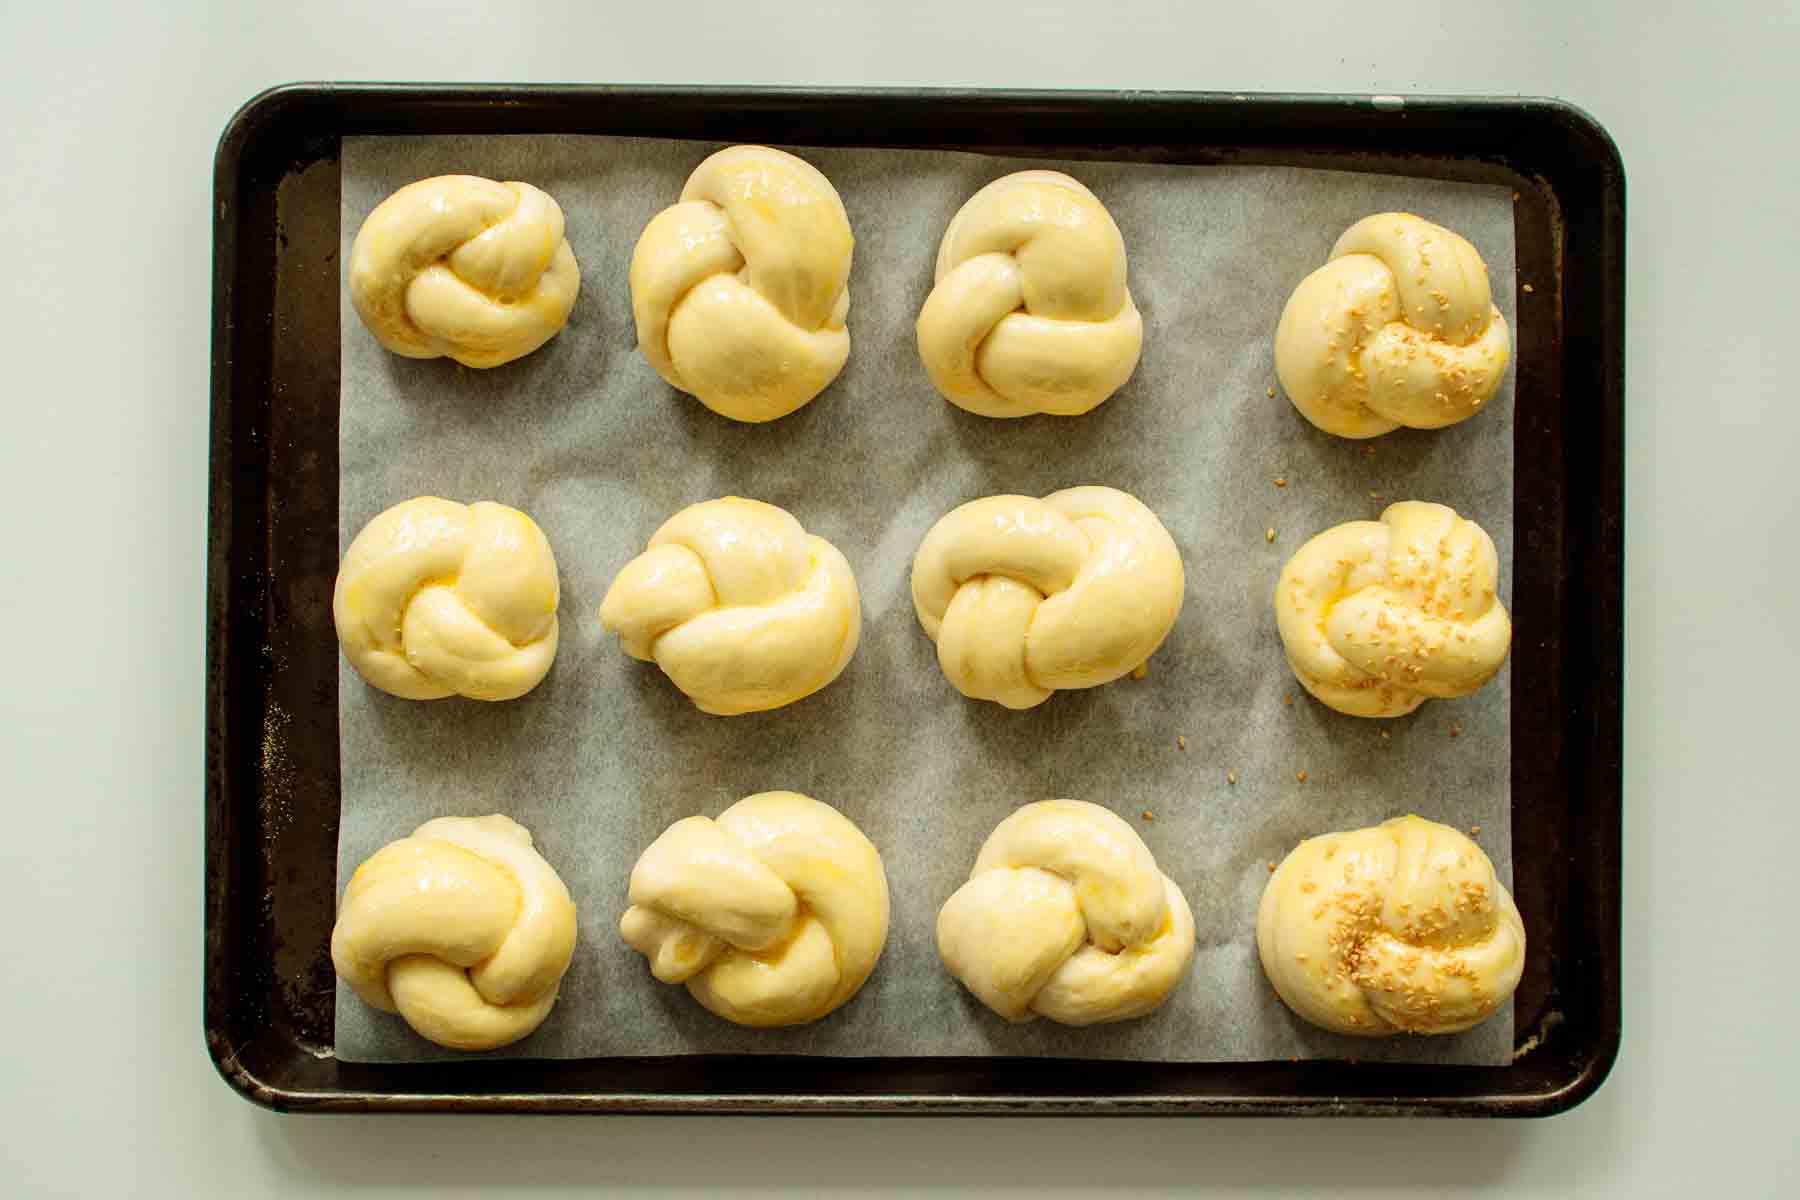
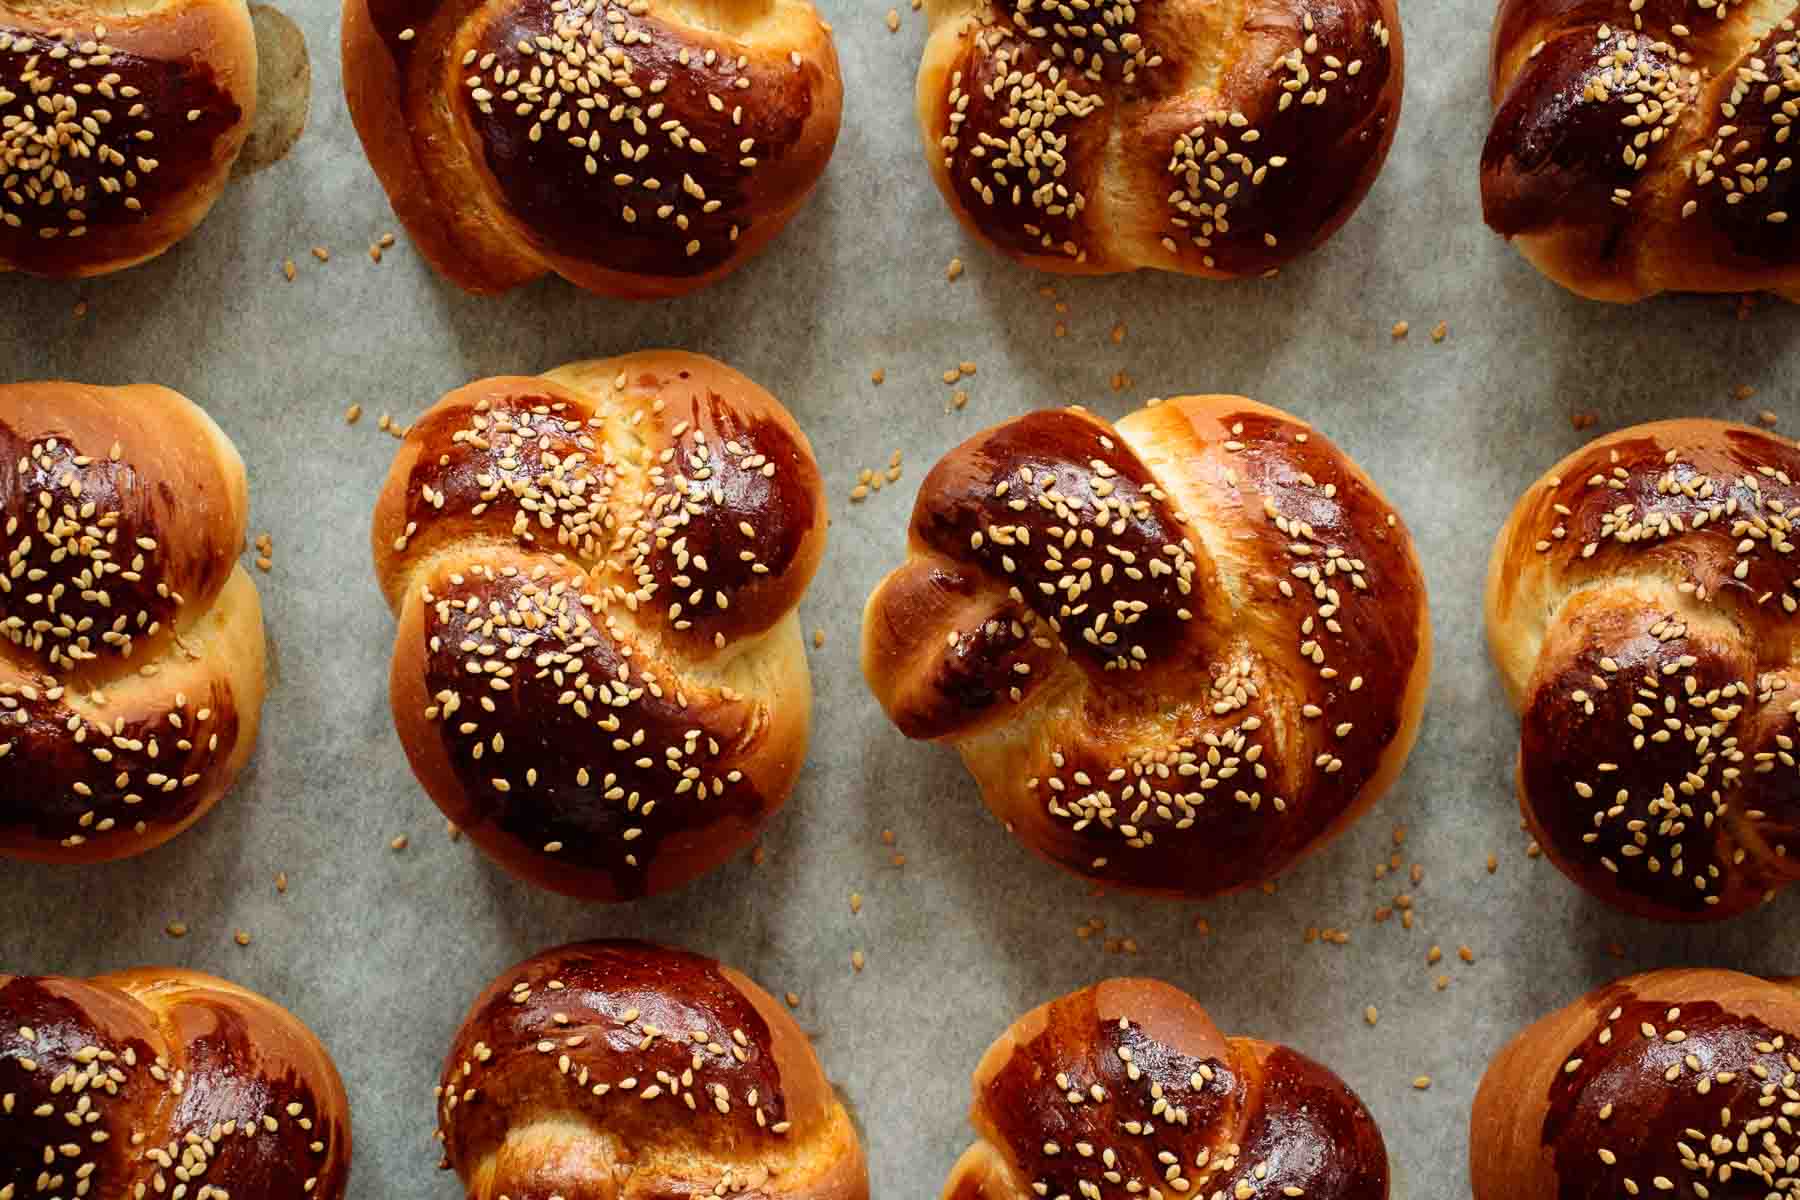
Step 10. Brush the egg wash and top with sesame seeds (if using). Bake in a preheated oven for 15 minutes, or until golden on top.
🕛Baker's schedule suggestions
My baker's schedule when I'm baking these buns for dinner:
- 4 pm: Mix the dough ingredients together, and shape dough into a smooth ball, placing it into a oiled bowl and covering it.
- 4:10 pm: Let the dough rise until doubled. If you have a proofing basket, or if your oven has a proofing mode, use it!
- 5:40 pm: Punch down the dough, and divide it into 9 equal pieces. Shape each challah roll, place into a lined baking sheet and let them rise for the second time.
- 6:20 pm: Brush each roll with egg wash, top with sesame seeds and bake until golden brown.
- 6:45 pm: After baked, wait a few minutes. They'll be ready for 7pm dinner!
My baker's schedule when I'm baking these buns for breakfast or lunch:
- 4 pm: Mix the dough ingredients together, and shape dough into a smooth ball, placing it into a oiled bowl.
- 4:10 pm: Let the dough rise until doubled. If you have a proofing basket, or if your oven has a proofing mode, use it!
- 5:40 pm: When the first rise is complete, store dough (covered with plastic wrap to avoid it to dry out in the surface) in the fridge overnight.
- 6am: Remove dough from fridge. Punch down the dough, and divide it into 9 equal pieces. Shape each challah roll, place into a lined baking sheet and let them rise for the second time. It can take a bit longer for them to rise, as the dough is cold. Let them rise in a warm spot.
- 7:00 pm: Brush each roll with egg wash, top with sesame seeds and bake until golden brown.
- 7:25 pm: After baked, wait a few minutes. They'll be ready for 7pm dinner!
✔️Expert tips
- Don’t forget to pinch the ends of the knotted dough under each roll. Doing that prevents the shaped challah rolls from unraveling while baking.
- It's best to use a kitchen scale to measure ingredients. Did you know that every cup of flour can weight differently? This recipe is in both grams and cups, but using cups can give you a different amount than the one asked. If you use cups, make sure you know how to measure flour properly to get the best result.
- If you're baking during cold months, use lukewarm water. I find that doing so aways helps me during winter, when my kitchen is colder. Just remember: never use hot water when baking why yeast. Hot water kills the yeast.
- Never use cold water when making bread: that can double the riding time, or even make your yeast inactive and ruin the recipe.
- Don't forget to preheat the oven for this recipe! Do it 15 minutes before baking.
🙋🏻♀️Questions you might have
Did you pinch the ends of the knotted dough under itself? Doing so prevents the challah rolls from splitting while baking.
Usually the reason is not letting the dough proof enough or using an expired yeast. Check if your yeast is still good for baking. Also, never add hot or cold water to the dough, let it rise in a warm spot, and always preheat the oven before baking.
Yes, you can add raising to the dough. Do it when kneading the dough, adding from ½ to 1 cup of raisings in the last 2 minutes of kneading.
🫙Storing and freezing
After cooled, store challah rolls in a break keeper or an air tight container. They’re good for 3 to 5 days. Never store bread inside the fridge.
Challah rolls freeze well. For freezing, I usually do it after baking, using a freezer safe plastic bag. Place rolls inside, push all the air out and seal bag before storing in the freezer. It keeps from up to 3 months.
To reheat frozen rolls, preheat oven to 350° F and bake them for 5 to 8 minutes.
🥐More buns and rolls recipes
If you tried this Challah Rolls Recipe, please leave a 🌟 star rating and let me know how it goes in the comments below!
📖 Recipe
Challah Rolls (Challah Buns)
Equipment
- 1 Baking sheet
Ingredients
- 500 g all-purpose flour
- 7 g instant yeast
- 7 g salt
- 50 g sugar
- 2 eggs large
- 180 ml water
- 50 g oil
- 1 egg yolk for egg wash
- sesame seeds for topping optional
Instructions
- In a large bowl, add dry ingredients, eggs, water and oil, and mix until dough is partially formed.
- In a standing mixer, using a dough hook, knead dough for 5 minutes on medium-low speed. The final dough will stick just a bit to the bottom of the bowl. If kneading by hand, do it for 10 to 15 minutes on a lightly floured surface.
- Place dough into an oiled bowl and cover with plastic wrap. Let it rise for about 1h30 or until it doubles in size, in a warm spot of your kitchen. If your oven has a proofing function, you can use it.
- Deflate dough. Using a bench scraper, a sharp knife or your hands, divide dough in 10 equal pieces. Line a baking sheet with parchment paper.
- Using your hands, roll dough open in a long rope. Twist it around and tie it, tucking the ends under each roll. Repeat with all pieces.
- Cover loose with plastic wrap and let shaped rolls rise for another 40 minutes, or until they almost double. Rolls should look puffy and feel light.
- Preheat oven to 425°F.
- Brush challah rolls with the remaining egg yolk and top with sesame seeds (if using them).
- Bake rolls for 15 minutes, or until they’re golden on top. Let them cool for 10 minutes before serving.
Pam Underwood
Can I freeze the shaped rolls before the 2nd rise to bake later??
Tatiana Kamakura
Hi Pam,
Yes, you can! Freeze the shaped rolls before the second rise—just place them on a baking sheet lined with parchment and freeze until solid. Then transfer them to a freezer-safe bag or container. When you're ready to bake, take them out, place on a baking sheet, and let them thaw and rise at room temp until puffy and doubled in size (this can take a few hours depending on your kitchen). Then bake as usual! Let me know if you give it a try, cheers!
Barbara Passo
I’ve made these at least six or more times. They’re delicious every time. I’ve made the dough into one challah or two challot. Since we’re just two without guests sometimes, I make them into smaller rolls. Today’s bake made 16. Sometimes I don’t brush with egg. Every time I’ve made them, they’re perfectly delicious.
Shabbat shalom
Barb
Tatiana Kamakura
So glad you like them, Barbara!
Cheers!
Amy
When making these, can I go as far as the second rise, and shape the rolls, then put them in the fridge overnight... pull them in the morning and let them rise, and then bake???
Milk and Pop
Hi Amy! Yes, that would work!
Cheers
S
Hi do you activate the years with water first?
Milk and Pop
Is using instant dry yeast, you can skip activation with water 😉
Nene
How cute are these challahs, I've already made the first rise, now they're resting in the fridge until tomorrow, I'm so excited for tomorrow.... thank you so much for the recipe
Milk and Pop
Hope you like it, Nene!
Happy baking 😉
Marsha
So i decided to make the dough into 2 full challot. Temp adjustment, or keep it that high? My gut says somewhat lower. Ill do my educated guess from my other recipes, figuring I don't hear back in time! 😄
Milk and Pop
Hi Marsha!
Your gut is right! I would bake on 350°F for 30-35 minutes if baking a loaf with this recipe. It should be golden brown, and if you're using a thermometer, challah bread should register 190°F in the middle.
Marsha
Whoa! Such a fast reply! Second rise almost done. Thanks so much, glad I refreshed the page! This is a great dough, btw, i made it once before as rolls and they were perfect! Shabbat shalom if you celebrate!