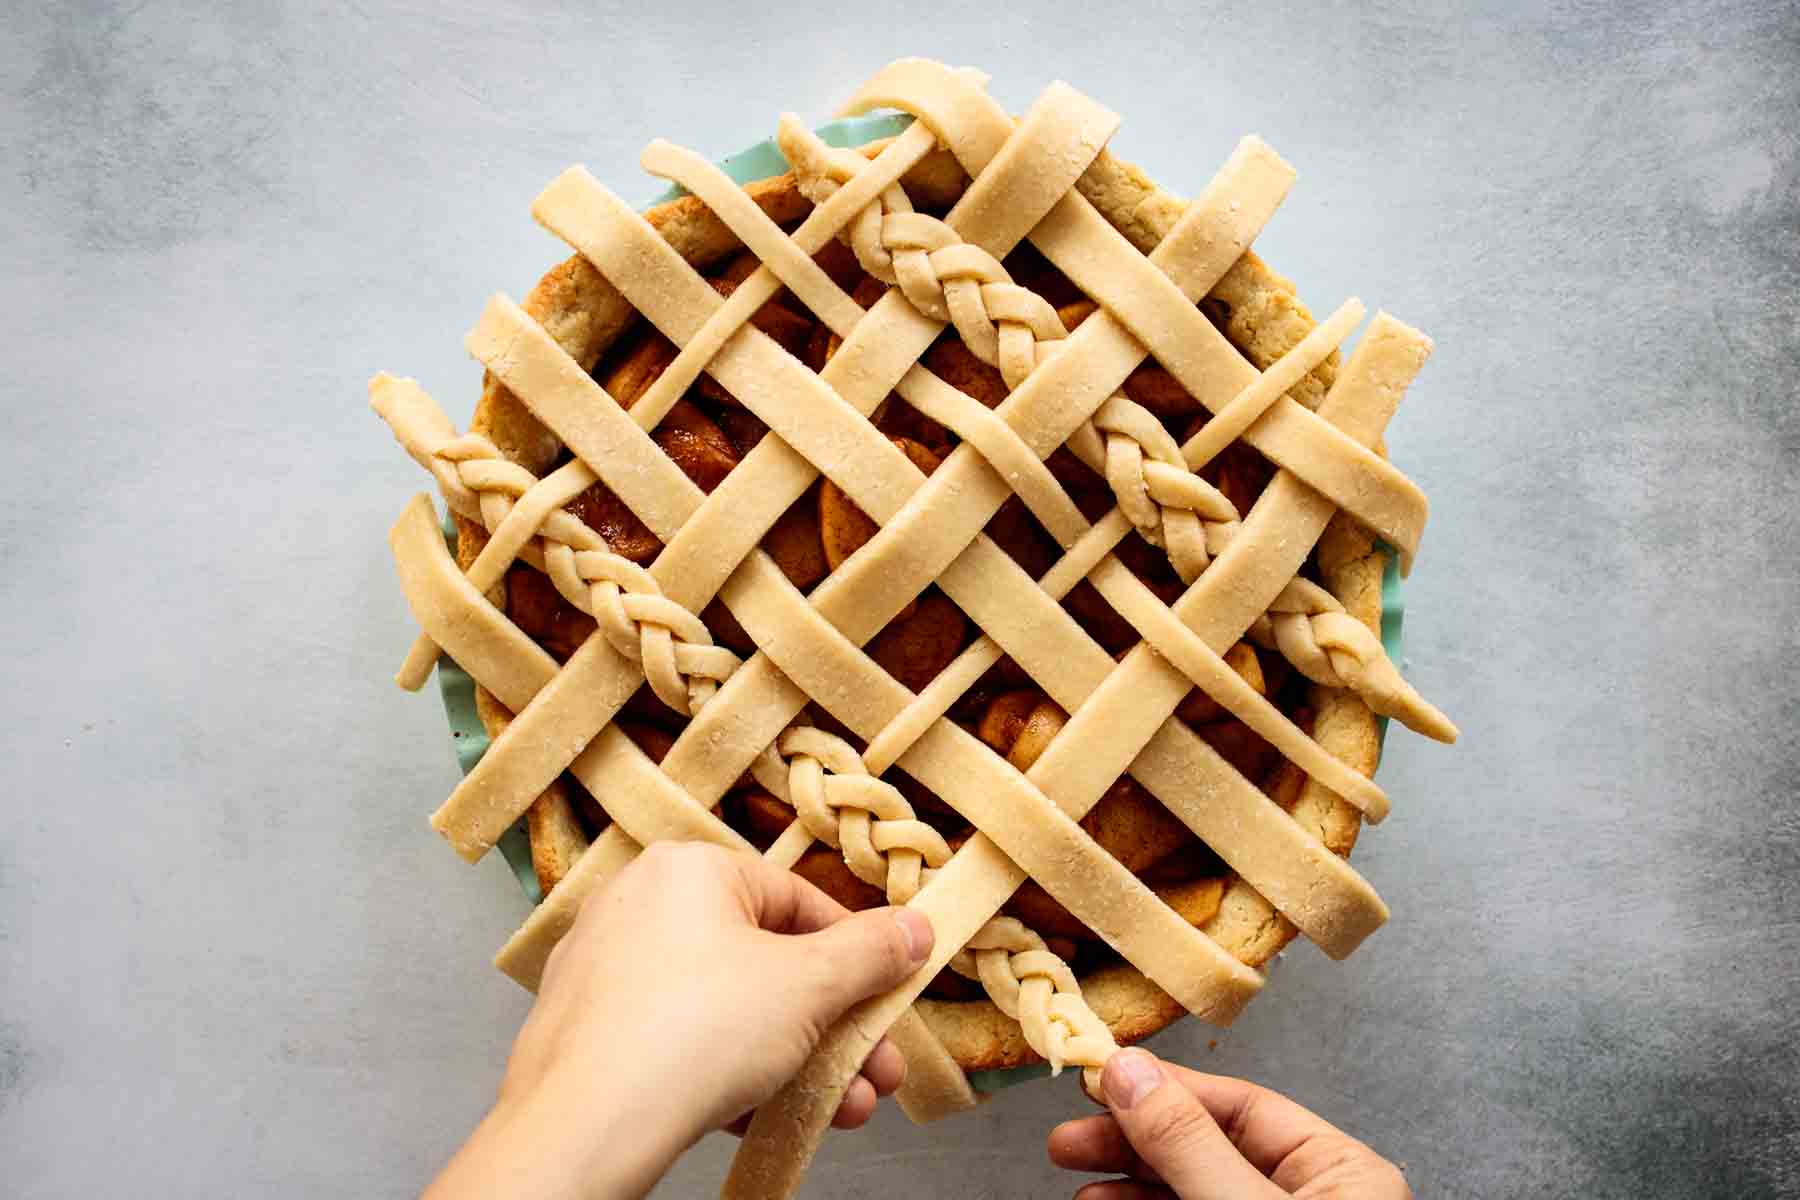
Flaky, tender and rich, this Sourdough Discard Pie Crust is easy to make and to bake! If you have problems when making pie or galette dough, this no-fail recipe might be just what you're looking for.

If you bake with sourdough, you understand the need of a lot of sourdough discard recipes. Having a good amount of recipes for unfed sourdough starter like these sourdough tortillas is the best way to avoid wasting discard.
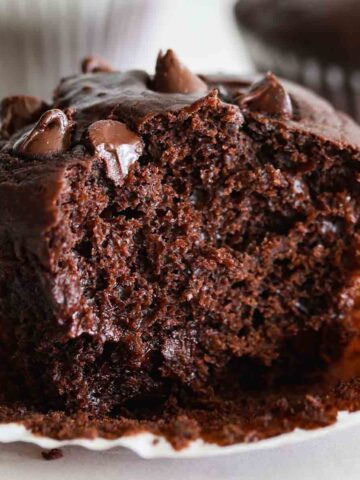
But did you know that using discard can improve a lot of baking goods recipes? Like this delicious sourdough chocolate cake, this pie crust is flakier and more tender using sourdough discard.
🥧Why make this recipe
This is an amazing recipe to have saved for the holidays, or just when you want to bake a pie totally from scratch!
- Sourdough discard will make your pie crust tender;
- You can use this recipe for sweet and savory pies, galettes and quiches!
- This recipe works every time!
📃Ingredients
This recipe makes enough crust for a pie that requires only bottom crust.
If your recipe requires top and bottom crust, double the ingredients. You can easily do it on the recipe card: just click x2.
Sourdough starter. Use sourdough discard to make this recipe (cold and 100% hydration).
Sugar. Use caster or granulated sugar. The amount used won’t make this crust sweet, but help with caramelization, giving it a beautiful golden color when baked.
Salt. Use sea salt. It helps to boost the flavor. The amount used won’t make the dough salty: you can still use this recipe for both savory and sweet pies.
Flour. I use all-purpose flour for this recipe. Whole wheat flour will change the amount of liquid you’ll need to add to form the dough, and also it will make a tougher pie crust, so I recommend sticking to AP flour.
Butter. I usuallt use unsalted, but it can be made with salted butter is that what you have. Make sure the butter is cold.
You can long-ferment this sourdough discard pie, or just chill for just 2 hours and use it. Both ways will give you an amazing and tender pie crust.
If you want to long-ferment, always do it inside the fridge: pie crust dough needs to be kept cold all the time.
You can leave the dough cold-fermenting for 24 hours to 4 days. The longer you leave, the more complex it will taste, but 24 hours are sufficient for a delicious taste.
🥣How to make it
This recipe is made for everyone that, like me, has many problems when making pie crust.
I make it using a food processor. If you follow every step, you’ll get a super tender pie crust even with this cheating method.
Don’t have a food processor? You can still do it by mixing all the ingredients using your hands, a fork or a pastry cutter.
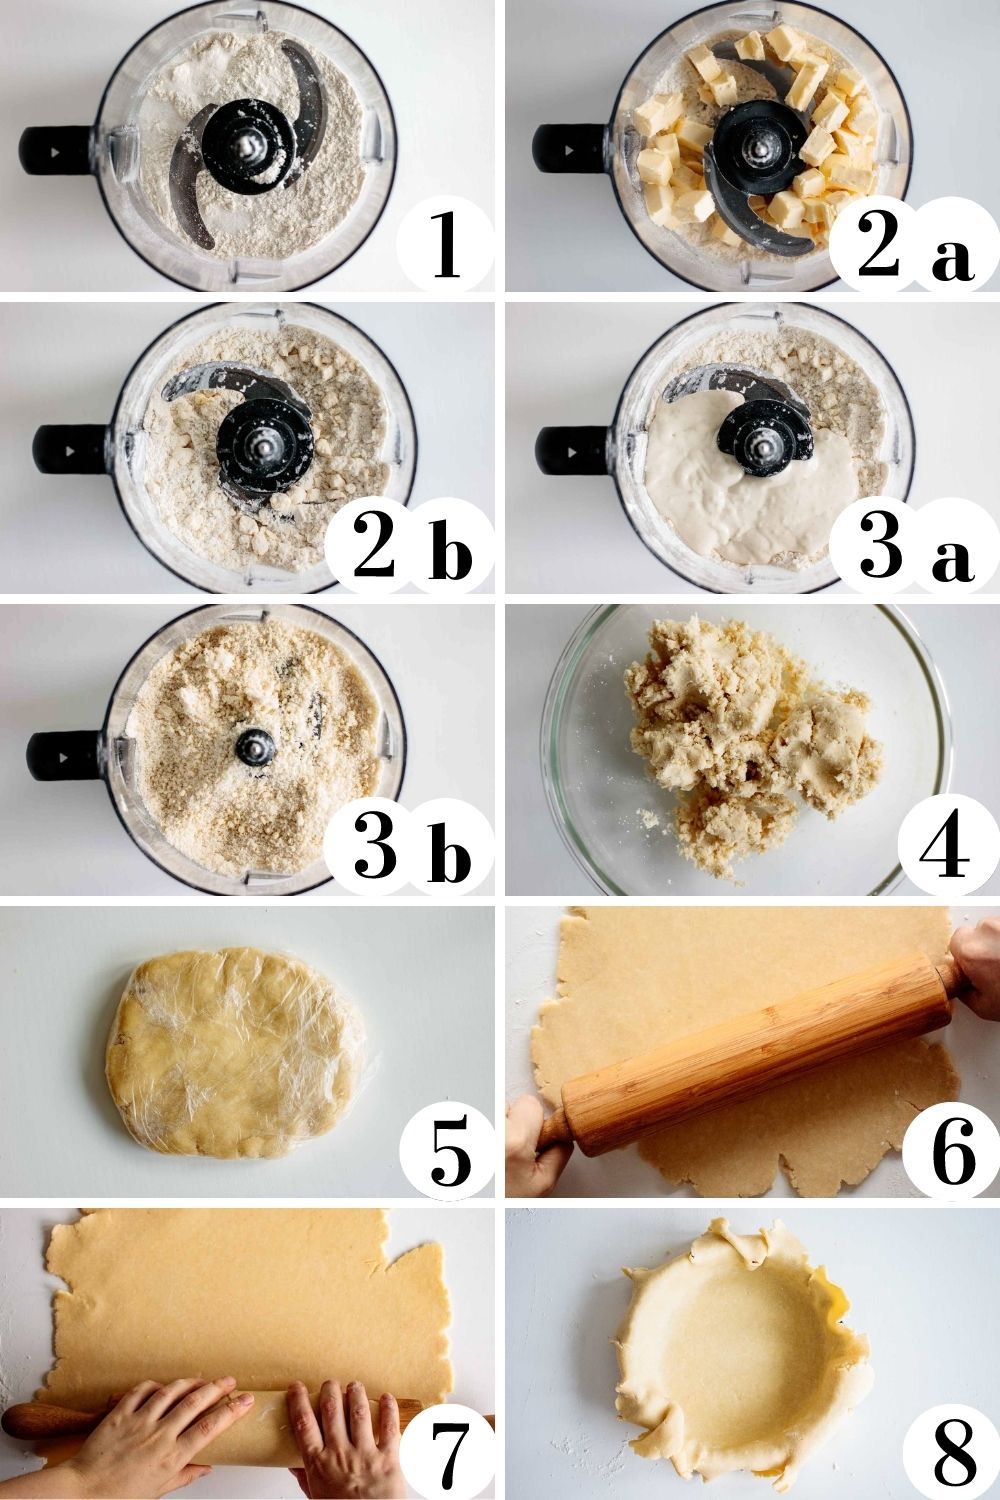
- Mix dry ingredients. Add flour, sugar and salt to a food processor, giving it a quick pulse to combine.
- Add butter (2a). Remember: butter needs to be cold. Cut butter into cubes, add to food processor and quick pulse 5 to 6 times (2b). Butter should be broken up into smaller pieces.
- Add sourdough starter. Add sourdough starter (3a) and quick pulse 5 to 6 times more, just to mix starter evenly in the mixture (3b) .
- Form dough. Place crumbly mixture into a large bowl, and press it together until you form dough. It should be considerably easy, and I get the result you see without adding any liquid. If your dough is too crumbly, add 1 tablespoon of vodka.
- Chill for at least 2 hours. Shape dough into a disk and cover it in plastic wrap. Chill for at least 2 hours, to 4 days.
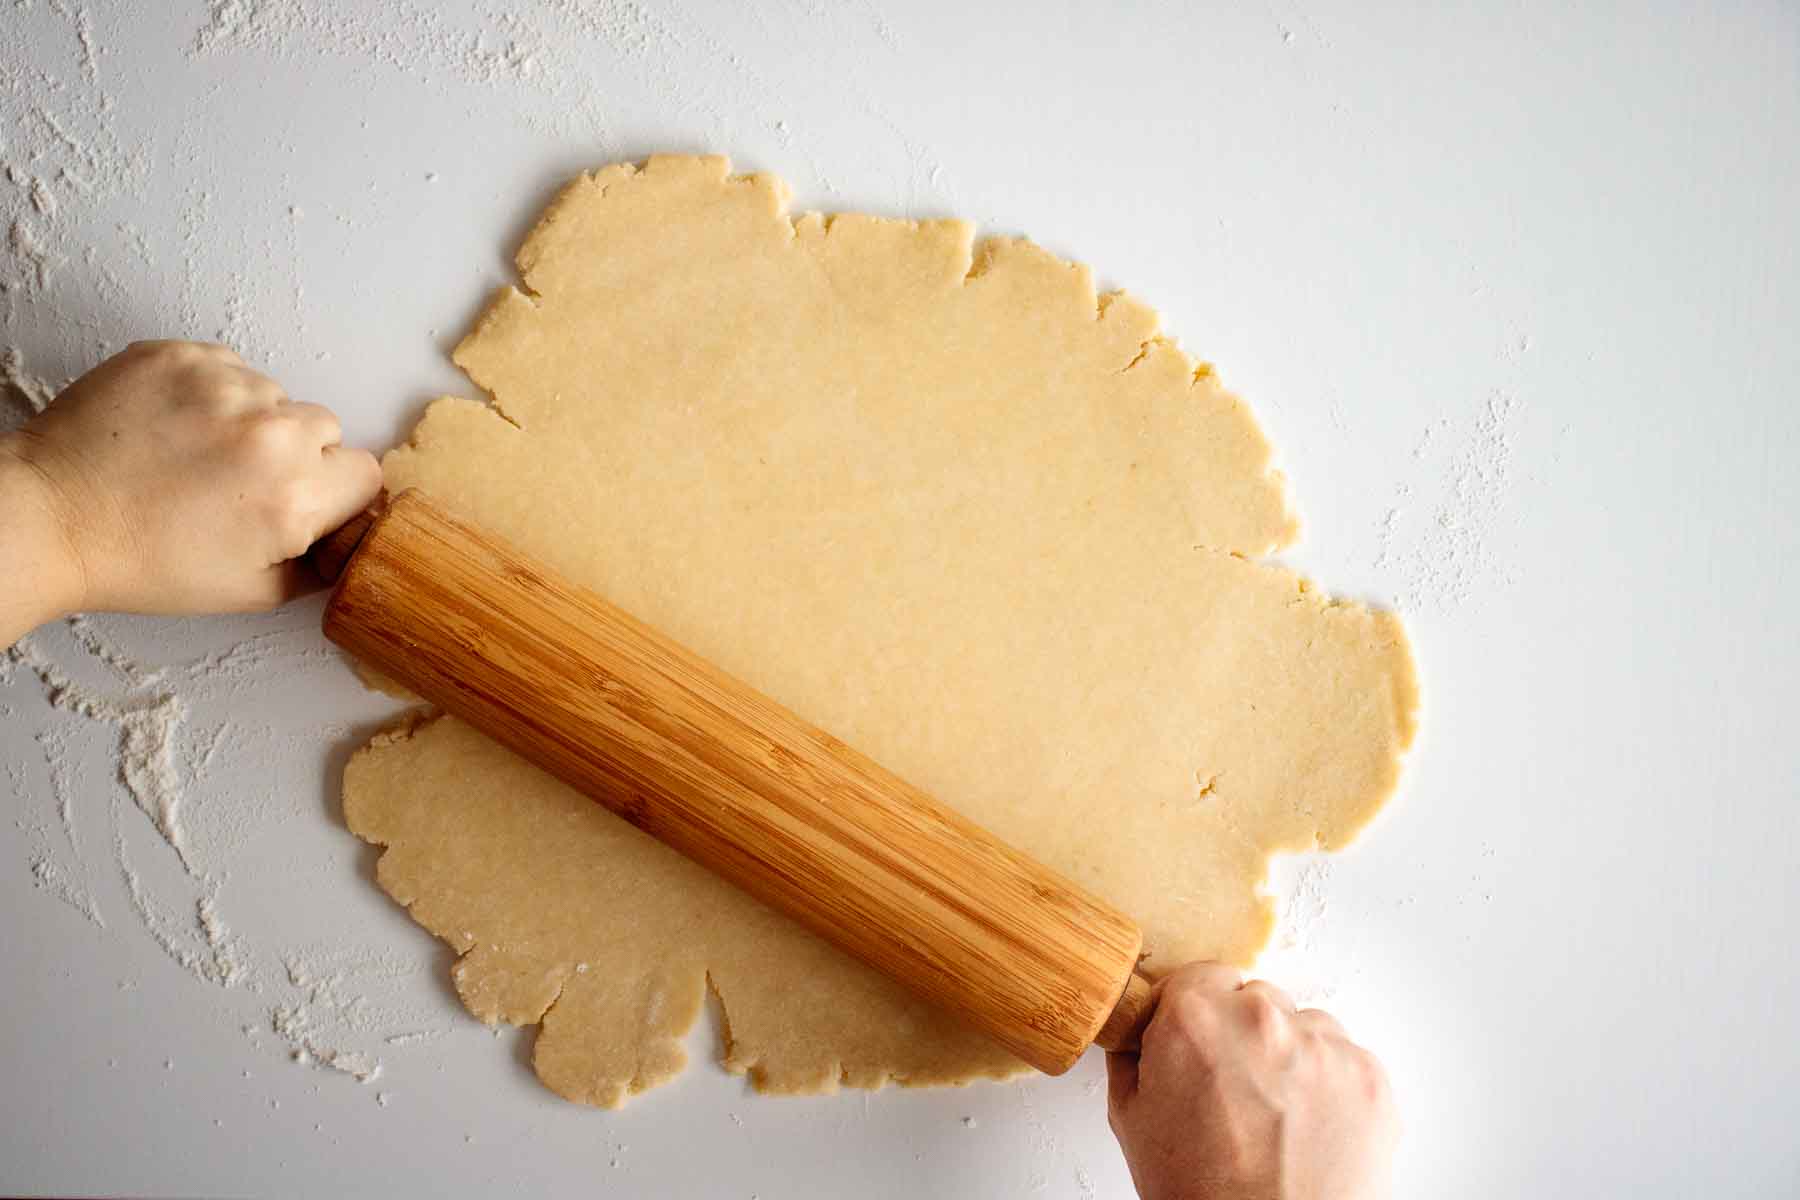
- Open dough. Let dough come to room temperature for about 15 minutes, so it’ll be easier to work with. Unwrap dough, place it on a floured surface and roll it open with a rolling pin. Make sure dough is not sticking by rotating it a few times during rolling. If sticking, unstuck it carefully and re-flour the surface you’re working on.
- Transfer open dough to pie dish. I use my rolling pin to make it easier and also to avoid breaking the pie crust in the process. Wrap it around the rolling pin and unwrap over pie dish. You can see it better on the recipe’s video.
- Refrigerate for at least 30 minutes. I like to be extra sure my pie crust is cold before putting in the oven, so it won’t shrink when baking, becoming though. So while I preheat my oven, I usually cover and refrigerate the opened dough again for at least 30 minutes.
For blind baking, preheat for at least 15 minutes at 450°F. The high heat helps the gluten set before the butter melts, and that prevents the edges from collapsing when baking. You can lower the temperature after the gluten has set.
🥧How to roll the dough open?
Let me give you a few tips for when rolling open this pie crust:
- Remove from the fridge and let it rest at room temperature for at least 15 minutes, so the dough will be easier to work with;
- Always flour the surface you’ll be using to roll open this pie crust;
- After a few passes of the rolling pin, check if the crust is not sticking. If it is, re-flour the surface you’re working on;
- Use as much flour you need to prevent dough from sticking; and
- Be as quick as you can.
✔️Expert tips
- Always start with chilled ingredients. They need to be super cold, so gluten does not develop. The less gluten, the tender the pie crust will be. Sourdough discard, butter and vodka if needed must be added cold.
- Try not to overwork the dough. When you're mixing, pressing the dough together or rolling it open, you're also helping with the gluten formation. Handle pie crust as little as possible. Never knead pie crust dough.
- Flatten the dough before chilling. The flatter, the easier will be to work with. Check the photos and video to see how much I flatten the dough before chilling.
- Never stretch the dough when placing it into the pie dish. If you do, the dough will shrink when baking. Place dough gently into the dish.
- Use a pie shield. Aluminum foil works great for that purpose if you don’t have a proper pie shield. Use it around the edges of your pie crust to prevent burning, specially if you’re blind baking it.
🙋🏻♀️Questions you might have
Vinegar is an acidic ingredient that, when added in the right amount, helps to prevent a tough crust preventing gluten formation. Without gluten, you have a tender and flaky crust.
Sourdough discard is, like vinegar, an acidic ingredient that helps to prevent gluten formation, giving you a tender and flaky crust. It also gives a tiny lift in the crust because of the wild yeast present in the dough, resulting in a extra-tender pie crust.
Poking holes when blind baking a pie crust helps the steam to escape when baking, avoiding the formation of bubbles and pockets in the crust. If you opt for poking instead of using weights, do it with a fork through all crust bottom and sides.
Baking a pie crust blind prevents a soggy bottom, especially if you’re using watery raw fruits or a runny filling: place parchment paper and weigh it down with pie weights, beans or rice before placing in the oven to avoid bottom from browning. Baking in the bottom rack of your oven also helps with a crispy crust: it concentrates heat at the bottom, and that helps specially if you’re baking a pie with a watery filling. Lastly, never forget to preheat the oven when baking pies.
Why I don’t include baking directions in the recipe card
Time and temperature will vary a lot depending of the recipe you’re making and the dish you’re using to bake your pie. Follow the recipe direction you’re using for a better result.
If you’re blind baking using a ceramic dish, here’s what I do:
- Preheat oven at 450°F.
- Bake for 15 minutes, using pie weights or a fork to dock to prevent the formation of bubbles and pockets in the crust.
🫙Storing and freezing
This recipe can be made ahead of time. You can store it from 2 hours to 4 days inside your fridge. Cover well the whole disk before storing in the refrigerator.
Sourdough pie crust also freezes well. Wrap it well in plastic wrap, or store it in a freezer-safe bag, pushing out all the air before closing. It keeps for 3 months in the freezer.
🥧More delicious discard recipes


If you tried this Sourdough Pie Crust Recipe, please leave a 🌟 star rating and let me know how it goes in the comments below!
📖 Recipe

Sourdough Pie Crust
Ingredients
- 2 cups 250g all-purpose flour
- 2 tablespoon 28g sugar
- 1 teaspoon 6g salt
- ⅔ cup 150g butter, cold
- ⅓ cup 130g sourdough discard
Instructions
- Mix dry ingredients. Add flour, sugar and salt to a food processor, giving it 1 quick pulse to combine.
- Add butter. Remember: butter needs to be cold. Cut butter into cubes, add to food processor and quick pulse 5 to 6 times. Butter should be broken up into smaller pieces.
- Add sourdough starter. Add sourdough starter and quick pulse 5 to 6 times more, just to mix starter evenly in the mixture.
- Form dough. Place crumbly mixture into a large bowl, and press it together until you form dough. If your dough is too crumbly, add 1 tablespoon of vodka.
- Shape dough into a disk and cover it in plastic wrap. Chill for at least 2 hours, to 4 days.
- Let dough come to room temperature for about 15 minutes, so it’ll be easier to work with. Unwrap dough, place it on a floured surface and roll it open with a rolling pin. Make sure dough is not sticking by rotating it a few times during rolling. If sticking, unstuck it carefully and re-flour the surface you’re working on.
- Transfer open dough to pie dish. I use my rolling pin to make it easier and avoid breaking the pie crust in the process. Wrap it around the rolling pin, and unwrap over pie dish. You can see it better on the recipe’s video.
- Refrigerate for at least 30 minutes. I like to be extra sure my pie crust is cold before putting in the oven, so it won’t shrink when baking, becoming though. So while I preheat my oven, I usually cover and refrigerate the opened dough again for at least 30 minutes.
Video
Notes
- Always start with chilled ingredients;
- Try not to overwork the dough;
- Flatten the dough before chilling;
- Never stretch the dough when placing it into the pie dish.
- Preheat oven at 450°F;
- Bake for 15 minutes, using pie weights or a fork to dock to prevent the formation of bubbles and pockets in the crust.


Raychael F
Thank you for the recipe! Just a heads up, Step 4 says to add a tablespoon of vodka rather than water and the metric units don’t multiply with the standard units.
Anonymous
My family loved it, thanks for the recipe!
Alexandra
First time making pie crust and this recipe worked great! The crust was so flaky and delicious!
Tatiana Kamakura
Hi Alexandra! Thanks for trying this recipe, glad you liked it! Cheers 😉
Kathryn
I made this for the first time for Thanksgiving. My family loved it! It is my new favorite pie crust recipe.