Every sourdough starter has its own unique personality and there’s no one-size-fits-all solution for getting it to rise. Let’s explore together why your starter might not be rising as expected.
Some reasons your starter might not be rising or bubbling as much include:
- Immaturity: Your starter might still be too young to show a strong rise.
- Feeding Ratio: An incorrect feeding ratio (too much water or flour) can make the rising more difficult to see.
- Overfeeding: Adding too much flour and water can dilute the yeast population, reducing the rise.
- Temperature: If it’s too cold, fermentation slows down, preventing the rise.
- Water or Flour Quality: Poor-quality water or flour can affect starter activity.
- Insufficient Fermentation Time: New starters need more time between feedings to show activity,
- Contamination: Mold or contamination could interfere with the rise and fermentation.
When troubleshooting your starter, keep in mind that it’s usually a combination of factors. In my experience, the main variables that affect rise time are temperature, ingredients, feeding schedules, flour type, and the amount of flour used. Let’s dive into each one.
Immaturity: It Might Not Be Ready Yet
Although you can get a sourdough starter in about 15 days, establishing a new starter typically takes more than two weeks. The usual progression is as follows:
- Days 1–2: Little to no activity.
- Days 3–4: A burst of activity that usually dies off (bad bacteria activity followed by dead phase).
- Days 4–7: Activity may slow down, which often leads to concern (many people panic during this phase and think they’ve killed their starter).
- Days 7–14: A small but predictable rise begins, which grows stronger if the starter is fed and taken care of properly.
If you're still in the beginning (less than 2 weeks), your starter is likely still developing. Be patient and give it more time:
- Don’t Rush the Process: Just because your starter shows a burst of activity on day 2 or 3 doesn’t mean it’s ready. It may look inactive for a few days afterward—this is normal, despite what you might hear from some YouTubers.
- Stay Patient During the "Dead" Phase: Don’t give up during the quiet, dead phase. Your starter is still developing! Keep feeding it and trust the process.
Feeding Ratio: Are You Adding Too Much Water?
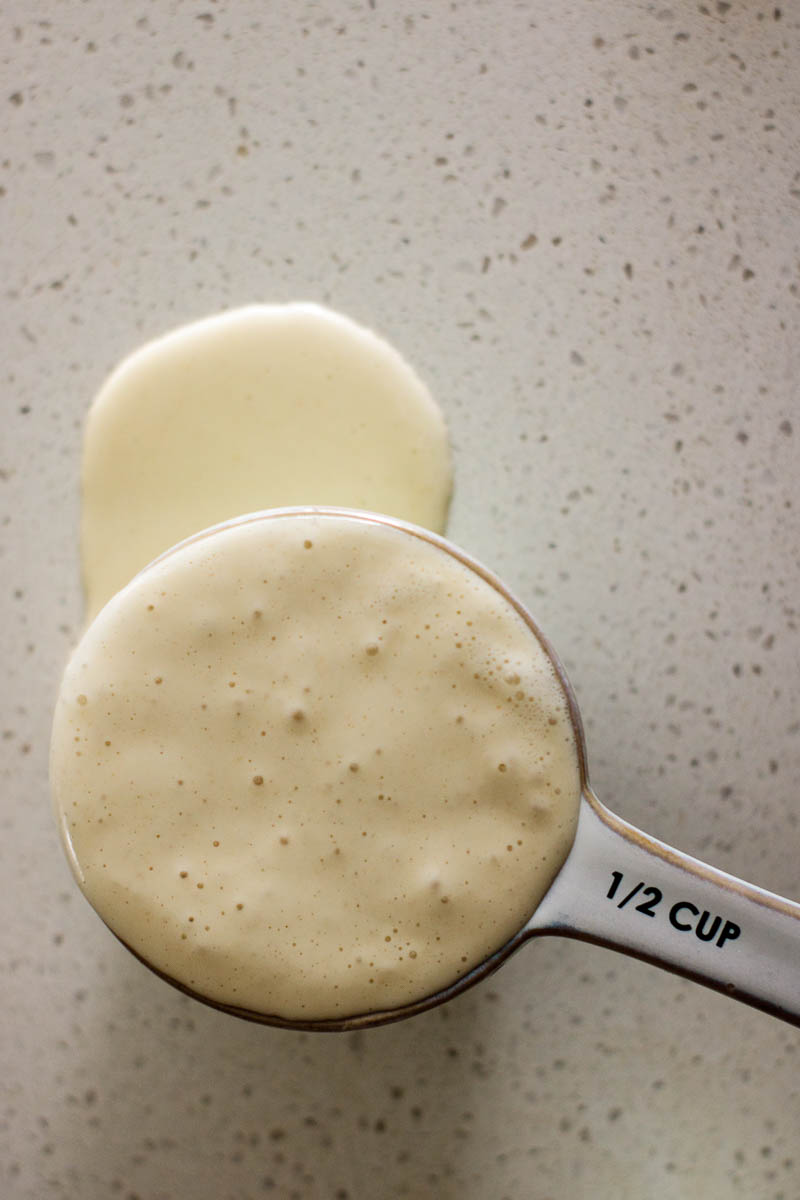
Adjusting your feeding ratio can make a significant difference. For a starter, a common ratio is 1:1:1 (equal parts starter, flour, and water by weight). This is known as 100% hydration, and the consistency should resemble a thick batter or sticky dough.
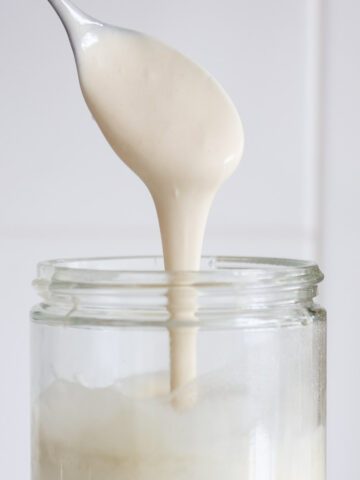
The consistency of your starter can impact how it rises. A thicker starter may rise more visibly than a thinner one. If you're feeding without a scale and your starter is too runny (like a very thin pancake batter), try reducing the water content slightly to achieve a thicker consistency.
Overfeeding: It Weakens Your Starter
Just like us, your starter can be overfed or underfed. If your starter was bubbly and active but suddenly stops rising, it may need more or less food.
If you're feeding it less flour and water than the amount of starter, like feeding 30g of flour and 30g of water to 100g of starter, it could be underfed.
You should avoid refeeding your starter before it reaches its peak, as doing so could weaken it. After you feed your starter, the yeast population needs time to grow back. If you feed it before it peaks, the yeast won’t have fully regrown, and you’ll end up with less yeast in your starter.
Temperature: Are You Freezing Your Starter?
Starters thrive in warm environments: the warmer the spot, the quicker it will rise. But finding the perfect warm spot can be tricky, especially during colder months. Ideally, you want the temperature of your starter to be between 70°F and 80°F (21°C to 27°C).
If your starter is too cold, it will be sluggish, and both the dough and starter will take longer to rise, ferment, and peak. Maintaining the right temperature is crucial for a healthy rise.
During winter, if your starter isn’t rising, try placing it inside an oven with the light on. Just be sure to monitor it closely, as it can get quite warm. Another option is to use your microwave—place your starter inside with the light on, but keep the microwave turned off.
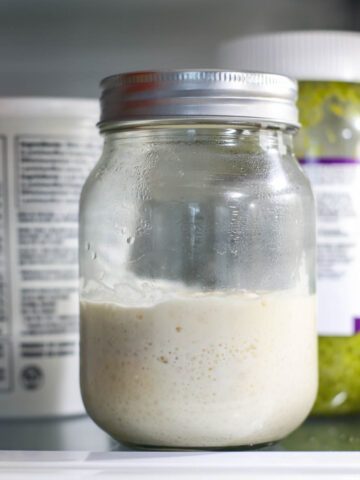
Note: A strong and well-established starter should rise just fine in both warm and cooler environments, even if stored in the fridge. This indicates your starter is healthy, well-fed, and able to rise no matter where it’s kept.
Ingredients: Are You Using the Right Ones?
A sourdough starter is made of flour and water, so that’s only two ingredients we need to worry about.
When selecting flour, opt for unbleached varieties, free from chemicals. Keep in mind, flour can vary greatly depending on where it’s sourced. For example, flour from the UK has different mineral and enzyme levels than flour from the U.S. or Australia. Organic flours also perform differently, so it’s best to stick to one brand while troubleshooting your starter.
For the water, if you're having problems with your starters rise, I recommend using filtered water, especially if your tap water contains chlorine or other chemicals that could interfere with the starter’s rise.
If you switch the type of flour you’re feeding your starter, it might take some time for it to get used to the new food. Different flours contain varying types of starches and enzymes, so it can take a week or two for your starter to fully adapt.
If you’re feeding it all-purpose flour only, know that this type of flour contains less gluten (protein) than other flours, making it less absorbent and causing your starter to be flatter and wetter. Although the starter may not rise as tall, it can still be strong, as long as it’s producing good bubbles.
Insufficient Fermentation Time: Don’t Rush it
Especially with new starters, they may need more time between feedings to show visible signs of activity. Don’t be too quick to judge your starter’s progress. Make sure you’re giving it enough time to ferment properly before concluding it isn’t rising.
A mature, established starter typically peaks between 4 and 6 hours at the right temperature, while a younger starter might take up to 12 hours. Use a rubber band to mark the starter's level and watch for streaks in the jar that indicate its rise to make sure you’re not missing it.
Contamination: If your starter has gone bad, you’ll need to toss it
Mold or harmful bacteria can negatively affect your sourdough starter. If your starter develops fuzzy or black mold, or takes on a bright green, yellow, or pink/red color, it’s a clear sign that unwanted microorganisms have taken over. These can interfere with the natural yeast and bacteria, disrupting fermentation.
Even if the starter still rises, it may not rise as much as usual. Don't attempt to save it, as consuming it could be harmful to you. Make a sourdough starter from zero if you don’t have a backup starter.
How to Fix Your Sourdough Starter When It Won’t Rise
In most cases, you just need to be patient—really! However, if you think something might be wrong and your established starter hasn’t shown any activity after more than 24 hours since its last feeding, you can try resetting it to get it back on track.
If your starter was once thriving but is now sluggish and not doubling in size, a “reset” might help.
How to Reset Your Starter:
- Stir your starter well and transfer 20 grams (about 1 tablespoon) to a clean jar.
- Feed it using a 1:5:5 ratio (100 grams of water and 100 grams of flour). Stir until fully combined.
- Cover the jar loosely with its lid and mark the level with a rubber band to track the rise. Let it sit at room temperature until it doubles in size (this can take up to 24 hours).
- Once it peaks, discard all but 20 grams and repeat the feeding process. Continue this until the starter consistently doubles in size within 4 to 8 hours.
Bottom Line: Your Starter Will Rise Again
A sourdough starter’s rise depends on many factors, including temperature, feeding ratio, type of flour, and proper fermentation time. Starters thrive in warm environments (70°F–80°F) and with consistent feedings. Make sure your starter has enough time to ferment between feedings, as rushing the process can affect its rise negatively.
If your starter was once active but has slowed down, it might need troubleshooting. Check for signs of contamination, ensure it’s not too runny, and avoid overfeeding before it peaks. With patience and adjustments, your starter should bubble back to life.


Leave a Reply